
Choosing the best time to paint the inside of your house is crucial to ensure a smooth and successful project. Factors such as weather conditions, temperature, and humidity levels can greatly affect the outcome of your paint job. Painting during mild weather conditions, when the temperature is between 50°F and 85°F, is ideal. Additionally, painting during drier months with lower humidity levels will help the paint dry faster and prevent issues like blistering or peeling. Proper planning and consideration of these factors will help you achieve a flawless paint finish inside your home.
Choosing the Right Season for Interior Painting
When it comes to painting the interior of your home, choosing the right season can make a significant difference in the final outcome. Factors such as temperature, humidity, and ventilation play a crucial role in the success of your painting project. In this section, we will discuss the best seasons for interior painting and provide you with some tips to ensure a smooth and long-lasting finish.
1. Spring
Spring is often considered the best season for interior painting. As the weather begins to warm up, it becomes easier to open windows and create proper ventilation. This helps in speeding up the drying process of the paint and reduces the chances of any unwanted odors lingering in your home. Additionally, springtime often has moderate humidity levels, which is ideal for paint to adhere properly to the walls.
Tips:
- Choose low VOC or zero VOC paint to minimize indoor air pollution.
- Ensure proper ventilation by opening windows and using fans.
- Avoid painting on rainy days or when there is high humidity.
2. Fall
Fall is another favorable season for interior painting. The temperatures are typically mild, which allows the paint to dry evenly. It is also a time when humidity levels tend to be lower, preventing issues such as blistering or peeling of the paint. Fall is particularly suitable if you live in an area with unpredictable summers, where painting during the hot and humid months can be challenging.
Tips:
- Plan your painting project before the colder months set in.
- Ensure adequate ventilation by opening windows or using dehumidifiers.
- Keep an eye on the weather forecast to avoid painting on rainy or extremely humid days.
3. Winter
While winter may not be the most popular season for interior painting, it can still be done successfully with proper precautions. It is crucial to choose the right type of paint that is suitable for lower temperatures. Most modern paints are designed to be used in a wide range of temperatures, but it is essential to check the manufacturer’s recommendations. Additionally, consider using space heaters or fans to maintain an optimal painting environment.
Tips:
- Choose a paint designed for lower temperatures.
- Ensure proper ventilation by using fans or opening windows (briefly) in well-ventilated rooms.
- Allow sufficient drying time due to the cooler temperatures.
4. Summer
While summer may seem like an ideal time for painting, it comes with its own challenges. High temperatures and humidity can lead to faster drying times, making it difficult to achieve a smooth finish. It is crucial to plan your painting project during the cooler parts of the day and avoid direct sunlight, as it can cause the paint to dry too quickly. Additionally, consider using air conditioning or fans to maintain a comfortable temperature and reduce humidity levels.
Tips:
- Avoid painting during the hottest parts of the day.
- Keep the paint and tools in a cool, shaded area to prevent premature drying.
- Use a humidifier to control moisture levels in the room.
Summary
Choosing the right season for interior painting is essential to achieve the best results. Spring and fall are generally considered ideal due to moderate temperatures and humidity levels. Winter and summer can also be suitable with the proper precautions and adjustments. By following the tips provided for each season, you can ensure a smooth and long-lasting finish for your interior painting project.
Benefits of Painting Your Home in Spring
When it comes to home improvement projects, painting is one of the most effective and affordable ways to give your home a fresh new look. If you’re considering repainting your home, spring is the perfect time to do it. In this section, we will discuss the numerous benefits of painting your home in spring.
1. Ideal Weather Conditions
Spring offers ideal weather conditions for painting your home. The mild temperatures and lower humidity levels provide the perfect environment for the paint to dry properly. Unlike the hot and humid summer months, spring weather allows the paint to cure evenly and prevents it from blistering or peeling. Additionally, painting during spring ensures that the paint will adhere better and last longer.
2. Quick Drying Time
Painting your home in spring allows for quicker drying times. With the warm but not scorching temperatures, the paint dries faster, allowing you to finish the project in a shorter amount of time. This means less disruption to your daily routine and a faster transformation for your home’s appearance.
3. Preparing for the Summer Season
Spring is the perfect time to prepare your home for the upcoming summer season. By giving your home a fresh coat of paint, you can enhance its curb appeal and make it stand out in the neighborhood. A beautifully painted exterior can create a positive first impression and increase the value of your property.
4. Protection against Moisture and Mold
Spring brings increased rain showers and higher humidity levels. By repainting your home in spring, you can protect the exterior from moisture damage and prevent the growth of mold and mildew. A fresh coat of paint acts as a barrier against water intrusion, ensuring the longevity of your home’s exterior surfaces.
5. Renewed Interior Spaces
Spring is not only a great time to freshen up the exterior of your home but also the interior. If you’ve been wanting to update the colors of your walls or give your rooms a new look, spring is the perfect season for it. Repainting the interior of your home can transform dull spaces into vibrant and inviting areas, creating a pleasant atmosphere for you and your family.
6. Increased Happiness and Productivity
A fresh coat of paint can have a significant impact on your mood and overall well-being. Studies have shown that colors can affect our emotions and behaviors. By choosing the right paint colors, you can create a space that promotes happiness, relaxation, and productivity. Spring is the ideal time to revitalize your home and improve the overall feel of your living environment.
7. Cost Savings
Another benefit of painting your home in spring is potential cost savings. Many painting contractors offer discounts and promotions during the off-peak season, including spring. By taking advantage of these deals, you can save money on labor and materials while still achieving the desired results.
In summary, painting your home in spring offers numerous benefits. From ideal weather conditions to quick drying times, you can enjoy a hassle-free painting experience. By refreshing both the interior and exterior of your home, you can enhance its appearance, protect it from moisture damage, and create a pleasant and inviting living environment. So, why wait? Spring into action and give your home a fresh new look today!
Preparing Your Interior Walls for Painting
One of the most important steps in achieving a professional-looking paint job is properly preparing your interior walls. Whether you are refreshing the look of your home or preparing to sell, taking the time to prepare your walls will ensure a smooth and long-lasting finish. In this section, we will guide you through the necessary steps to prepare your interior walls for painting.
Gather the Materials
Before you begin, it is essential to gather all the necessary materials for the job. This will save you time and effort later on. Some of the materials you will need include:
- Drywall compound
- Sandpaper
- Painter’s tape
- Dust sheets or plastic tarps
- Primer
- Paintbrushes and rollers
- Drop cloths
- Cleaning supplies (soap, water, and sponge)
Inspect and Repair Wall Imperfections
Start by inspecting your walls for any imperfections such as cracks, holes, or dents. These need to be repaired before painting to ensure a smooth and flawless finish. Use a putty knife and apply a small amount of drywall compound to fill in the imperfections. Allow the compound to dry, then sand it down until it is flush with the wall surface.
Clean the Walls
Next, thoroughly clean the walls to remove any dirt, dust, or grease that may have accumulated over time. Use a mixture of mild soap and water, along with a sponge or cloth, to gently scrub the walls. Rinse with clean water and allow the walls to dry completely before proceeding.
Protect Surrounding Areas
Before you begin painting, it is important to protect the surrounding areas from accidental spills or splatters. Cover the floor with drop cloths or plastic tarps to prevent paint from damaging your flooring. Use painter’s tape to cover any trim, baseboards, or windows that you want to keep free from paint.
Apply Primer
Applying a coat of primer is essential to ensure proper adhesion and coverage of the paint. Use a brush or roller to apply the primer evenly to the walls. Allow the primer to dry completely before moving on to the painting step. This will provide a solid base for the paint and help achieve a professional finish.
Final Sanding
After the primer has dried, lightly sand the walls with fine-grit sandpaper. This will smooth out any imperfections, ensuring a flawless finish. Be sure to wipe away any dust with a damp cloth before proceeding to the painting step.
Begin Painting
Now that your walls are properly prepared, it’s time to start painting. Use a high-quality paintbrush or roller and apply the paint in smooth, even strokes. Start from the top of the wall and work your way down, using long vertical or horizontal strokes. Allow the first coat to dry completely before applying additional coats if necessary.
Final Touches
Once the paint has dried, carefully remove the painter’s tape and clean up any drips or spills. Inspect the walls for any touch-ups or areas that may require additional coats of paint. Take your time to ensure a flawless finish.
In Summary
Preparing your interior walls for painting is a crucial step that should not be overlooked. By following these steps, you can achieve a professional-looking paint job that will enhance the beauty of your home. Remember to gather all the necessary materials, inspect and repair any wall imperfections, clean the walls thoroughly, protect surrounding areas, apply primer, perform a final sanding, and begin painting. With careful attention to detail, your newly painted walls will bring a fresh and vibrant look to your space.
Best Interior Paint Colors for Different Rooms
Choosing the right paint color for your home can be an overwhelming task. With so many options available, it’s important to consider the specific room you’re painting and the overall mood you want to create. In this section, we will explore the best interior paint colors for different rooms, helping you make the right choice for each space.
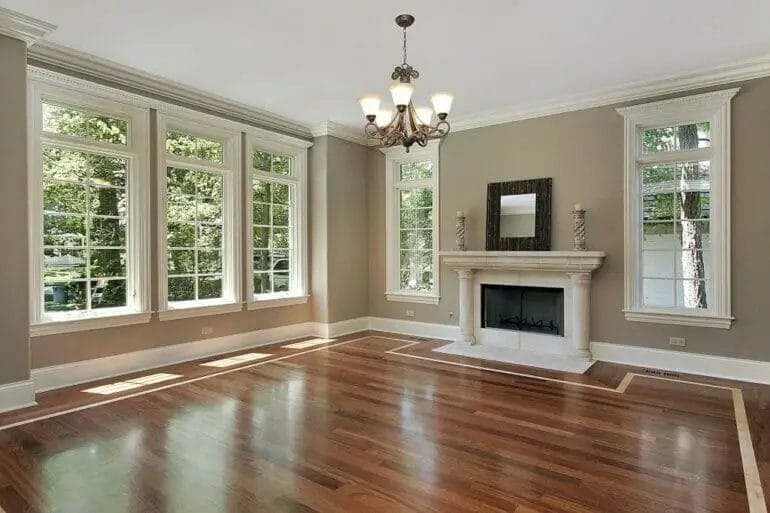
1. Living Room
The living room is often the central gathering space in a home, so it’s important to choose a paint color that promotes relaxation and comfort. Neutral tones like beige, gray, and warm white are popular choices for living rooms, as they create a calming and inviting atmosphere. These colors also provide a versatile backdrop for your furniture and decor.
2. Bedroom
Your bedroom should be a sanctuary where you can unwind and relax. To create a peaceful and tranquil ambiance, consider using soft and soothing colors like lavender, light blue, or pale green. These colors have a calming effect and can help promote better sleep. Avoid vibrant or bold shades that may be too stimulating for a restful environment.
3. Kitchen
In the kitchen, you want a paint color that complements the cabinetry and appliances while creating a warm and inviting space. Neutral colors like white, cream, or light gray are timeless choices that can make your kitchen feel bright and spacious. You can also opt for a splash of color by using pastel shades or soft blues and greens for a refreshing look.
4. Bathroom
When it comes to the bathroom, it’s important to choose a paint color that creates a clean and spa-like atmosphere. Light and airy shades like soft blue, pale gray, or mint green work well in bathrooms, as they evoke a sense of freshness and cleanliness. Avoid using dark colors as they can make the space feel smaller and less inviting.
5. Home Office
Your home office should be a space that promotes focus and productivity. Opt for colors that stimulate creativity and concentration, such as light shades of blue or green. These colors have a calming effect and can help you stay focused during work hours. Additionally, incorporating pops of bold colors like yellow or orange can energize the space and inspire creativity.
6. Dining Room
The dining room is a place where family and friends come together, so it’s essential to choose a paint color that creates a warm and inviting atmosphere. Earthy tones like warm beige, rich browns, or deep reds can set the mood for a cozy and intimate dining experience. Consider utilizing different shades within the same color family to add depth and visual interest to the space.
7. Kid’s Room
When it comes to painting a kid’s room, you can get creative with colors and patterns. Bright and vibrant colors like orange, yellow, or pink can create a playful and energetic environment. Consider incorporating fun patterns or accent walls to add visual interest and stimulate creativity. Additionally, consider using washable and durable paint finishes that can withstand the wear and tear of active children.
In summary, choosing the right paint color for each room in your home can elevate the overall ambiance and create a space that reflects your personal style. Whether you prefer soothing neutrals or vibrant hues, consider the function of the room and the mood you want to create. By selecting the best interior paint colors for different rooms, you can transform your home into a beautiful and cohesive space.
Quick and Easy Interior Painting Tips
If you’re thinking about giving your home a fresh new look, painting the interior is a great way to achieve a dramatic transformation. However, the thought of taking on a painting project can be daunting for many homeowners. Don’t worry, though! With these quick and easy interior painting tips, you’ll have your walls looking like they were done by a professional in no time.
Gather the Right Tools
Before you begin your painting project, it’s essential to gather all the necessary tools. This will make the process much more efficient and ensure that you have everything you need at hand. Some of the essential tools you will need include:
- Paint brushes and rollers
- Drop cloths or plastic sheeting to protect your floors and furniture
- Tape to cover areas you don’t want to paint
- Sandpaper for smoothing rough surfaces
- Paint trays and liners
- Painters’ tape and a putty knife for perfectly straight lines
Prepare the Surface
Proper preparation is key to achieving a smooth and professional-looking paint job. Start by removing any dirt, grease, or stains from the walls. A mild detergent solution works well for this. Once the walls are clean and dry, inspect them for any imperfections such as cracks or holes. Use a spackling compound to fill in these areas, then sand them smooth once dry.
After you’ve addressed any imperfections, it’s important to prime the walls before painting. Primer helps the paint adhere better and ensures a more even finish. Apply the primer with a brush or roller, following the manufacturer’s instructions.
Choose the Right Paint
When selecting paint for your interior walls, consider both the color and the type of paint. Opt for high-quality paint that will provide excellent coverage and durability. It’s also important to choose a finish that suits the room’s purpose. For example:
- Eggshell or satin finishes are great for living rooms and bedrooms as they offer a low sheen and are easy to clean.
- Semi-gloss or gloss finishes work well in high-moisture areas like bathrooms and kitchens, as they are more resistant to moisture and stains.
- Flat or matte finishes are ideal for ceilings, as they help to minimize imperfections.
Apply the Paint
Now it’s time to put brush to wall and start painting! Start by cutting in around the edges of the room using a brush. This will create crisp lines where the walls meet the ceiling, baseboards, and trim. Then, use a roller to fill in the larger areas of the wall. Remember to use long, even strokes and apply multiple thin coats rather than one thick coat.
Allow each coat of paint to dry fully before applying the next one. This will ensure a smooth and even finish. Once you’re done painting, remove any tape and touch up any areas that may need it.
Clean Up
After completing your painting project, it’s important to clean up properly. Remove any drop cloths or plastic sheeting and dispose of them responsibly. Clean your brushes and rollers thoroughly to ensure they can be used again in the future. If you have any leftover paint, secure the container tightly and store it in a cool, dry place.
Summary
Painting the interior of your home doesn’t have to be a daunting task. With the right tools, proper preparation, and careful execution, you can achieve professional-looking results in no time. Remember to gather all the necessary tools, prepare the surface properly, choose the right paint, apply it correctly, and clean up afterward. Following these quick and easy interior painting tips will help you transform your space and give it a fresh new look.
FAQs
When is the best time to paint inside your house?
The best time to paint inside your house is during dry weather conditions with low humidity. Avoid painting during rainy or extremely humid days as it can affect the drying process and result in uneven finish. Additionally, it is recommended to paint when the temperature is between 50°F and 85°F for optimal drying and adhesion.

Conclusion:
In conclusion, choosing the best time to paint inside your house can greatly impact the quality and efficiency of the project. It is recommended to paint during dry seasons with moderate temperatures, as this allows the paint to dry and adhere properly. Additionally, painting during the daytime can provide ample natural light, ensuring accurate color selection and even coverage. Proper ventilation is also crucial to prevent the build-up of fumes and promote faster drying. Lastly, planning and preparation are key to a successful interior painting project, including selecting the right paint type and color, protecting furniture and floors, and ensuring a clean and smooth surface. By considering these factors, you can achieve a professional and long-lasting paint job for your home.
Painting the inside of your house can be a rewarding and transformative project. By following the best practices and considering the ideal time, you can achieve a beautiful and durable result. So, take the plunge and give your home a fresh new look!