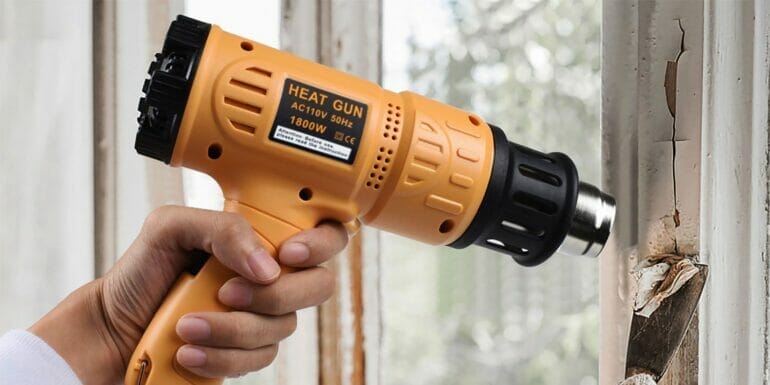
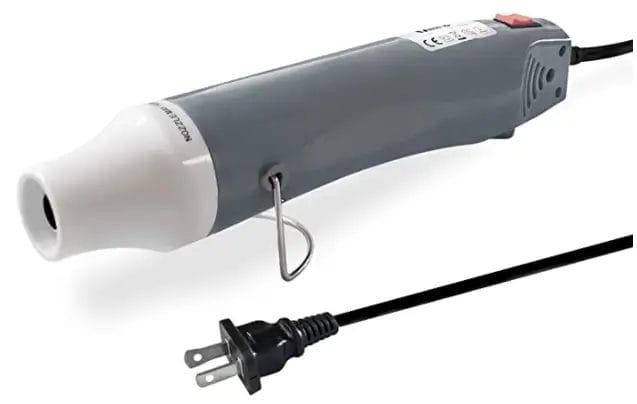
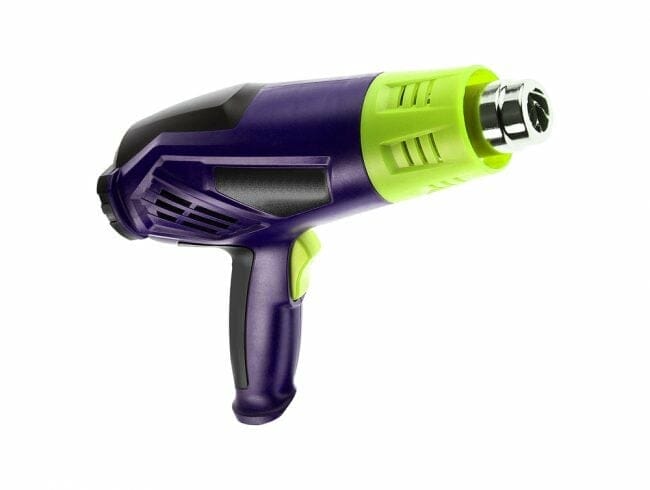
Are you searching for the best heat gun to elevate your acrylic pouring projects? Look no further! We have curated a list of top heat guns specifically designed for acrylic pouring enthusiasts. These heat guns offer precise temperature control, powerful airflow, and ergonomic designs, allowing you to achieve stunning results with your art. Whether you are a beginner or an experienced artist, our recommended heat guns will help you create mesmerizing, vibrant acrylic pour paintings.

How to Choose the Right Heat Gun for Acrylic Pouring
Acrylic pouring is a popular art technique that involves creating abstract designs by pouring layers of acrylic paint onto a canvas or other surface. One important tool for achieving the desired effects in acrylic pouring is a heat gun. A heat gun is used to apply heat to the surface of the poured paint, which helps to create cells, blend colors, and create interesting patterns. However, with so many options available in the market, choosing the right heat gun can be a daunting task. In this section, we will discuss some key factors to consider when selecting a heat gun for acrylic pouring.
1. Temperature Control
Temperature control is a crucial feature to look for in a heat gun for acrylic pouring. Different effects require different levels of heat. Some heat guns come with adjustable temperature settings, allowing you to control the intensity of the heat. This is particularly useful if you are experimenting with different pouring techniques or working with different types of paint. Look for a heat gun that offers temperature control options for maximum flexibility.
2. Airflow Control
In addition to temperature control, airflow control is another important feature to consider. The airflow controls the speed and intensity of the heat gun, which can affect the patterns and cells created in your artwork. Look for a heat gun that offers adjustable airflow settings, as this will give you greater control over the outcome of your pours.
3. Size and Weight
The size and weight of the heat gun can also impact your overall experience with acrylic pouring. A smaller and lighter heat gun can be easier to handle and maneuver, especially during longer painting sessions. Consider your own comfort and preferences when selecting the size and weight of your heat gun.
4. Safety Features
Safety should always be a top priority when working with any heat tool. Look for a heat gun that has built-in safety features such as heat shields or auto-shutoff mechanisms. These features can help prevent accidental burns and minimize the risk of fire hazards.
5. Durability and Quality
Investing in a high-quality heat gun can save you money in the long run. Look for heat guns made from durable materials that can withstand frequent use. Reading customer reviews and checking product warranties can give you an idea of the quality and durability of a particular heat gun.
6. Price Range
Heat guns come in a wide range of prices, so it’s important to consider your budget before making a purchase. While it can be tempting to opt for the cheapest option, keep in mind that low-quality heat guns may not deliver the desired results and may not last as long. Look for a heat gun that offers a good balance between price and quality.
7. Additional Features
Some heat guns come with additional features that can enhance your acrylic pouring experience. These may include LCD displays for temperature settings, ergonomic handles for comfort, or even accessory kits with additional nozzles and attachments. Consider these extra features and decide if they would be beneficial for your specific needs.
In summary, choosing the right heat gun for acrylic pouring involves considering factors such as temperature control, airflow control, size and weight, safety features, durability and quality, price range, and additional features. By taking these factors into account, you can select a heat gun that best suits your artistic style and preferences, allowing you to create stunning acrylic pouring artwork.

The Pros and Cons of Using Heat Guns for Acrylic Pouring
Acrylic pouring is a popular art technique that involves pouring layers of acrylic paint onto a canvas to create unique and dynamic designs. One of the tools that artists often use in this process is a heat gun. A heat gun is a handheld device that emits a stream of hot air and can be used to manipulate and move the paint on the canvas. While heat guns can be a valuable tool for acrylic pouring, they also come with their own set of pros and cons.
Pros of Using Heat Guns for Acrylic Pouring
1. Faster Drying Time: One of the main advantages of using a heat gun in acrylic pouring is that it speeds up the drying time of the paint. The hot air from the heat gun helps to evaporate the water content in the paint, allowing it to dry more quickly. This is especially beneficial when doing multiple layers or when you’re eager to see the final result.
2. Creating Unique Effects: Heat guns can be used to create unique effects in acrylic pouring. By directing the heat towards the wet paint, you can create cells, bubbles, and other interesting textures. This adds depth and visual interest to your artwork.
3. Fixing Mistakes: If you make a mistake while pouring the paint, a heat gun can help you fix it. By applying heat to the area, you can reactivate the paint and move it around to correct any errors. This allows you to have more control over the final outcome of your artwork.
Cons of Using Heat Guns for Acrylic Pouring
1. Potential for Overheating: One of the main drawbacks of using a heat gun is the potential for overheating the paint. If the heat is applied for too long or too closely to the surface, it can cause the paint to bubble, crack, or even burn. It’s important to use the heat gun with caution and to maintain a distance between the gun and the canvas.
2. Uneven Heat Distribution: Another challenge with using heat guns is achieving an even distribution of heat. If the heat is concentrated in one area, it can cause the paint to dry unevenly and create unwanted patterns or streaks. It requires practice and skill to use the heat gun effectively and achieve the desired results.
3. Limited Control: While a heat gun offers a certain level of control in manipulating the paint, it is not as precise as other techniques, such as using a brush or a palette knife. The heat can sometimes spread the paint too much or create unintended effects. It’s important to experiment and practice with the heat gun to understand its capabilities and limitations.
In summary, using a heat gun for acrylic pouring can be both beneficial and challenging. It speeds up the drying time, allows for the creation of unique effects, and helps fix mistakes. However, there is a risk of overheating the paint, achieving uneven heat distribution, and limited control over the outcome. With practice and caution, artists can leverage the advantages of a heat gun while minimizing its drawbacks in acrylic pouring.

Tips and Tricks for Using a Heat Gun in Acrylic Pouring
Acrylic pouring is a popular art technique that involves pouring layers of acrylic paint onto a canvas or other surface to create unique and vibrant abstract designs. One tool that is commonly used in acrylic pouring is a heat gun. A heat gun can help to manipulate the paint, create interesting effects, and speed up the drying process. In this section, we will explore some tips and tricks for using a heat gun in acrylic pouring.
1. Safety First
Before using a heat gun, it is important to prioritize safety. Make sure you are working in a well-ventilated area to avoid inhaling any fumes. Wear protective goggles and gloves to protect your eyes and hands from the heat. Additionally, keep the heat gun away from any flammable materials to prevent accidents.
2. Distance Matters
When using a heat gun in acrylic pouring, the distance between the gun and the paint surface is crucial. Holding the heat gun too close can cause the paint to bubble or scorch, while holding it too far away may not have the desired effect. Experiment with different distances to find the sweet spot where the paint starts to move and blend without overheating.
3. Move Slowly and Evenly
As you apply heat to the paint, it is important to move the heat gun slowly and evenly across the surface. This helps to distribute the heat evenly and prevents any areas from getting overheated. Avoid keeping the heat gun stationary in one spot for too long, as it can lead to uneven drying and potential damage to the paint.
4. Use in Layers
In acrylic pouring, artists often work with multiple layers of paint to create depth and dimension. When using a heat gun, it is best to apply heat between each layer to encourage better adhesion and blending. Allow each layer to dry partially before applying the heat, as this can prevent the colors from blending too much and losing their individuality.
5. Experiment with Angles
The angle at which you hold the heat gun can significantly impact the effects achieved in acrylic pouring. Holding the gun parallel to the surface will create a wide and gentle movement, while holding it at a steeper angle can lead to more concentrated and precise movement. Play around with different angles to see what works best for your desired effect.
6. Test on a Small Area
If you are trying out new techniques or experimenting with different heat gun settings, it is always a good idea to test them on a small area before applying them to your entire artwork. This allows you to see how the paint reacts to the heat and make any necessary adjustments before committing to the entire piece.
7. Use a Diffuser Attachment
Some heat guns come with diffuser attachments that can help to disperse the heat more evenly. These attachments can be particularly useful when working with delicate or intricate designs, as they help to prevent the paint from getting overheated in specific areas. Consider using a diffuser attachment for more controlled and uniform heat distribution.
8. Practice and Explore
Acrylic pouring is a versatile and creative art form, and using a heat gun opens up a world of possibilities. Take the time to practice and explore different techniques with the heat gun. Try different heat settings, angles, and distances to see how they affect the paint. Through experimentation, you can discover unique effects and develop your own style.
Summary
Using a heat gun in acrylic pouring can enhance your artwork and create captivating effects. However, it is crucial to prioritize safety and follow proper guidelines. Experiment with different distances, angles, and heat settings to achieve the desired results. Remember to test new techniques on a small area before applying them to your entire artwork. With practice and exploration, you can unlock the full potential of using a heat gun in acrylic pouring.
Maintaining and Cleaning Your Heat Gun for Longevity
Heat guns are versatile tools that are used for a variety of tasks such as paint stripping, soldering, thawing pipes, and even crafting. To ensure that your heat gun continues to perform at its best and has a long lifespan, proper maintenance and cleaning are essential. In this section, we will take a closer look at the steps you can take to maintain and clean your heat gun.
1. Read the Manual
Before you start using your heat gun, it is important to read the manual provided by the manufacturer. The manual will contain important information about the specific model of your heat gun, including maintenance and cleaning instructions. Following the manufacturer’s guidelines will ensure that you do not accidentally damage the tool during the cleaning process.
2. Unplug and Allow Cooling
Before attempting any maintenance or cleaning on your heat gun, always unplug it from the power source and allow it to cool down completely. Working on a hot or powered heat gun can be dangerous and may result in burns or electric shock.
3. Remove Dust and Debris
Dust and debris can accumulate on the surface and vents of your heat gun, affecting its performance. Use a soft brush or a dry cloth to gently remove any loose dust and debris from the tool. Be careful not to push the residue further into the internal components.
4. Check and Clean the Air Intake Vents
The air intake vents of your heat gun may get clogged over time, hindering the airflow and causing the tool to overheat. Inspect the vents for any obstructions, such as dust or debris, and clean them using a small brush or compressed air. Ensure that the vents are completely clear to allow proper ventilation.
5. Clean the Nozzle
The nozzle of your heat gun can get clogged with residue from various applications. This can affect the airflow and heat distribution. To clean the nozzle, you can use a cleaning brush or a small wire to remove any built-up residue. Be gentle while cleaning to avoid damaging the nozzle.
6. Clean the Heating Element
The heating element of your heat gun is responsible for generating the heat needed for various tasks. Over time, it can accumulate dirt and residue, affecting its performance. To clean the heating element, use a soft cloth or cotton swabs dipped in isopropyl alcohol. Gently wipe the heating element to remove any dirt or residue.
7. Store Properly
When you are done using your heat gun, it is important to store it properly. Keep it in a clean and dry environment, away from moisture and dust. Use the provided storage case or a dedicated storage area to protect the heat gun from potential damage.
8. Regular Inspection
Periodically inspect your heat gun for any signs of wear or damage. Check the power cord, plug, and switches for any fraying or loose connections. If you notice any issues, contact a professional for repairs or consider replacing the heat gun if necessary.
Summary
In summary, maintaining and cleaning your heat gun is crucial for its longevity and optimal performance. By following the manufacturer’s guidelines, regularly cleaning the vents and nozzle, and storing it properly, you can ensure that your heat gun lasts for years to come. Remember to always prioritize safety by unplugging and allowing the tool to cool down before performing any maintenance or cleaning tasks.
FAQs
1. What is the best heat gun for acrylic pouring?
The Wagner HT400 Heat Gun is highly recommended for acrylic pouring. It offers precise temperature control, a compact design, and a range of airflow settings to suit different projects. Its low heat setting is ideal for acrylic pouring as it helps to evenly distribute and move the paint without causing excessive heat damage.
2. How do I choose the right heat gun for acrylic pouring?
When choosing a heat gun for acrylic pouring, look for one with adjustable temperature settings, a range of airflow speeds, and a nozzle that directs heat in a controlled manner. It’s also important to consider the gun’s durability, ease of use, and customer reviews to ensure you’re getting a reliable product.
3. Can I use a hairdryer instead of a heat gun for acrylic pouring?
While a hairdryer can be used as an alternative to a heat gun for acrylic pouring, it may not provide the same level of control as a dedicated heat gun. Hairdryers often have limited temperature settings and airflow options, which can result in uneven heat distribution and potential damage to the artwork. It’s recommended to use a heat gun specifically designed for acrylic pouring for best results.
Conclusion:Conclusion
In conclusion, when it comes to finding the best heat gun for acrylic pouring, there are several factors to consider. It is important to look for a heat gun that offers adjustable temperature settings, as different acrylic paints require different levels of heat to achieve the desired effect. Additionally, a heat gun with a comfortable grip and lightweight design will reduce fatigue during longer painting sessions. Safety features such as overheat protection and a cool-down mode are also important for peace of mind. Lastly, reading customer reviews and considering the reputation of the brand can help narrow down the options and find the best heat gun for your acrylic pouring needs.
Remember, finding the right heat gun is crucial in achieving stunning results in your acrylic pouring projects. Whether you are a beginner or an experienced artist, investing in a high-quality heat gun will ensure that you have precise control over the drying process and can enhance the flow and vibrancy of your acrylic paints. So, take your time to research and compare different models, considering the specific features mentioned above, and make an informed decision that suits your unique requirements and artistic style.
