
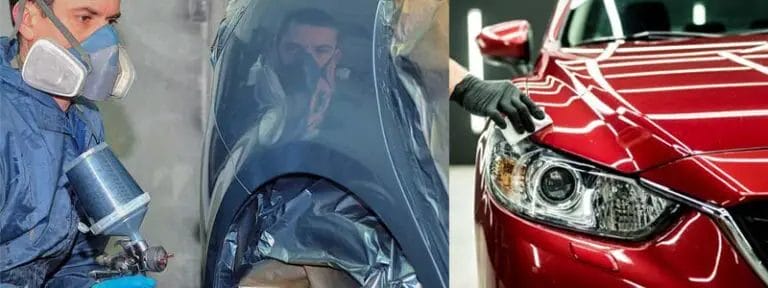
Looking for a flawless and professional finish for your car? Learn how to spray acrylic enamel car paint like a pro with our step-by-step guide. From preparing the surface to applying the paint, we’ll walk you through the process to achieve a showroom-worthy result.
First, start by cleaning and sanding the car’s surface to ensure proper adhesion. Next, choose a well-ventilated area and protect nearby surfaces with plastic or drop cloths. Then, mix the acrylic enamel paint with the appropriate reducer and hardener according to the manufacturer’s instructions.
After that, load the paint into a high-quality spray gun and test the spray pattern on a scrap surface. Start spraying in a smooth, even motion, overlapping each pass for consistent coverage. Allow proper drying time between coats, and lightly sand between each layer for maximum smoothness.
Once you’ve achieved the desired coverage and finish, let the final coat dry completely. Finally, buff the painted surface to a high shine using a polishing compound and a clean, soft cloth. Now you’re ready to show off your freshly painted ride!
Remember to always follow safety precautions when working with automotive paints, such as wearing protective clothing and a respirator. Happy painting!
Choosing the Right Equipment: Essential Tools for Acrylic Enamel Car Painting
When it comes to painting a car with acrylic enamel, having the right equipment is essential. The quality of your tools can greatly impact the outcome of your paint job. In this section, we will discuss the essential tools you need for acrylic enamel car painting.
Spray Gun
A high-quality spray gun is a must-have tool for acrylic enamel car painting. Look for a spray gun with a nozzle that is appropriate for acrylic enamel paint. This will ensure that the paint is applied evenly and smoothly onto the car’s surface. A spray gun with adjustable settings is also beneficial, as it allows you to control the amount of paint being sprayed.

Air Compressor
An air compressor is another important tool for acrylic enamel car painting. The air compressor provides the necessary pressure to push the paint through the spray gun. Make sure to choose an air compressor that is suitable for automotive painting, as it needs to deliver sufficient air pressure for the paint application.
Sanding Equipment
Prior to painting, the car’s surface needs to be properly prepared. This involves sanding away any imperfections or rough spots. Invest in sanding equipment such as sandpaper or sanding blocks of different grits. Coarser grits are used for removing larger imperfections, while finer grits are used for smoothing the surface.
Masking Tape and Plastic Sheet
Masking tape and plastic sheet are essential for protecting areas of the car that you do not want to be painted. Use masking tape to cover parts such as windows, trim, and emblems. Plastic sheeting can be used to create a barrier between the painted and unpainted areas, ensuring a clean and professional finish.
Respirator
Painting a car involves the use of chemicals and fumes that can be harmful if inhaled. It is crucial to wear a respirator to protect yourself from these hazards. Look for a respirator that is specifically designed for automotive painting, as it will provide the necessary filtration to keep you safe.
Paint Mixing Tools
Acrylic enamel paint needs to be thoroughly mixed before application. Invest in paint mixing tools such as stir sticks or shakers to ensure that the paint is well-mixed and ready to use. Properly mixed paint will result in a consistent color and finish.
Paint Booth or Proper Ventilation
Lastly, it is important to have a paint booth or a well-ventilated area for acrylic enamel car painting. Proper ventilation is crucial to remove fumes and ensure the safety of both the painter and the car. A dedicated paint booth is ideal as it provides controlled airflow and minimizes the risk of contaminants.
In summary, when it comes to acrylic enamel car painting, having the right tools is essential for a professional-looking finish. Invest in high-quality equipment such as a spray gun, air compressor, sanding tools, masking tape, plastic sheeting, respirator, paint mixing tools, and a paint booth or proper ventilation. With the right tools, you can achieve a flawless and long-lasting paint job on your car.
2. Preparing the Car Surface: Steps to Ensure a Smooth and Clean Paint Job
Before embarking on a car painting project, it is crucial to properly prepare the car surface. Proper preparation ensures that the paint job is smooth, adheres well, and lasts longer. Here are the steps to follow to ensure a smooth and clean paint job:
Gather the Necessary Tools and Materials
Before starting the surface preparation, it is essential to gather all the necessary tools and materials. You will need:
- Soap or car wash shampoo
- Water hose or pressure washer
- Sponge or soft cloth
- Automotive cleaner or degreaser
- Sandpaper (various grit sizes)
- Tack cloth
- Primer
- Masking tape
- Newspaper or plastic sheeting
- Safety goggles and gloves
Clean the Car Thoroughly
The first step in preparing the car surface is to clean it thoroughly. Start by washing the car using soap or car wash shampoo and a sponge or soft cloth. Rinse off the soap with a water hose or pressure washer to ensure all dirt and grime are removed. Pay extra attention to areas prone to dirt buildup, such as the wheel wells and lower body panels.
Next, use an automotive cleaner or degreaser to remove any grease, oil, or wax residues from the surface. This step is crucial to ensure that the paint adheres properly to the car’s surface.
Sand the Surface
After cleaning the car, it is time to sand the surface. Start by identifying any rough spots, scratches, or imperfections on the car’s body. Use sandpaper with a suitable grit size (generally starting with a higher grit and progressing to a finer grit) to smooth out these areas.
When sanding, make sure to maintain an even pressure and use a back-and-forth or circular motion. This process helps to remove any previous paint or clear coat, as well as smoothen out the surface for a better finish. Take care not to oversand or apply excessive pressure, as this can damage the car’s surface.
Once the surface is sanded, use a tack cloth to remove any sanding dust. The tack cloth is sticky and helps to pick up small particles, ensuring a clean surface for painting.
Apply Primer and Masking
Before applying the final coat of paint, it is recommended to apply a layer of primer. Primer helps to improve paint adhesion, provides a smooth surface, and enhances the durability of the paint job. Follow the manufacturer’s instructions for the specific primer you are using.
After applying the primer, allow it to dry completely. Once dry, you can proceed to mask off any areas that you do not want to be painted. Use high-quality masking tape to cover areas such as windows, trim, and other parts that should not be painted. Cover the rest of the car with newspaper or plastic sheeting to protect it from overspray.
Summary
In summary, proper preparation of the car surface is vital to ensure a smooth and clean paint job. Gather all the necessary tools and materials before starting. Clean the car thoroughly, removing any dirt, grime, grease, or wax residues. Sand the surface to smooth out imperfections and provide a better surface for painting. Apply a layer of primer for improved adhesion and durability. Finally, mask off areas that should not be painted to protect them from overspray.
By following these steps, you can ensure that your car’s paint job looks professional and lasts for years to come.
Applying the Acrylic Enamel Paint: Techniques for Achieving a Professional Finish
Once you have prepared the surface and primed it, you are now ready to apply the acrylic enamel paint. This step is crucial in achieving a professional finish and ensuring the longevity of your paint job. In this section, we will discuss some techniques that can help you achieve excellent results.
1. Choose the Right Tools
Before you start painting, it is important to have the right tools at hand. Here are some essentials:
- High-quality brushes or rollers: Choose brushes or rollers specifically designed for acrylic enamel paint. Ensure they are in good condition, clean, and free from previous paint residue.
- Paint tray: Use a paint tray to hold the paint and facilitate easy access for your brushes or rollers.
- Painter’s tape: Use painter’s tape to mask off areas where you don’t want the paint to go, such as trim or windows.
- Drop cloths or plastic sheets: Protect your floors and furnishings by covering them with drop cloths or plastic sheets.
2. Apply Thin and Even Coats
One of the key factors in achieving a professional finish with acrylic enamel paint is applying thin and even coats. Here’s how:
- Start by dipping your brush or roller into the paint, ensuring not to overload it. Excess paint can lead to drips and uneven application.
- Apply the paint in long, smooth strokes, working from one side to the other. For larger surfaces, consider using a roller for faster and more uniform coverage.
- Avoid pressing too hard on the brush or roller, as this can cause streaks and texture in the finish. Apply gentle and even pressure to achieve a smooth result.
- Allow each coat to dry completely before applying the next. This will help prevent the paint from smudging or mixing with subsequent coats.
3. Use Proper Painting Techniques
There are a few techniques you can employ while painting with acrylic enamel to ensure a professional finish:
- Feathering: Feathering is a technique used to blend the edges of wet paint with the previous stroke. This helps create a seamless finish without visible brush or roller marks.
- Cut-in method: When painting near edges or corners, use the cut-in method. This involves painting a narrow strip with a brush before using a roller for the rest of the surface.
- Crosshatching: Crosshatching involves applying the paint in a crisscross pattern. This technique helps to even out the paint and eliminate any streaks or lines.
4. Pay Attention to Drying and Curing Times
Acrylic enamel paint requires adequate drying and curing time to achieve its full durability and resistance. Follow these guidelines:
- Drying time: Allow each coat of paint to dry for the recommended time specified by the manufacturer. This can vary depending on the brand and environmental conditions.
- Curing time: After the final coat has dried, it is important to allow sufficient curing time. This can range from a few days to a couple of weeks, depending on the product. Avoid heavy use or exposure to harsh elements during this period.
By following these techniques, you can achieve a professional finish when applying acrylic enamel paint. Remember to choose the right tools, apply thin and even coats, use proper painting techniques, and allow ample drying and curing time for the best results.
Tips for Achieving Proper Coverage and Consistency with Acrylic Enamel Spray Paint
Acrylic enamel spray paint is a popular choice for DIY enthusiasts and professionals alike. Its quick drying time, durability, and vibrant colors make it ideal for a wide range of projects. However, achieving proper coverage and consistency can sometimes be a challenge. In this section, we will discuss some helpful tips to ensure optimal results with acrylic enamel spray paint.
1. Prepare the Surface
Before applying acrylic enamel spray paint, it is essential to prepare the surface properly. Start by cleaning the surface with soap and water to remove any dirt, grease, or debris. Use a mild abrasive to smooth out rough patches and sand down any existing paint or finish. Make sure to rinse the surface thoroughly and allow it to dry completely before proceeding to the next step.
2. Prime the Surface
Priming the surface before applying acrylic enamel spray paint is highly recommended, especially for porous or uneven surfaces. A primer creates a smooth and uniform base, enhancing the adhesion of the paint and promoting better coverage. Choose a primer that is specifically formulated for use with acrylic enamel spray paint and follow the manufacturer’s instructions for application.
3. Shake the Can Thoroughly
Prior to using acrylic enamel spray paint, it is crucial to shake the can thoroughly. This helps to ensure that the paint is well mixed and that the pigments are evenly distributed throughout the can. Hold the can upside down and shake it vigorously for at least one minute. This will prevent the paint from clogging or splattering and result in a more consistent spray.
4. Test the Spray Pattern
Before applying acrylic enamel spray paint to your project, it is advisable to test the spray pattern on a scrap piece of cardboard or a similar surface. This allows you to familiarize yourself with the spray nozzle and adjust the distance and speed of spraying for optimal coverage. Aim for a smooth and even application without excessive buildup or drips.
5. Apply Multiple Thin Coats
When using acrylic enamel spray paint, it is better to apply multiple thin coats rather than a single heavy coat. Thin coats dry faster and are less likely to result in drips or uneven coverage. Allow each coat to dry according to the manufacturer’s instructions before applying the next. This will help achieve a smooth and consistent finish.
6. Maintain Proper Distance
The distance between the spray can and the surface plays a crucial role in achieving proper coverage and consistency. Holding the can too close can result in excessive paint buildup, while holding it too far can lead to uneven coverage. Maintain a distance of approximately 8 to 12 inches from the surface and use smooth, sweeping motions for the best results.
7. Work in a Well-Ventilated Area
Working with acrylic enamel spray paint releases fumes that can be harmful if inhaled. Therefore, it is essential to work in a well-ventilated area to minimize exposure. Open windows and doors to allow fresh air circulation or use a fan to improve ventilation. If working indoors, consider wearing a respirator to protect yourself.
8. Follow Drying and Curing Times
Acrylic enamel spray paint requires proper drying and curing times to ensure a durable and long-lasting finish. Read the manufacturer’s instructions carefully and allow adequate time between coats and for the final cure. Rushing the process can lead to surface imperfections, such as bubbling or peeling.
9. Clean and Store Properly
After completing your project, it is essential to clean the nozzle of the spray can to prevent clogging. Turn the can upside down and press the nozzle until clear gas is released. Store the can in a cool and dry place, away from direct sunlight or extreme temperatures. Proper storage ensures the longevity of the paint and allows for future use.
In summary, achieving proper coverage and consistency with acrylic enamel spray paint requires careful preparation, proper technique, and following the manufacturer’s instructions. By following these tips, you can enhance the quality of your paint job and achieve professional-looking results for your projects.
Properly Caring for and Maintaining Your Acrylic Enamel Car Paint
Acrylic enamel car paint is a popular choice among car enthusiasts for its durability and glossy finish. To keep your car looking its best, it is important to properly care for and maintain the paint. In this section, we will discuss some tips and techniques to help you keep your acrylic enamel car paint in pristine condition.
1. Regular Washing
Regular washing is the first step to maintaining your acrylic enamel car paint. Use a mild car wash soap and a soft sponge or wash mitt to gently clean the surface of your car. Avoid using harsh chemicals or abrasive cleaners, as they can damage the paint. Rinse the car thoroughly with water to remove any soap residue.
2. Drying
After washing your car, it is important to dry it thoroughly to prevent water spots. Use a clean microfiber cloth or chamois to gently dry the surface. Avoid using rough towels or drying the car in direct sunlight, as this can cause scratches or swirl marks.
3. Waxing
Waxing your car on a regular basis helps to protect the acrylic enamel paint and enhance its shine. Choose a high-quality car wax that is specifically formulated for acrylic enamel finishes. Apply the wax using a soft cloth, following the manufacturer’s instructions. Buff the waxed surface with a clean microfiber cloth to achieve a glossy finish.
4. Avoiding Scratches
To maintain the beauty of your acrylic enamel car paint, it is important to avoid scratches. Park your car in a shaded area or use a car cover to protect it from the sun’s harmful UV rays. Be cautious when opening doors or placing objects on the car’s surface to prevent accidental scratches.
5. Dealing with Stains or Spills
If your car’s acrylic enamel paint gets stained or spills occur, it is important to address them promptly. Use a mild detergent or specialized stain remover that is safe for use on automotive paint. Gently blot the stain or spill with a clean cloth, being careful not to rub or scrub the paint.
6. Professional Detailing
While regular maintenance can keep your acrylic enamel car paint in good condition, professional detailing can help restore and rejuvenate the paint. Consider taking your car to a reputable auto detailing service for a thorough cleaning, polish, and sealant application.
7. Paint Touch-Ups
If your acrylic enamel car paint gets chipped or scratched, it is important to address these issues promptly to prevent further damage. Consult with a professional automotive paint specialist to determine the best approach for touch-ups and repairs. They can provide guidance on matching the paint color and applying touch-up paint properly.
8. Prevention
Prevention is key to maintaining your acrylic enamel car paint. Avoid parking under trees or near construction sites where your car could be exposed to sap, bird droppings, or other contaminants. Regularly inspect your car’s paint for any signs of damage and address them promptly to prevent further deterioration.
9. Storage
If you need to store your car for an extended period, take precautions to protect the acrylic enamel paint. Choose a clean and dry storage area, preferably indoors, to minimize exposure to the elements. Use a breathable car cover to protect the surface from dust, dirt, and potential scratches.
Summary
Proper care and maintenance are essential for preserving the beauty and longevity of your acrylic enamel car paint. Follow these tips to keep your car looking its best:
- Regularly wash your car using a mild car wash soap.
- Thoroughly dry the car to prevent water spots.
- Wax your car to protect the paint and enhance its shine.
- Take precautions to avoid scratches.
- Promptly address stains or spills.
- Consider professional detailing services.
- Address paint chips or scratches promptly.
- Prevent damage by avoiding exposure to contaminants.
- Take protective measures when storing your car.
By following these steps, you can ensure that your acrylic enamel car paint remains in excellent condition for years to come.
FAQs
1. How do I spray acrylic enamel car paint?
To spray acrylic enamel car paint, begin by preparing the surface by cleaning it thoroughly and sanding any rough areas. Apply a primer to create a smooth base, followed by several thin coats of acrylic enamel paint. Hold the spray can about 6-8 inches away from the surface and apply even strokes, overlapping each pass. Allow sufficient drying time between coats for best results.
2. Can I use a regular spray gun to apply acrylic enamel paint?
Yes, you can use a regular spray gun to apply acrylic enamel paint. However, make sure to use a gun with the appropriate nozzle size for the paint viscosity. Adjust the air pressure and fan pattern according to the manufacturer’s recommendations. Apply multiple thin coats, allowing each coat to dry before applying the next.
3. How long does acrylic enamel car paint take to dry?
The drying time of acrylic enamel car paint can vary depending on factors such as temperature and humidity. Generally, it takes around 24-48 hours for the paint to dry completely. However, it is recommended to wait longer before exposing the painted surface to harsh conditions or performing any heavy tasks to avoid damaging the finish.
Conclusion:
In conclusion, learning how to spray acrylic enamel car paint can be a game-changer for any car enthusiast. By following the proper techniques and using the appropriate tools, you can achieve a professional-quality finish that will make your car stand out.
Remember to prepare the surface thoroughly, choose the right type of paint, and apply thin coats with smooth, even strokes. Practice makes perfect, so don’t be discouraged if your first attempt doesn’t turn out as expected. With time and patience, you’ll master the art of spraying acrylic enamel car paint and enjoy the satisfaction of transforming your vehicle into a stunning work of art.
So, why wait? Grab your spray gun, pick your favorite color, and get ready to give your car a fresh, flawless look that will turn heads wherever you go!