
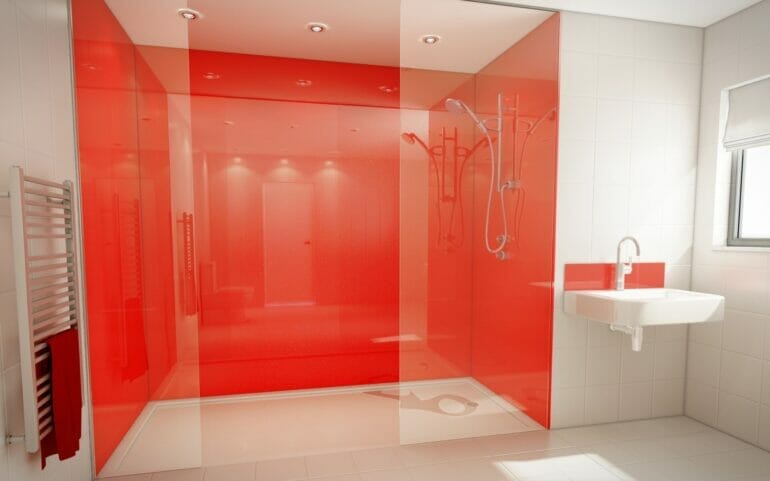
If you’re looking to give your bathroom a fresh and modern look, removing acrylic shower wall panels is a great place to start. Whether you want to replace them with new panels or switch to a different material, the process doesn’t have to be complicated.
First, start by removing any caulk or adhesive around the edges of the panels. Then, use a putty knife or pry bar to gently pry the panels away from the wall. Take care not to damage the wall behind the panels.
Once the panels are removed, clean the wall thoroughly to remove any remaining adhesive or residue. You can use a mild detergent and warm water or a specialized cleaner.
If you’re planning to install new panels, make sure to measure and cut them to fit your shower space accurately. Use a level to ensure the panels are straight and secure them to the wall using adhesive or nails, depending on the material.
Removing acrylic shower wall panels can be a DIY project with the right tools and preparation. However, if you’re not confident in your abilities, it’s always best to seek professional help to avoid any potential damage or mistakes.

Essential Tools and Materials for Removing Acrylic Shower Wall Panels
If you are planning to renovate your bathroom or replace your old shower wall panels, it is important to have the right tools and materials for the job. Removing acrylic shower wall panels requires a careful approach and the use of specific tools to ensure a smooth and successful process. In this section, we will discuss the essential tools and materials that you will need to effectively remove acrylic shower wall panels.
Tools
1. Utility Knife: A sharp utility knife is an essential tool for cutting through the caulking and adhesive that holds the acrylic panels in place. It allows you to safely and smoothly remove the panels without causing any damage.
2. Pry Bar: A pry bar or a crowbar is useful for gently prying the acrylic panels away from the wall. It helps in loosening the panels and separating them from the adhesive.
3. Putty Knife: A putty knife can be used to scrape off any remaining adhesive or caulking from the wall after the panels have been removed. It helps in preparing the wall for the installation of new panels.
4. Screwdriver: Depending on the installation method, you may need a screwdriver to unscrew any screws or fasteners holding the panels in place. Make sure to choose the appropriate type and size of screwdriver for the job.
5. Safety Glasses and Gloves: Safety should always be a top priority when working with tools. Wear safety glasses to protect your eyes from any flying debris or splinters. Additionally, wearing gloves will protect your hands from any sharp edges or cuts.
Materials
1. Adhesive Remover: An adhesive remover is necessary to dissolve and remove any stubborn adhesive residue left on the wall after the panels are removed. Follow the manufacturer’s instructions for safe and effective use.
2. Plastic Sheet or Drop Cloth: Place a plastic sheet or a drop cloth on the floor or bathtub to catch any debris, dust, or falling pieces during the removal process. This will make cleaning up easier and prevent any damage to the surrounding area.
3. Cleaning Supplies: After removing the acrylic panels, you will need cleaning supplies such as a mild soap or detergent and a sponge or cloth to clean the wall surface. This will ensure that the wall is clean and ready for the installation of new panels.
4. New Shower Wall Panels: Finally, you will need new shower wall panels to replace the old ones. Measure the dimensions of your shower area and choose panels that are suitable for your needs and preferences. Make sure to follow the manufacturer’s instructions for proper installation.
By having these essential tools and materials on hand, you will be well-equipped to remove acrylic shower wall panels safely and efficiently. Remember to take your time, follow proper safety precautions, and seek professional help if needed. With the right tools and materials, you can successfully complete your shower wall panel replacement project and achieve a refreshed and updated bathroom.
Step-by-Step Guide to Safely Removing Acrylic Shower Wall Panels
Acrylic shower wall panels are a popular choice for bathroom remodels due to their durability, easy maintenance, and sleek appearance. However, there may come a time when you need to remove these panels for repairs or to install new ones. While it may seem like a daunting task, with the right tools and knowledge, you can safely remove acrylic shower wall panels without causing damage to the surrounding area. In this guide, we will walk you through the step-by-step process of removing acrylic shower wall panels.
1. Gather the necessary tools
Before you begin, gather all the tools you will need for the project. This includes a utility knife, pry bar, putty knife, screwdriver, safety goggles, and gloves. Having all the necessary tools at hand will make the process smoother and more efficient.
2. Turn off the water supply
Prior to removing the shower wall panels, it is important to turn off the water supply to prevent any leaks or water damage. Locate the shut-off valves for the water supply and close them tightly.
3. Remove any caulking
Using a utility knife, carefully cut through the caulking around the edges of the shower wall panels. This will help loosen the panels and make it easier to remove them. Be sure to wear safety goggles and gloves during this step to protect yourself from any debris.
4. Start at the bottom
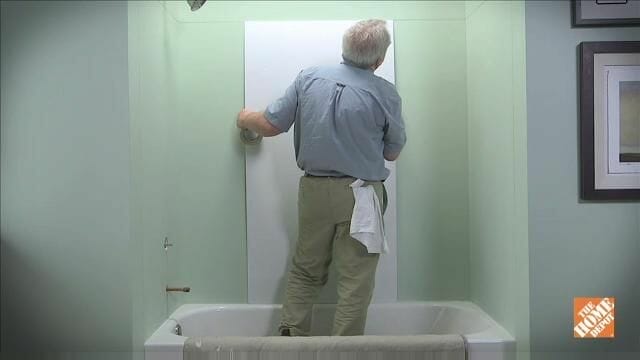
Begin removing the panels from the bottom. Insert a putty knife or pry bar between the panel and the wall, gently prying it away. Slowly work your way up, applying gentle pressure to release the adhesive or caulk holding the panel in place. Take your time and be careful not to force or damage the panels.
5. Remove screws or fasteners
If your acrylic shower wall panels are secured with screws or other fasteners, use a screwdriver to remove them. Take note of the location of each screw or fastener so you can easily reinstall the new panels.
6. Clean the surface
Once all the panels have been removed, clean the surface thoroughly. Remove any remaining adhesive, caulk, or debris using a putty knife or scraper. Wipe the area clean with a damp cloth to ensure a smooth and even surface for the new panels.
7. Install new panels or make repairs
If you are replacing the panels, carefully follow the manufacturer’s instructions for installation. If you are making repairs, assess the damage and determine the necessary steps to fix it. This may include patching holes, re-caulking, or applying new adhesive.
8. Reconnect the water supply
Once the new panels are installed or repairs are complete, it’s time to reconnect the water supply. Turn the shut-off valves back on and check for any leaks. Allow the water to run for a few minutes to ensure everything is functioning properly.
9. Apply new caulking
Finally, apply a fresh bead of caulk around the edges of the newly installed or repaired shower wall panels. This will help create a watertight seal and prevent any moisture from seeping behind the panels.
Summary
Removing acrylic shower wall panels may seem like a daunting task, but by following these step-by-step instructions, you can safely and effectively remove the panels without causing damage. Remember to gather all the necessary tools, turn off the water supply, remove any caulking, start at the bottom, remove screws or fasteners, clean the surface, install new panels or make repairs, reconnect the water supply, and apply new caulking. By taking your time and being careful, you can successfully remove and replace acrylic shower wall panels to give your bathroom a fresh and updated look.
Tips for Avoiding Damage to Walls and Surrounding Areas during Panel Removal
When it comes to removing panels from walls, it’s important to exercise caution and take measures to prevent any damage to the walls themselves or the surrounding areas. Whether you’re renovating your home or simply updating the look of a room, following these tips can help you avoid costly repairs and ensure a smooth panel removal process.
1. Prepare the workspace
Before you begin removing any panels, it’s important to prepare the workspace to minimize the risk of damage. Clear the area of any furniture or decorative items that could obstruct your movement or get damaged during the process. Cover the floor with a drop cloth or plastic sheet to protect it from any debris or accidental spills.
2. Use the right tools
Using the appropriate tools for panel removal can make the process much easier and minimize the risk of damage. Invest in a pry bar or panel removal tool specifically designed for this purpose. These tools are designed to provide leverage and prevent damage to the surrounding walls.
3. Start from the edges
When removing panels, it’s best to start from the edges rather than the center. Gently insert the pry bar or panel removal tool at the edge of the panel and apply gradual pressure to loosen it. Working from the edges allows you to maintain control and reduces the likelihood of causing damage to the adjacent panels or walls.
4. Take your time
Rushing through the panel removal process can result in unnecessary damage. Take your time and work slowly and carefully. Apply consistent pressure with the pry bar or removal tool while ensuring that you’re not forcing or bending the panels. Patience is key to prevent any mishaps during the removal process.
5. Protect the walls
While removing the panels, it’s essential to protect the walls from accidental scratches or dents. One way to do this is by placing a thin piece of wood or cardboard between the pry bar and the wall. This acts as a buffer and helps distribute the pressure evenly, reducing the risk of damage.
6. Use caution around electrical outlets
If you’re removing panels that are close to electrical outlets, it’s crucial to exercise caution. Turn off the power to the affected area and use insulated gloves when working near electrical components. Avoid applying excessive force or pressure that could damage the outlets or wiring.
7. Patch and repair as needed
Once you’ve successfully removed the panels, carefully inspect the walls for any damage. If you notice any scratches, holes, or other imperfections, take the necessary steps to patch and repair them. Use spackle or drywall compound to fill in any holes or cracks, and sand the area smooth before applying paint or wallpaper.
Summary
Removing panels from walls can be a challenging task, but with these tips, you can avoid damage to the walls and surrounding areas. Prepare the workspace, use the right tools, and start from the edges to ensure a smooth removal process. Take your time, protect the walls, and exercise caution around electrical outlets. Finally, patch and repair any damage once the panels are removed. By following these tips, you can safely remove panels without compromising the integrity of your walls.
How to Dispose of Acrylic Shower Wall Panels Responsibly
Acrylic shower wall panels are a popular choice for many homeowners due to their durability, easy maintenance, and aesthetic appeal. However, there may come a time when you need to replace or dispose of these panels. It is essential to handle their disposal responsibly to minimize environmental impact and ensure compliance with waste management regulations. This article will guide you through the proper methods of disposing of acrylic shower wall panels responsibly.
1. Determine the Condition of the Panels
Before disposing of your acrylic shower wall panels, assess their condition. If the panels are in good shape and free from any damage, consider repurposing or recycling them. Repurposing can involve using the panels for DIY projects or donating them to someone in need of such materials. Recycling, on the other hand, involves sending the panels to a recycling facility where they can be processed and used to create new products.
2. Contact Local Recycling Centers
If you decide to recycle your acrylic shower wall panels, the next step is to contact local recycling centers or facilities that accept plastic materials. Check with your municipality or waste management department for a list of recycling centers in your area. Some recycling centers may have specific requirements or guidelines for accepting acrylic panels, so it is important to inquire about their procedures beforehand.
3. Prepare the Panels for Recycling
Before taking your acrylic shower wall panels to the recycling facility, make sure to prepare them properly. Remove any fixtures, such as handles or soap holders, and clean the panels thoroughly. Use a mild soap and water solution to remove any residue or dirt. Once the panels are clean and dry, separate them from any other materials or debris.
4. Transport the Panels Safely
When transporting your acrylic shower wall panels to the recycling facility, ensure they are securely packed and protected to prevent any damage. Place them in a sturdy box or wrap them in bubble wrap or old blankets. This will minimize the risk of breakage during transit and protect both yourself and the panels from any potential harm.
5. Follow Recycling Facility Guidelines
When you arrive at the recycling facility, follow their guidelines and instructions for disposing of the acrylic shower wall panels. Some facilities may have designated drop-off areas or specific procedures for accepting these materials. Be prepared to provide any necessary paperwork or identification as required by the facility.
6. Explore Other Disposal Options
If repurposing or recycling is not feasible for your acrylic shower wall panels, you can explore alternative disposal options. Contact your local waste management department to inquire about any scheduled bulky item pickups or special disposal programs in your area. They may have specific guidelines for disposing of large plastic items like shower wall panels.
7. Avoid Improper Disposal
It is crucial to avoid improper disposal methods, such as throwing the acrylic shower wall panels in regular household waste or dumping them in landfills. Improper disposal can harm the environment, contribute to pollution, and may be subject to penalties or fines. By taking the time to dispose of your panels responsibly, you are contributing to a sustainable waste management system.
In Summary
When it comes to disposing of acrylic shower wall panels responsibly, it is best to explore options like repurposing or recycling. Contact local recycling centers to inquire about their procedures and guidelines for accepting acrylic panels. Prepare the panels by removing fixtures and cleaning them thoroughly before transport. Follow the facility’s instructions when dropping off the panels, and if recycling or repurposing is not feasible, contact your local waste management department for alternative disposal options. By handling the disposal of acrylic shower wall panels responsibly, you are making a positive impact on the environment and promoting sustainable waste management practices.
FAQs
1. How can I remove acrylic shower wall panels?
To remove acrylic shower wall panels, start by removing any caulk or silicone sealant around the edges. Then, carefully pry the panels away from the wall using a pry bar or putty knife. Take care not to damage the underlying wall surface. If necessary, use a heat gun to soften the adhesive and make removal easier.
2. Can I reuse the acrylic shower wall panels after removing them?
In most cases, it is not recommended to reuse acrylic shower wall panels after removing them. The panels may become damaged or warped during the removal process, making them unsuitable for reuse. It is usually best to replace the panels with new ones.
3. Do I need any special tools to remove acrylic shower wall panels?
Removing acrylic shower wall panels typically requires basic tools such as a pry bar or putty knife. Additionally, a heat gun may be helpful for softening adhesive if needed. It’s important to use these tools carefully to avoid damaging the panels or the underlying wall surface.
Conclusion
In conclusion, removing acrylic shower wall panels can be a straightforward process if done carefully and with the right tools. By following the steps outlined in this guide, you can effectively remove and replace your old panels to give your bathroom a fresh new look.
Remember to take necessary precautions such as wearing protective gear and using proper tools to avoid any injuries. If you’re unsure or uncomfortable with the process, it’s always a good idea to seek professional assistance. With the right knowledge and approach, you can successfully remove acrylic shower wall panels and transform your bathroom into a more inviting and aesthetically pleasing space.