
Cleaning an acrylic shower is essential for maintaining its pristine appearance and hygiene. With the right techniques and products, you can easily remove dirt, grime, and soap scum from your acrylic shower. In this guide, we will provide you with step-by-step instructions on how to clean your acrylic shower effectively and safely, without causing any damage to the surface. Whether you have a traditional or a modern acrylic shower, these cleaning tips will help you keep it sparkling clean and looking as good as new.
First, start by removing any loose debris or hair from the shower floor and drain. Then, prepare a solution of warm water and mild, non-abrasive dish soap. Dip a soft cloth or sponge into the soapy water and gently scrub the entire surface of the acrylic shower, focusing on areas with visible stains or soap scum buildup.
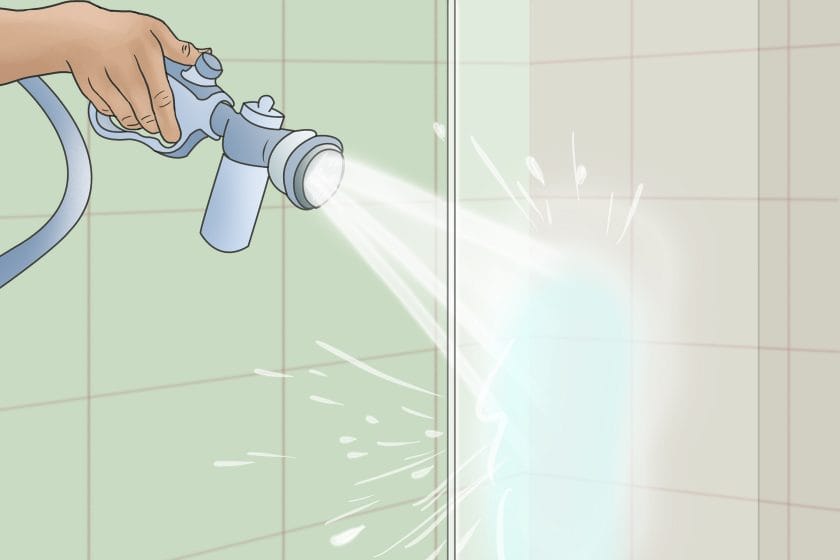
Next, rinse the shower thoroughly with warm water to remove the soapy residue. Avoid using hot water, as it can cause the acrylic to warp or crack. For tough stains or stubborn soap scum, you can use a mixture of white vinegar and water. Simply spray the solution onto the problem areas, let it sit for a few minutes, and then wipe it away with a clean cloth.
After cleaning, make sure to dry the acrylic shower completely to prevent water spots or streaks. Use a soft, lint-free cloth or towel to remove any moisture from the surface. Avoid using abrasive
Step-by-Step Guide to Cleaning Acrylic Showers
Acrylic showers are a popular choice for many homeowners due to their durability, affordability, and easy maintenance. However, over time, they can accumulate dirt, soap scum, and hard water stains, making them appear dull and unattractive. To keep your acrylic shower looking clean and new, follow this step-by-step guide to effectively clean and maintain it.
1. Gather Your Supplies
Before you start cleaning your acrylic shower, gather all the necessary supplies. This will help you save time and ensure that you have everything you need. Some essential items you’ll need include:
- Mild dish soap
- White vinegar
- Baking soda
- Soft microfiber cloth
- Soft-bristle brush or sponge
- Non-abrasive cleaner specifically designed for acrylic surfaces
- Water
2. Start with a Gentle Cleaning Solution
Begin by creating a gentle cleaning solution by mixing a few drops of mild dish soap with warm water in a bucket or spray bottle. Avoid using abrasive cleaners or harsh chemicals as they can scratch or damage the acrylic surface of your shower.
3. Remove Loose Dirt and Debris
Use a soft microfiber cloth or a soft-bristle brush to gently remove any loose dirt, debris, or soap scum from the surface of your acrylic shower. Start from the top and work your way down, paying extra attention to the corners and crevices.
4. Apply the Cleaning Solution
Dampen a clean cloth or sponge with the cleaning solution and apply it to the entire surface of your acrylic shower. Let the solution sit for a few minutes to loosen any stubborn stains or grime.
5. Scrub with a Soft-Bristle Brush
Using a soft-bristle brush or sponge, lightly scrub the surface of your acrylic shower in circular motions. Be gentle to avoid scratching the surface. Focus on areas with stains or buildup, such as soap scum or hard water deposits.
6. Rinse Thoroughly
After scrubbing, rinse the entire shower with warm water to remove any remaining cleaning solution and debris. Ensure that all traces of soap or cleaner are washed away.
7. Treat Stubborn Stains with Vinegar or Baking Soda
If you encounter stubborn stains that are not easily removed with the cleaning solution, you can use vinegar or baking soda as a natural cleaner. For hard water stains, dampen a cloth with white vinegar and gently rub the affected areas. For tougher stains, create a paste by mixing baking soda with water and apply it to the stains. Let it sit for a few minutes before gently scrubbing and rinsing.
8. Dry and Buff
Once you have rinsed off all the cleaning solutions and stains, use a soft, dry microfiber cloth to dry and buff the surface of your acrylic shower. This helps prevent water spots and streaks from forming, leaving your shower looking shiny and clean.
9. Regular Maintenance
To keep your acrylic shower looking its best, it’s important to maintain a regular cleaning routine. This can involve wiping down the shower after each use to remove soap residue and preventing the buildup of grime. Avoid using abrasive or harsh cleaners, as they can damage the acrylic surface. Instead, stick to mild dish soap, vinegar, or baking soda for routine cleaning.
In summary, cleaning your acrylic shower doesn’t have to be a daunting task. By following this step-by-step guide and using the right cleaning techniques and products, you can keep your acrylic shower looking clean, fresh, and inviting for years to come.

Natural and Homemade Cleaning Solutions for Acrylic Showers
Acrylic showers are a popular choice for modern bathrooms due to their sleek appearance and durability. However, over time, they can become dirty and stained, requiring regular cleaning to maintain their pristine condition. While there are many commercial cleaning products available, they often contain harsh chemicals that can damage the acrylic surface. Fortunately, there are natural and homemade cleaning solutions that can effectively clean acrylic showers without causing any harm. In this section, we will explore some of these solutions and how to use them.
Vinegar and Water Solution
Vinegar is a versatile cleaning agent that can be found in most households. Its acidic properties make it ideal for removing soap scum, hard water stains, and mineral deposits from acrylic showers. To create a vinegar and water solution, simply mix equal parts of distilled white vinegar and water in a spray bottle. Spray the solution onto the shower walls and floor, and let it sit for a few minutes to allow the vinegar to penetrate the dirt and grime. Then, scrub the surface gently with a soft cloth or sponge. Rinse thoroughly with clean water to remove any residue.
Baking Soda Paste
Baking soda is another effective natural cleaner that can be used to tackle tough stains on acrylic showers. To create a baking soda paste, mix baking soda with a small amount of water until it forms a thick, spreadable consistency. Apply the paste to the stained areas of the shower, and let it sit for about 15-20 minutes. Then, scrub the surface gently with a soft brush or sponge, focusing on the stained areas. Rinse thoroughly with clean water to remove any residue.
Lemon Juice and Olive Oil Mixture
Lemon juice is a natural acidic cleaner that can help remove stains and brighten the surface of acrylic showers. When combined with olive oil, it creates a powerful cleaning solution that can also condition and protect the acrylic surface. To make the mixture, combine equal parts of lemon juice and olive oil in a spray bottle or bowl. Spray or apply the mixture to the shower walls and floor, and let it sit for a few minutes. Then, scrub gently with a soft cloth or sponge and rinse thoroughly with clean water.
Hydrogen Peroxide Solution
Hydrogen peroxide is an effective cleaner and disinfectant that can be used to remove mold and mildew from acrylic showers. To create a hydrogen peroxide solution, mix equal parts of hydrogen peroxide and water in a spray bottle. Spray the solution onto the affected areas of the shower, and let it sit for about 10-15 minutes. Scrub the surface gently with a soft brush or sponge, focusing on the mold or mildew spots. Rinse thoroughly with clean water to remove any residue.
Preventing Stains and Build-up
In addition to regular cleaning, there are some preventive measures you can take to minimize stains and build-up on your acrylic shower. Avoid using abrasive cleaners, scrub brushes, or harsh chemicals as they can scratch or damage the surface. Instead, opt for soft cloths, sponges, or non-abrasive cleaning tools. Wiping down the shower after each use and keeping it well-ventilated can also help prevent the growth of mold and mildew. Using a squeegee to remove excess water and moisture from the surface can further prevent water spots and mineral deposits.
In summary, maintaining a clean and sparkling acrylic shower is easy with natural and homemade cleaning solutions. Vinegar and water, baking soda paste, lemon juice and olive oil mixture, and hydrogen peroxide solution are all effective options for removing dirt, stains, and mold from acrylic surfaces. Remember to use gentle cleaning tools and avoid abrasive cleaners to protect the integrity of the acrylic. By implementing regular cleaning and preventive measures, you can keep your acrylic shower looking beautiful and extend its lifespan.
Expert Tips for Maintaining the Shine of Acrylic Showers
Acrylic showers are a popular choice for many homeowners due to their durability, easy maintenance, and sleek appearance. To keep your acrylic shower looking shiny and new, it is important to follow a few expert tips. In this section, we will discuss some essential techniques and products that can help maintain the shine of your acrylic shower.
1. Regular Cleaning
Regular cleaning is the key to keeping your acrylic shower looking its best. Start by using a mild, non-abrasive cleaner that is specifically formulated for acrylic surfaces. Avoid using harsh chemicals, abrasive cleaners, or scrub brushes, as they can damage the acrylic and cause scratches. Instead, use a soft cloth or sponge to gently scrub the surface. Rinse thoroughly with clean water to remove any remaining residue.
2. Vinegar Solution
If your acrylic shower has stubborn stains or soap scum buildup, a vinegar solution can be highly effective. Mix equal parts of white vinegar and water in a spray bottle. Spray the solution onto the affected areas and let it sit for a few minutes. Then, gently scrub with a soft cloth or sponge. Rinse thoroughly with clean water to remove any vinegar residue.
3. Avoid Abrasive Materials
Avoid using abrasive materials or scrub brushes on your acrylic shower, as they can cause scratches and dull the shine. Instead, opt for soft cloths, microfiber towels, or non-abrasive sponges. When cleaning the shower, be gentle and avoid applying excessive pressure. This will help preserve the glossy finish of the acrylic.
4. Waxing and Polishing
To enhance the shine and protect the surface of your acrylic shower, consider waxing and polishing. Acrylic-specific wax can be applied to the shower surface using a soft cloth. Gently rub the wax into the acrylic in circular motions, then buff it off with a clean, dry cloth. This will create a protective layer and help maintain the shine for a longer period of time.
5. Remove Hard-Water Stains
If your acrylic shower develops hard-water stains, you can remove them using a mixture of warm water and mild dish soap. Dip a soft cloth or sponge into the soapy solution and gently scrub the stained areas. Rinse thoroughly with clean water and dry the surface with a soft cloth. Repeat the process if necessary until the stains are completely removed.
6. Avoid Harsh Chemicals
When cleaning your acrylic shower, it is important to avoid using harsh chemicals such as bleach, ammonia, or abrasive cleaners. These can cause discoloration, damage the surface, and diminish the shine of the acrylic. Stick to mild, non-abrasive cleaners that are specifically designed for acrylic surfaces.
7. Preventive Measures
To prevent the buildup of soap scum, hard-water stains, and other debris, it is important to take preventive measures. After each shower, use a squeegee or soft cloth to remove excess water from the walls and floor of the acrylic shower. This will help prevent the formation of water spots and minimize the need for frequent cleaning.
8. Avoid Extreme Temperatures
Avoid exposing your acrylic shower to extreme temperatures, as it can damage the surface and affect the shine. Avoid using very hot water or placing hot objects directly on the acrylic surface. Similarly, avoid using harsh chemicals or solvents that could react with the acrylic and cause discoloration or damage.
9. Regular Maintenance
Regular maintenance is essential for keeping your acrylic shower in optimal condition. In addition to regular cleaning, inspect the shower for any signs of damage, such as cracks or chips. Promptly address any issues to prevent further damage and maintain the overall shine and appearance of the acrylic shower.
10. Professional Assistance
If you are unsure about how to properly maintain your acrylic shower or if you encounter any issues, it is best to seek professional assistance. An expert can provide guidance, recommend suitable cleaning products, and address any specific concerns you may have. They can also perform any necessary repairs or refinishing to restore the shine of your acrylic shower.
In summary, maintaining the shine of acrylic showers requires regular cleaning with mild, non-abrasive cleaners, avoiding harsh chemicals and abrasive materials, and taking preventive measures. Waxing and polishing can enhance the shine and protect the surface, while addressing hard-water stains promptly and avoiding extreme temperatures can help preserve the acrylic’s appearance. Regular maintenance and seeking professional assistance when needed can ensure the long-lasting
Common Mistakes to Avoid When Cleaning Acrylic Showers
Acrylic showers are a popular choice for bathrooms due to their durability, affordability, and easy maintenance. However, cleaning acrylic showers requires special care to prevent damage and maintain their pristine appearance. In this section, we will discuss some common mistakes to avoid when cleaning acrylic showers.
Using Abrasive Cleaners
One of the biggest mistakes people make when cleaning acrylic showers is using abrasive cleaners. Acrylic is a delicate material that can easily scratch or become dull when exposed to harsh chemicals or abrasive scrubbing pads. Avoid using scouring powders, steel wool, or any other abrasive cleaning tools on your acrylic shower. Instead, opt for mild, non-abrasive cleaners specifically designed for acrylic surfaces.
Using Harsh Chemicals
Another mistake to avoid is using harsh chemicals on your acrylic shower. Strong cleaning agents such as bleach, ammonia, or vinegar can damage the acrylic surface, causing it to become discolored or even crack over time. Stick to gentle, non-toxic cleaners that are specifically formulated for acrylic showers. These cleaners will effectively remove soap scum, hard water stains, and mildew without causing any harm to the acrylic material.
Scrubbing Too Hard
While it may be tempting to scrub vigorously to remove tough stains, scrubbing too hard can damage the acrylic shower. Excessive scrubbing can cause scratches, dullness, or even remove the protective layer of the acrylic surface. Instead, use a soft sponge or cloth and gently scrub the shower in circular motions. Allow the cleaner to sit for a few minutes to loosen the dirt before wiping it away.
Using Incorrect Tools
Using the wrong cleaning tools can also lead to damage when cleaning acrylic showers. Avoid using brushes or scrubbers with stiff bristles as they can leave scratches on the acrylic surface. Instead, opt for soft microfiber cloths, sponges, or non-abrasive scrub brushes specifically designed for acrylic cleaning. These tools will effectively clean the shower without causing any harm.
Not Rinsing Thoroughly
Another mistake to avoid is not rinsing the acrylic shower thoroughly after cleaning. Leaving any residue or cleaner on the surface can lead to streaks, a sticky residue, or even damage over time. After cleaning, rinse the shower thoroughly with water to ensure all the cleaner is removed. Use a clean, soft cloth to dry the shower or let it air dry naturally.
Not Using a Protective Coating
Lastly, not using a protective coating on your acrylic shower is a mistake to avoid. Applying a protective coating to the acrylic surface can help maintain its shine, prevent stains, and make future cleaning easier. There are acrylic protectant sprays or polishes available that can be applied periodically to keep your shower looking its best. Just make sure to follow the manufacturer’s instructions when applying the protective coating.
In summary, cleaning acrylic showers requires special care to avoid common mistakes that can lead to damage or dullness. Avoid using abrasive cleaners or harsh chemicals, and opt for gentle, non-abrasive cleaners specifically designed for acrylic surfaces. Use soft sponges or cloths to gently scrub the shower, and rinse thoroughly to remove any residue. Additionally, consider applying a protective coating to maintain the acrylic shower’s appearance and make future cleaning easier. By following these tips, you can keep your acrylic shower looking clean and pristine for years to come.
FAQs
1. How do I clean an acrylic shower?
To clean an acrylic shower, mix warm water with a mild non-abrasive cleaner or dish soap. Gently scrub the surface using a soft cloth or sponge. Rinse thoroughly with warm water and dry with a clean towel. Avoid using abrasive cleaners or scrub brushes, as they can scratch the acrylic.
2. Can I use vinegar to clean my acrylic shower?
No, it is not recommended to use vinegar on acrylic showers. Vinegar is acidic and can cause damage to the acrylic surface. Stick to mild non-abrasive cleaners or dish soap for safe and effective cleaning.
3. How often should I clean my acrylic shower?
It is generally recommended to clean your acrylic shower at least once a week to prevent build-up of soap scum and grime. Regular cleaning helps maintain the appearance and prolong the life of your acrylic shower.
Conclusion:
In conclusion, maintaining a clean and sparkling acrylic shower is crucial for a hygienic and visually pleasing bathroom. By following the proper cleaning techniques and using gentle yet effective products, you can easily remove dirt, grime, and soap scum from your acrylic shower. Regularly wiping down the surfaces with a soft cloth or sponge, using non-abrasive cleaners, and avoiding harsh scrubbing will help preserve the integrity and shine of your shower. Additionally, consider implementing preventive measures such as using a squeegee after each use to keep your acrylic shower looking its best for years to come. With these simple steps, you can enjoy a pristine and inviting showering experience every day.
Remember, always prioritize safety when cleaning your acrylic shower. Avoid using abrasive tools or chemicals that may cause damage or discoloration. If you’re unsure about a specific cleaner or method, consult the manufacturer’s guidelines or seek professional advice. By investing a little time and effort into regular cleaning and maintenance, you can ensure that your acrylic shower remains a beautiful and functional centerpiece of your bathroom. So, get ready to step into a clean, rejuvenating shower and indulge in a truly refreshing experience.