
If you’re looking for tips on how to paint your toenails when you’re fat, we’re here to help!
Painting your toenails can be a fun and relaxing way to express yourself, regardless of your body size. Here are some practical tips to make the process easier:
1. Find a comfortable position where you can easily access your feet. This could be sitting on a chair or propping your foot up on a cushion.
2. Use a toenail clipper or file to shape your nails to your desired length and shape. This will ensure a smooth canvas for the polish.
3. Apply a base coat to protect your nails and prevent staining. This step is especially important if you’re using dark or vibrant colors.
4. Choose a nail polish color that you love and apply it using thin, even coats. If you’re worried about precision, you can use a toe separator or cotton balls to keep your toes separated.
5. Allow each coat to dry before applying the next one. It’s better to have multiple thin layers than one thick, clumpy layer of polish.
6. Finish off with a top coat to seal in the color and add shine. This will also help your pedicure last longer.
Remember, self-care and self-expression are for everyone, regardless of body size. Embrace your beauty
Easy Toenail Painting Techniques for Plus Size Individuals
When it comes to self-care and pampering, one activity that many people enjoy is painting their toenails. It’s a simple and fun way to add a pop of color and style to your feet. However, for plus size individuals, reaching and painting toenails can sometimes be a bit challenging. But fear not! In this section, we will share some easy toenail painting techniques specifically tailored for plus size individuals, ensuring that everyone can enjoy beautifully painted toes.
1. Get the right tools
Before you begin, it’s important to have the right tools on hand. Invest in a long-handled toenail clipper and a toenail file with an extended handle. These tools will make it easier to reach and shape your toenails, even if you have limited flexibility. Additionally, choose a nail polish with a wide brush that can cover your entire nail with just a few strokes.
2. Prepare your workspace
Creating a comfortable and accessible workspace is key. Find a well-lit area where you can comfortably sit and have all your tools within reach. You may also want to place a towel or mat under your feet for added stability and to catch any drips.
3. Opt for a seated position
Instead of attempting to paint your toenails while standing or bending over, try sitting down. Choose a chair or stool that provides proper back support and allows you to comfortably reach your feet. This seated position will give you better control and precision during the painting process.
4. Use toe separators
Toe separators are a great tool for plus size individuals as they help to ensure that each toe is properly spaced and allows for easier access while painting. These can be found at most beauty supply stores or even made at home using foam or washcloths.
5. Apply a base coat
Before applying your desired nail polish color, always start with a base coat. This helps to protect your nails from staining and extends the longevity of your polish. It also provides a smooth surface for your chosen color to adhere to.
6. Choose the right color and technique
When it comes to choosing a nail polish color, the options are endless. Plus size individuals can opt for any color that makes them feel confident and beautiful. Whether you prefer vibrant shades or subtle neutrals, the choice is yours! As for the technique, experiment with different styles such as solid color, French tips, or even nail art to find what suits your personal taste.
7. Practice patience and allow for drying time
After applying your desired nail polish, it’s essential to practice patience and allow sufficient drying time. Smudges or smears can easily happen if you rush to put on shoes or socks too quickly. Consider using a quick-dry top coat or even a nail dryer to speed up the process.
8. Add a finishing touch
Once your nail polish is completely dry, add a final touch by applying a moisturizing cuticle oil or lotion. This will nourish your cuticles and help to maintain the health of your nails.
In summary, these easy toenail painting techniques are specifically designed for plus size individuals to ensure a seamless and pleasurable experience. By following these steps and incorporating them into your nail care routine, you can confidently show off beautifully painted toes and embrace self-care at its finest.
Tips for Comfortably Reaching and Painting Toenails
Painting toenails is a fun and creative way to express your personal style and enhance the appearance of your feet. However, it can sometimes be challenging to comfortably reach and paint your toenails, especially if you have limited mobility or flexibility. In this section, we will provide you with some helpful tips to make the process easier and more comfortable.
1. Start with a Soak
Before you begin painting your toenails, it’s important to prepare them properly. Soaking your feet in warm water for about 10 minutes can help soften the nails and make them easier to work with. You can add some Epsom salt or a few drops of essential oil to enhance the relaxation and moisturizing benefits of the soak.
2. Use a Comfortable Seating Position
Choosing a comfortable seating position is crucial for reaching and painting your toenails with ease. You can sit on a sturdy chair or a low stool, ensuring that your back is supported. If you have difficulty bending forward, you can also prop your feet up on a footrest or a stack of pillows to bring them closer to you.
3. Use the Right Tools
Investing in the right tools can greatly simplify the process of reaching and painting your toenails. Here are some essential tools you should consider:
- A long-handled toenail clipper or scissors to trim your nails to the desired length.
- A nail file or emery board to shape the edges and smooth out any roughness.
- A toe separator or a rolled-up towel to keep your toes apart, allowing for easier access to each nail.
- A nail polish brush with a long handle or an extension wand to reach your toenails more comfortably.
- Toe spacers or foam toe protectors to prevent smudging while the polish dries.
4. Choose the Right Nail Polish
When selecting a nail polish, opt for one that offers good coverage and long-lasting wear. Look for polishes that are specifically formulated for toenails, as they tend to be more durable and resistant to chipping. Choose a color that complements your skin tone and personal style.
5. Take Your Time and Be Patient
Painting toenails requires precision and attention to detail. Take your time and be patient with the process. Apply thin, even coats of polish, allowing each coat to dry before applying the next one. This will help prevent smudging and ensure a smooth, professional-looking finish.
6. Consider Seeking Assistance
If you find it difficult to comfortably reach and paint your toenails on your own, don’t hesitate to ask for assistance. You can visit a professional nail salon or enlist the help of a family member or friend. They can help you achieve the desired results while ensuring your comfort and safety.
Summary
Painting toenails can be a fun and enjoyable activity. By following these tips, you can comfortably reach and paint your toenails, achieving beautiful and salon-worthy results. Remember to prepare your feet with a soak, choose a comfortable seating position, use the right tools, select the right nail polish, take your time, and seek assistance if needed. Enjoy the process and let your creativity shine through your perfectly painted toenails!
4. Nail Art Inspirations to Boost Confidence
Having well-groomed nails not only enhances our appearance but also boosts our confidence. Nail art has become a popular trend in recent years, allowing individuals to express their creativity and individuality through unique designs and color combinations. If you’re looking for nail art inspirations to boost your confidence, look no further! In this section, we will explore some stunning nail art ideas that will make you feel empowered and self-assured.
4.1. Geometric Patterns
Geometric patterns have been a major trend in the world of nail art. These designs are clean, modern, and can instantly elevate any look. From simple lines and squares to intricate shapes and angles, geometric nail art can be customized to suit your personal style. The boldness and precision of these designs exude confidence and make a strong statement.
To achieve geometric patterns, you can use nail striping tapes or thin brushes to create clean lines. Experiment with different color combinations and shapes to create a unique design that reflects your personality. Whether you prefer monochromatic patterns or vibrant color schemes, geometric nail art is a sure way to boost your confidence.
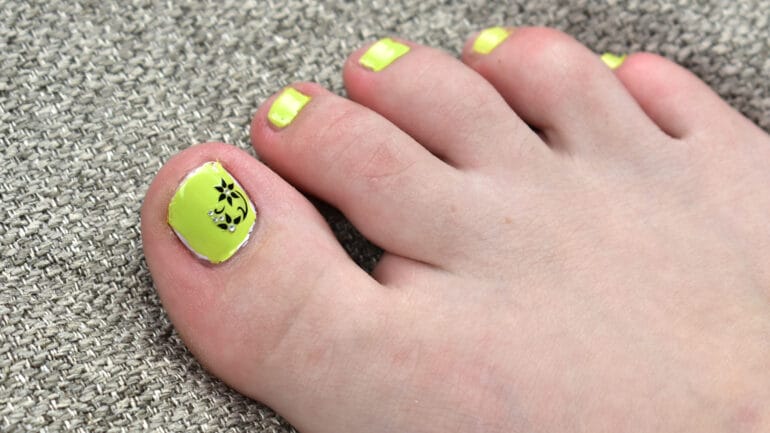
4.2. Floral Accents
If you’re a fan of feminine and delicate designs, floral accents are perfect for you. Floral nail art adds a touch of elegance and sophistication to your nails while boosting your confidence. You can opt for dainty flowers on a nude base for a subtle look or go all out with vibrant blooms on a colorful background.
To create floral nail art, you can use nail stamping plates, decals, or even hand-paint the flowers using a thin brush. Experiment with different flower sizes, colors, and arrangements to find a style that resonates with you. Floral nail art is not only visually appealing but also symbolizes growth, beauty, and positivity.
4.3. Metallic Accents
Metallic nail art has been gaining popularity due to its edgy and glamorous appeal. Whether it’s gold, silver, or rose gold, metallic accents can instantly transform your nails and boost your confidence. The reflective finish adds a touch of luxury and sophistication to any nail design.
To incorporate metallic accents into your nail art, you can use metallic nail polishes, foils, or even rhinestones. Create geometric shapes, stripes, or intricate designs using metallic elements for a bold and eye-catching look. Metallic nail art is versatile and can be dressed up or down, making it suitable for any occasion.
4.4. Abstract Art
If you’re looking for nail art that is unique and artistic, abstract designs are the way to go. Abstract nail art allows you to let your creativity run wild and create one-of-a-kind designs that reflect your personality. This bold and unconventional style of nail art is sure to boost your confidence and make a statement.
Experiment with different colors, shapes, and textures to create abstract designs that are visually captivating. You can use nail brushes, dotting tools, or even toothpicks to create abstract patterns on your nails. Abstract nail art is all about embracing imperfections and celebrating individuality.
4.5. Negative Space Designs
Negative space designs have become increasingly popular in nail art as they provide a modern and minimalist aesthetic. These designs utilize the natural nail as a part of the overall design, creating a visually interesting and unique effect. Negative space nail art is versatile and can be customized to suit any style or occasion.
To create negative space designs, you can use nail tapes or stickers to create clean lines and shapes. Experiment with different color combinations and patterns to achieve a striking look. Negative space nail art is not only visually appealing but also allows you to show off your natural nails, boosting your confidence.
Summary:
Nail art can be a powerful tool in boosting confidence and expressing creativity. By trying out different nail art inspirations such as geometric patterns, floral accents, metallic designs, abstract art, and negative space designs, you can enhance your appearance and feel empowered. Find the style that resonates with you and showcase your unique personality through your nails. Remember, well-groomed nails are not just a beauty trend but a reflection of self-care and confidence.
DIY Pedicure at Home: Step-by-Step Guide for Plus Size Individuals
Regular pedicures are a great way to pamper yourself and keep your feet looking and feeling their best. However, for plus size individuals, it can sometimes be challenging to find a comfortable and convenient salon that caters to their needs. The good news is that you can easily achieve salon-quality results with a DIY pedicure at home. In this guide, we will walk you through the step-by-step process of giving yourself a relaxing and rejuvenating pedicure.
Gather Your Supplies
The first step in giving yourself a DIY pedicure is to gather all the necessary supplies. Here are the items you will need:
- Nail polish remover
- Nail clippers
- Nail file
- Foot soak or bath salts
- Pumice stone or foot scrub
- Moisturizing lotion or oil
- Nail polish
- Base coat
- Top coat
- Cotton balls or pads
- Toe separators (optional)
Prepare Your Feet
Start by removing any old nail polish using a cotton ball or pad soaked in nail polish remover. Once your nails are polish-free, it’s time to trim and shape them. Use nail clippers to trim your nails to your desired length, and then use a nail file to smooth out any rough edges. If you have any calluses or rough skin on your feet, now is the time to address them. Soak your feet in warm water with foot soak or bath salts for about 10 minutes to soften the skin. Then, use a pumice stone or foot scrub to gently exfoliate and remove dead skin. Rinse your feet and pat them dry with a towel.
Pamper Your Feet
After preparing your feet, it’s time to give them some extra care and attention. Massage a generous amount of moisturizing lotion or oil into your feet, focusing on the heels and any other dry areas. Take your time and enjoy the soothing sensation as your skin absorbs the moisture.
Apply Nail Polish
Once your feet are pampered and moisturized, it’s time to apply nail polish. Start by applying a clear base coat to protect your nails and extend the longevity of your manicure. Allow the base coat to dry completely before moving on to the next step. Then, choose your desired nail polish color and apply two thin coats, allowing each coat to dry before applying the next. Finally, finish off your pedicure with a clear top coat to seal in the color and add shine.
Final Touches
After applying nail polish, check for any smudges or mistakes and use a cotton swab soaked in nail polish remover to clean them up. If you prefer, you can also use toe separators to prevent your freshly painted toes from smudging while they dry. Once your nails are completely dry, take a moment to admire your beautiful DIY pedicure.
Summary
With a little time and effort, plus size individuals can easily give themselves a professional-looking pedicure at home. By following this step-by-step guide, you can create a relaxing and rejuvenating experience while taking care of your feet. Remember to gather all the necessary supplies, prepare your feet, pamper them with moisture, apply nail polish with care, and finish off with final touches. Enjoy your DIY pedicure and show off your beautiful feet with confidence!
FAQs
1. How can I paint my toenails if I have difficulty reaching them due to being overweight?
If you have difficulty reaching your toenails, you can try using a long-handled toenail brush or a toe spacer. Additionally, you can ask for assistance from a friend or family member to help you paint your toenails.
2. What are some tips for painting toenails without smudging when you’re overweight?
To avoid smudging your toenail polish, you can try placing a towel or cloth under your feet to provide stability. It is also helpful to use a slow-drying or quick-drying nail polish formula to minimize the chances of smudging.
3. Is there a specific way to position yourself when painting your toenails if you are overweight?
You can sit on a chair or bed with your knees bent and your feet rested on another chair or stool. This position can help you comfortably reach and paint your toenails. Alternatively, you can elevate your legs using a cushion or pillow to make it easier to access your toenails.
Conclusion
In conclusion, painting your toenails should be a fun and enjoyable experience, regardless of your body size or shape. It is important to remember that self-care and self-expression should not be limited to any particular body type. Embrace your uniqueness and express yourself through the beautiful and vibrant colors of nail polish. Your self-confidence and happiness are not determined by your weight or size. Don’t let society’s beauty standards dictate how you feel about yourself. Paint your toenails with pride and confidence, knowing that you deserve to feel beautiful and confident in your own skin.
Remember, there are no rules or limitations when it comes to expressing yourself through nail art. Experiment with different colors, designs, and styles that make you feel fabulous. Whether you prefer bold and vibrant shades or soft and subtle hues, embrace your personal style and let your personality shine through your painted toenails. Treat yourself to a relaxing at-home pedicure or visit a nail salon for professional pampering. Pamper yourself and prioritize self-care, because you deserve it. So go ahead, paint your toenails, and embrace your beauty, no matter your size.
Painting your toenails is not about conforming to societal beauty standards, but rather a way to express yourself and boost your self-confidence. It’s a small act of self-care that can make a big difference in how you feel about yourself. Don’t let your weight