
Painting a stainless steel tumbler is a great way to personalize and add a touch of creativity to your drinkware. Whether you want to customize it with your favorite design or create a unique gift, the process can be simple and rewarding. But before you grab your paintbrush, it’s important to know the right steps to ensure a long-lasting finish. In this guide, we’ll walk you through the essential tips and techniques to successfully paint a stainless steel tumbler.
Firstly, start by thoroughly cleaning the tumbler to remove any dirt, oils or residue that could affect the adhesion of the paint. Use a mild soap or dish detergent and warm water to wash the tumbler. Rinse it well and dry it completely.
Next, prepare the surface of the tumbler by lightly sanding it with a fine-grit sandpaper. This step helps create a rough surface for the paint to adhere to. Be gentle and make sure to sand the entire surface evenly.
Once the tumbler is sanded, wipe it down with a lint-free cloth to remove any dust or debris. This will ensure a clean surface for the paint application.
Now comes the fun part – applying the paint! Choose a high-quality, acrylic-based paint that is suitable for metal surfaces. Apply thin, even coats of paint using a soft-bristle brush or a sponge brush. Allow each coat to

Preparing the Surface: Cleaning and Sanding
Before starting any painting project, it is important to properly prepare the surface. This ensures that the paint adheres well and results in a smooth and professional finish. One crucial step in surface preparation is cleaning and sanding.
Cleaning the Surface
The first step in preparing the surface is to clean it thoroughly. This involves removing any dirt, dust, grease, or other contaminants that may be present. To clean the surface, follow these steps:
- Start by removing any loose dirt or debris using a broom, brush, or vacuum cleaner.
- Next, use a mild detergent and water solution to scrub the surface, removing any stubborn stains or grime. Rinse the surface well with clean water to remove any soap residue.
- If there are any mold or mildew stains, use a mixture of bleach and water to kill and remove them. Be sure to follow the instructions on the bleach bottle and take necessary safety precautions.
- Allow the surface to dry completely before proceeding to the next step.
By cleaning the surface thoroughly, you ensure that the paint will adhere properly and result in a longer-lasting finish.
Sanding the Surface
Once the surface is clean and dry, the next step is to sand it. Sanding helps to smooth out any imperfections on the surface and creates a rough texture for the paint to adhere to. Follow these steps to sand the surface:
- Start by selecting the appropriate sandpaper grit. The level of roughness required depends on the condition of the surface and the type of paint you will be using. Coarser grits, such as 80 or 120, are suitable for rough surfaces or for removing old paint. Finer grits, such as 220 or 320, are used for smoothing out surfaces.
- Wrap the sandpaper around a sanding block or use a sanding sponge for ease of use and better control.
- Using light to moderate pressure, sand the surface in a circular or back-and-forth motion. Sand along the grain of the wood if you are working on a wooden surface.
- Continue sanding until the surface feels smooth to the touch and any imperfections have been leveled out. Be sure to sand evenly to avoid creating low or high spots.
- After sanding, remove any dust or debris using a clean, dry cloth or a vacuum cleaner.
Sanding the surface not only helps in creating a smooth and even surface for painting but also enhances the adhesion of the paint, resulting in a more professional-looking finish.
In summary, preparing the surface by cleaning and sanding is an essential step in any painting project. By thoroughly cleaning the surface and sanding away imperfections, you ensure that the paint adheres well and the final result is smooth and long-lasting. Take the time to properly prepare the surface, and you will be rewarded with a professional finish.
Applying Primer to Ensure Proper Adhesion
When it comes to painting or applying a new coat of paint, one crucial step that should not be skipped is applying primer. Primer acts as a preparatory layer that helps to ensure proper adhesion of paint to the surface, resulting in a long-lasting and smooth finish. In this section, we will explore the importance of applying primer and the steps involved in doing so.
Why is Primer Important?
Primer serves multiple purposes when it comes to painting. Its primary function is to create a bond between the surface and the paint. Here are some key reasons why primer is important:
- Promotes Adhesion: Primer creates a porous surface that allows the paint to adhere properly. Without primer, the paint may not stick well and can easily peel or chip off.
- Seals the Surface: Primer seals any porous areas, such as wood grains or drywall joints, preventing the paint from being absorbed unevenly. This helps to achieve a uniform appearance and color.
- Blocks Stains and Odors: Certain primers are designed to block stains and odors from seeping through the paint. This is particularly useful when covering surfaces with water or smoke damage.
- Enhances Durability: Applying primer enhances the durability of the paint job. It creates a strong foundation that helps the paint withstand wear and tear, ensuring a longer lifespan.
Steps for Applying Primer
Now that we understand the importance of primer, let’s go through the steps involved in applying it:
- Clean and Prepare the Surface: Before applying primer, it is essential to clean the surface thoroughly. Remove any dirt, dust, grease, or loose paint. Sand the surface if needed to create a smooth and even base.
- Choose the Right Primer: Select a primer that is suitable for the surface you are working on. There are different types of primers available, such as oil-based, water-based, or shellac-based. Consider the surface material and the type of paint you will be using.
- Apply the Primer: Using a brush, roller, or sprayer, apply the primer evenly on the surface. Make sure to follow the manufacturer’s instructions regarding drying time and number of coats required.
- Sand and Smooth: After the primer has dried completely, lightly sand the surface to remove any imperfections. This step helps to create a smooth surface for the paint to adhere to.
- Inspect for Coverage: Once the surface is sanded, inspect it for complete coverage. Check for any areas that may require additional primer. Touch up those areas as needed.
- Proceed with Painting: After the primer has been applied and dried, you can proceed with applying the paint of your choice. The primer will provide a strong foundation, allowing the paint to adhere properly and result in a flawless finish.
In summary, applying primer is a crucial step in the painting process. It promotes adhesion, seals the surface, blocks stains and odors, and enhances the durability of the paint job. By following the proper steps for applying primer, you can ensure a smooth and long-lasting finish that will enhance the appearance of your painted surface.
Painting Techniques: Brushing vs. Spraying
When it comes to painting, choosing the right technique can make a significant difference in the outcome of your project. Two popular options for applying paint are brushing and spraying. Each technique has its own advantages and disadvantages, and understanding them will help you make an informed decision for your painting needs.
Brushing
Brushing is the traditional and most commonly used painting technique. This method involves using a paintbrush to apply paint onto the surface you want to paint. Brushing offers several benefits:
- Precision: Brushing allows for precise control, especially when working on intricate details or small areas. It is ideal for projects that require accuracy and attention to detail.
- Even coverage: When done correctly, brushing can result in a smooth and even finish. By using the proper brush strokes, you can achieve a professional-looking paint job.
- Minimal waste: Brushing paint directly onto the surface minimizes the risk of overspray and reduces paint wastage.
- Easy cleanup: Brushes can be easily cleaned with soap and water, making it a convenient option for both professionals and DIY enthusiasts.
However, brushing does have some drawbacks:
- Time-consuming: Brushing takes longer compared to spraying, especially when working on larger areas. It requires patience and precision.
- Visible brush marks: If not executed properly, brushing can leave visible brush marks on the surface. This may require additional sanding or touch-ups to achieve a seamless finish.
Spraying
Spraying involves using a spray gun or aerosol can to apply paint in a fine mist onto the surface. This technique offers its own set of advantages:
- Speed: Spraying is much faster than brushing, making it ideal for large-scale projects or covering extensive areas.
- Smooth finish: When done correctly, spraying can result in a flawless, streak-free finish. It can achieve a level of smoothness that is difficult to replicate with a brush.
- No brush marks: Unlike brushing, spraying eliminates the risk of visible brush marks, resulting in a more uniform and professional-looking paint job.
However, spraying has some disadvantages to consider:
- Overspray: Spraying can create overspray, which may require careful masking and protection of surrounding areas to prevent paint from reaching unwanted surfaces.
- Waste and cleanup: Spraying can result in more paint wastage compared to brushing, and cleaning the spray equipment can be more time-consuming.
- Experience required: Achieving optimal results with spraying requires practice and experience. It may take time to master the technique and avoid issues such as uneven coverage or runs in the paint.
Choosing the Right Technique
When deciding between brushing and spraying, consider the specific requirements of your project. Here are some factors to consider:
- Surface type: Certain surfaces, such as textured walls or intricate woodwork, may be better suited for brushing to ensure proper coverage and detailing.
- Project size: For larger areas or extensive projects, spraying may be more efficient and time-saving.
- Finish type: The desired finish also plays a role. Brushing can achieve a brushed or textured look, while spraying provides a smoother, more even finish.
- Experience and skill level: Your level of experience and comfort with each technique should also be considered. If you have more experience with one method, it may be the better choice for your project.
In summary, both brushing and spraying have their pros and cons. Brushing offers precision and control, while spraying provides speed and a smooth finish. Consider your project’s requirements, surface type, and your own experience to determine the best technique for your painting needs.
Adding Designs and Personalization to Your Tumbler
Are you tired of using plain, boring tumblers? Do you want to add your personal touch and make your tumbler stand out from the crowd? Look no further! In this section, we will guide you through the process of adding designs and personalization to your tumbler, so you can showcase your style and creativity.
Gather Your Supplies
Before you begin, make sure you have all the necessary supplies. Here is a list of items you will need:
- A plain tumbler
- Design materials (such as vinyl, decals, or paint)
- Scissors
- Transfer tape
- A cutting machine (optional)
- A design template (if using a cutting machine)
- Clear sealant (optional)
Choose Your Design
The first step in adding personalization to your tumbler is to choose a design. You can either create your own design or find pre-made designs online. There are plenty of websites and marketplaces that offer a wide range of designs for tumblers. You can also get inspiration from social media platforms like Pinterest or Instagram.
Prepare Your Tumbler
Before applying any design, it’s important to properly prepare your tumbler. Clean the tumbler thoroughly using soap and water, and make sure it is completely dry before moving on to the next step. This will ensure that the design adheres well to the surface of the tumbler.
Apply the Design
If you are using vinyl or decals, you will need to cut out your design using scissors or a cutting machine. If using a cutting machine, make sure to use a design template that matches the dimensions of your tumbler. Once you have your design cut out, carefully peel off the backing paper and place it onto the tumbler. Use a squeegee or credit card to smooth out any air bubbles and ensure that the design is firmly adhered to the tumbler.
If you prefer to paint your own design, use acrylic paint and small brushes to create your desired design directly on the tumbler. You can use stencils or freehand techniques to achieve the desired look. Allow the paint to dry completely before handling or applying any sealant.
Seal and Protect Your Design
For added durability and longevity of your design, it is recommended to apply a clear sealant. This will protect the design from scratches, fading, and peeling. Make sure to choose a sealant that is specifically formulated for use on tumblers. Apply a thin, even coat of sealant over the entire design and let it dry according to the manufacturer’s instructions.
Show Off Your Personalized Tumbler
Once your design is applied and sealed, your personalized tumbler is ready to be used and shown off to the world. Whether you’re sipping your favorite beverage or gifting it to a loved one, your custom tumbler is sure to make a statement.
In summary, adding designs and personalization to your tumbler is a fun and creative way to express your individuality. With the right supplies and a little bit of creativity, you can transform a plain tumbler into a unique and eye-catching accessory. So go ahead, unleash your creativity, and make your tumbler truly one-of-a-kind!
FAQs about Painting Stainless Steel Tumblers
1. What is the best way to prepare a stainless steel tumbler for painting?
To prepare a stainless steel tumbler for painting, clean it thoroughly with soap and water to remove any dirt or oil. Next, lightly sand the surface with fine-grit sandpaper to create a rough texture that will help the paint adhere better. Finally, wipe off any dust or debris before applying the paint.
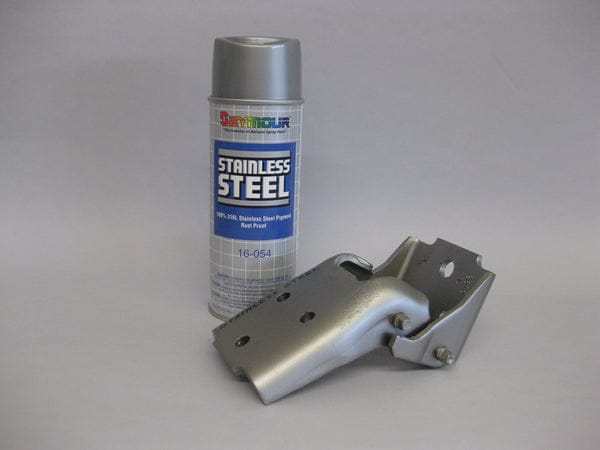
2. What type of paint is suitable for painting stainless steel tumblers?
When painting stainless steel tumblers, it is best to use an enamel or acrylic paint. These types of paint adhere well to metal surfaces and provide a durable finish. Additionally, make sure to choose a paint that is specifically designed for outdoor use if you want your tumbler to be weather-resistant.
3. How should I apply the paint to the stainless steel tumbler?
For the best results, you can use a spray paint specifically formulated for metal surfaces. Start by applying a thin and even coat of paint, holding the can about 6-8 inches away from the tumbler. Allow the first coat to dry completely before applying additional coats if needed. Follow the instructions on the paint can for the recommended drying time between coats.
Conclusion
In conclusion, painting a stainless steel tumbler can be a fun and creative way to personalize your drinkware. By following the proper steps, you can achieve a beautiful and durable finish that will make your tumbler stand out. Remember to clean and prepare the surface thoroughly, use high-quality paint and primer specifically designed for metal, and apply thin and even coats. Additionally, be patient and allow sufficient drying time between layers to avoid smudging or peeling. Whether you want to add vibrant colors, intricate designs, or simple patterns, painting a stainless steel tumbler is a great way to showcase your artistic skills and enjoy a unique drinking experience.