
Looking to add a touch of creativity to your garden while conserving water? Painting a rain barrel is the perfect way to do just that. By transforming a plain barrel into a vibrant piece of art, you can enhance the visual appeal of your outdoor space while also promoting sustainability.
Painting a rain barrel is a fun and easy DIY project that anyone can tackle. Not only does it allow you to express your artistic side, but it also helps to protect the barrel from weathering and adds an extra layer of durability.
Before starting the painting process, make sure to clean the barrel thoroughly to remove any dirt or debris. Once the barrel is clean and dry, choose a high-quality outdoor paint that is specifically designed for use on plastic surfaces.
When selecting a design for your rain barrel, consider incorporating elements that reflect your personal style or complement the surroundings of your garden. Whether you prefer a bold and colorful pattern or a more subtle and nature-inspired motif, the possibilities are endless.
Remember to plan your design in advance and sketch it out on the barrel using a pencil. This will help you visualize the final result and ensure that you achieve the desired look. Once you are satisfied with the design, start painting using thin coats to prevent drips and allow for better adhesion.
After applying the final coat of paint, allow the barrel to dry completely before installing it in your garden. This will ensure that
2. Preparing the Surface of the Rain Barrel
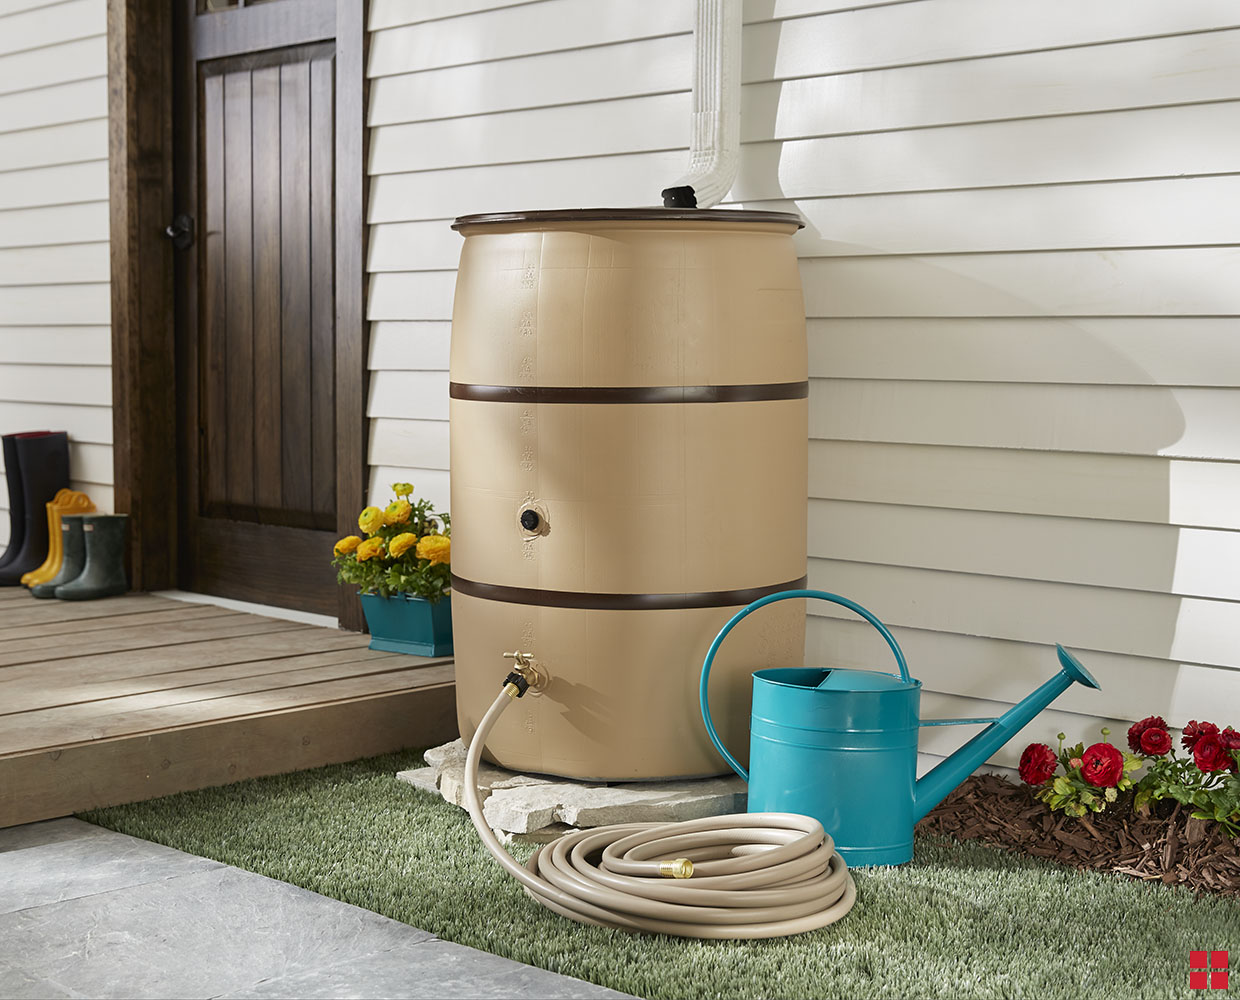
Before installing a rain barrel, it’s important to properly prepare the surface where it will be placed. This will ensure that the barrel remains stable and prevents any damage to the barrel or surrounding area. Here are some steps to follow when preparing the surface for your rain barrel:
- Choose a suitable location: Select a level area near a downspout where the rain barrel can collect water effectively. Ensure that the location provides easy access for maintenance and use.
- Clean the area: Clear away any debris, vegetation, or obstructions from the chosen location. This will prevent any interference with the rain barrel and minimize the risk of contamination.
- Level the ground: Use a shovel or garden rake to level the ground in the chosen area. This will help ensure that the rain barrel sits evenly and prevents any wobbling or tipping.
- Add a solid base: To provide extra stability, consider placing a solid base underneath the rain barrel. This can be a concrete paver, wooden pallet, or sturdy platform. The base should be larger than the footprint of the rain barrel to distribute the weight evenly.
- Secure the base: If using a base, secure it to the ground using stakes or screws to prevent it from shifting or moving. This will further enhance the stability of the rain barrel.
- Check for leakage: Inspect the surface where the rain barrel will be placed for any signs of leakage, such as cracks or holes. Repair any existing damage to ensure a watertight seal and prevent water from seeping into the ground.
- Consider a rain barrel stand: If you prefer to elevate your rain barrel, consider purchasing or building a stand. This will not only raise the barrel to a more convenient height for accessing the spigot but also create additional space for filling watering cans or attaching a hose.
By following these steps, you can effectively prepare the surface for your rain barrel, ensuring its stability, functionality, and longevity. Taking the time to properly prepare the surface will result in a more efficient rainwater harvesting system and a healthier environment.

Selecting the Best Paint for Your Rain Barrel
When it comes to rain barrels, not only do they serve as functional tools for collecting and storing rainwater, but they can also be an aesthetically pleasing addition to your garden or outdoor space. One way to enhance the visual appeal of your rain barrel is by giving it a fresh coat of paint. However, selecting the best paint for your rain barrel requires some consideration to ensure its longevity and durability. In this section, we will discuss the factors to consider when choosing the right paint for your rain barrel.
1. Water Resistance
Since rain barrels are exposed to the elements and constantly in contact with water, it is essential to select a paint that is water-resistant. Look for paints that are specifically formulated for outdoor use and have waterproof properties. These paints are designed to withstand moisture and prevent water damage, ensuring that your rain barrel’s paint job remains intact even during heavy rains.
2. Non-Toxic Formulation
Another crucial factor to consider when choosing paint for your rain barrel is its toxicity level. Rainwater collected in the rain barrel is often used for watering plants and gardens, so it is important to use a paint that is non-toxic and safe for the environment. Look for paints labeled as non-toxic or eco-friendly, as these options are made from natural, low VOC (volatile organic compound) ingredients that won’t contaminate the rainwater or harm the surrounding vegetation.
3. UV Protection
Exposure to sunlight can cause paint to fade and deteriorate over time. To ensure that your rain barrel’s paint job remains vibrant and intact, choose a paint that offers UV protection. UV-resistant paints are formulated to withstand the damaging effects of sunlight, including fading and cracking. This will help maintain the appearance of your rain barrel and extend its lifespan.
4. Adhesion and Durability
Since rain barrels are often made of plastic or metal, it is crucial to choose a paint that adheres well to these surfaces and provides long-lasting durability. Look for paints that are specifically designed for plastic or metal substrates, as they have better adhesion properties. Additionally, opt for paints that are scratch-resistant and can withstand the rigors of outdoor use.
5. Color Selection
When it comes to selecting the color for your rain barrel, the sky’s the limit. Choose a color that complements your outdoor space or matches your personal preference. Keep in mind that darker colors may absorb more heat from the sun, which can cause the water inside the rain barrel to warm up. If you live in a hot climate, consider opting for lighter colors that reflect heat to prevent excessive heating of the collected rainwater.
6. Application and Maintenance
Consider the ease of application and maintenance when selecting the best paint for your rain barrel. Look for paints that offer smooth and even coverage, making the painting process hassle-free. Additionally, choose paints that are easy to clean and maintain, allowing you to easily touch up any areas that may become chipped or scratched over time.
When it comes to selecting the best paint for your rain barrel, prioritize water resistance, non-toxic formulation, UV protection, adhesion, durability, color selection, and ease of application and maintenance. By considering these factors, you can ensure that your rain barrel remains not only functional but also visually appealing for years to come.
Applying Primer and Base Coat to the Rain Barrel
Once you have prepared your rain barrel by cleaning and sanding it, the next step is to apply a primer and base coat to ensure the paint adheres properly and provides long-lasting protection. This process will help to prevent rusting and extend the lifespan of your rain barrel. In this section, we will discuss the steps involved in applying primer and base coat to the rain barrel.
Materials Needed:
- Primer paint
- Base coat paint
- Paintbrush or roller
- Drop cloth or newspapers
- Painter’s tape (optional)
- Paint tray or container
- Paint thinner (for cleanup)
Step 1: Choose the Primer and Base Coat
When selecting the primer and base coat for your rain barrel, it is important to choose a paint that is specifically designed for outdoor use and can withstand the elements. Look for a primer that is suitable for metal surfaces and a base coat paint that offers protection against UV rays and water damage.
Step 2: Prepare the Work Area
Before you begin painting, prepare the work area by laying down a drop cloth or newspapers to protect the surrounding surfaces from any accidental paint spills or splatters. If desired, you can also use painter’s tape to mask off any areas that you do not want to paint.
Step 3: Apply the Primer
Start by applying a coat of primer to the entire surface of the rain barrel. Use a paintbrush or roller to evenly distribute the primer, ensuring that every area is covered. Follow the manufacturer’s instructions regarding drying time between coats, if multiple coats are necessary.
Step 4: Apply the Base Coat
Once the primer is dry, it’s time to apply the base coat. Using the same technique as before, apply an even coat of base coat paint to the rain barrel. Make sure to cover all areas and allow the paint to dry according to the manufacturer’s instructions.
Step 5: Apply Additional Coats (if necessary)
Depending on the desired level of coverage and the type of paint used, you may need to apply additional coats of the base coat to achieve the desired finish. Allow each coat to dry completely before applying the next one.
Step 6: Clean Up
Once you have finished applying the primer and base coat, clean up any spills or drips and properly dispose of any unused paint or materials. Clean your brushes or rollers using paint thinner according to the manufacturer’s instructions.
In summary, applying a primer and base coat to your rain barrel is an essential step in the painting process. It helps to protect the barrel from rusting and ensures that the paint adheres properly. By following these steps and using the appropriate materials, you can give your rain barrel a fresh and durable finish that will withstand the elements for years to come.
Adding Finishing Touches and Sealant to the Painted Rain Barrel
After successfully painting your rain barrel, it’s time to add some finishing touches and apply a sealant to protect your artwork and ensure its longevity. This step is essential in preserving the beauty of your painted rain barrel and preventing any damage caused by weather or other external factors. In this section, we will discuss the necessary steps to add finishing touches and apply a sealant to your painted rain barrel.
Materials You Will Need
- Paintbrush
- Clear acrylic sealant
- Drop cloth or newspaper
- Optional: Stencils, stickers, or additional decorative elements
Step 1: Choose the Right Sealant
Before applying any sealant, it’s crucial to choose the right one for your painted rain barrel. Look for a clear acrylic sealant that is specifically designed for outdoor use. This type of sealant provides excellent protection against UV rays, moisture, and other elements that could potentially damage your paint job.
Step 2: Prepare the Work Area
Start by placing a drop cloth or newspaper underneath your rain barrel to protect the surrounding area from any potential spills or drips. This will make the cleanup process much easier and prevent any damage to your outdoor space.
Step 3: Apply the Sealant
Using a clean paintbrush, apply a thin and even coat of clear acrylic sealant to the entire surface of your painted rain barrel. Make sure to cover all areas, including the top, sides, and bottom. Pay extra attention to any intricate details or designs to ensure they are adequately sealed.
Allow the first coat of sealant to dry completely, following the manufacturer’s recommended drying time. Once dry, apply a second coat for added protection and durability.
Step 4: Optional Decorative Elements
If you want to add some additional decorative elements to your painted rain barrel, now is the time to do so. You can use stencils, stickers, or other creative embellishments to enhance the overall design. Make sure to apply these elements after the sealant has completely dried to avoid any smudging or damage.
Step 5: Let it Cure
After completing all the necessary steps, allow your painted rain barrel to cure for the recommended period. This will ensure that the sealant has bonded properly and provide maximum protection against the elements. Refer to the sealant manufacturer’s instructions for the specific curing time.
Summary
Adding finishing touches and applying a sealant to your painted rain barrel is a vital step in preserving its beauty and protecting it from external factors. By following the steps outlined in this section, you can ensure that your artwork remains vibrant and intact for years to come. Remember to choose the right sealant, prepare the work area, apply thin and even coats, and let your painted rain barrel cure properly. With these final touches, your painted rain barrel will be ready to enhance your outdoor space while efficiently collecting rainwater.
FAQs
1. How do I paint a rain barrel?
To paint a rain barrel, start by cleaning the barrel with soap and water. Then, sand the surface lightly to create a better adhesion for paint. Apply a coat of primer specifically designed for plastic surfaces. Once the primer is dry, apply several thin coats of outdoor paint, allowing each coat to dry before applying the next. Finally, seal the painted surface with a clear, weatherproof sealant.
2. What type of paint should I use for a rain barrel?
For painting a rain barrel, it’s recommended to use outdoor paint that is suitable for plastic surfaces. Look for paint that is designed to withstand exposure to moisture, sunlight, and outdoor conditions.
3. Can I paint decorative designs on my rain barrel?
Yes, you can paint decorative designs on your rain barrel. Use stencils, tape, or freehand painting techniques to create your desired design. Just make sure to use outdoor paint and sealant to protect the artwork from weathering.
Conclusion
In conclusion, painting a rain barrel is a simple and creative way to enhance the aesthetic appeal of your garden while promoting sustainability. By following the step-by-step process, you can transform a plain rain barrel into a personalized work of art that adds beauty to your outdoor space.
Remember to choose non-toxic paint that is safe for the environment and to properly prepare the surface before painting. With a little time and effort, you can enjoy a visually appealing rain barrel that seamlessly blends into your garden, conserves water, and contributes to a greener world.
So, why wait? Get your paintbrush and unleash your creativity to turn your rain barrel into a stunning centerpiece that not only helps in water conservation but also adds a touch of beauty to your surroundings.