
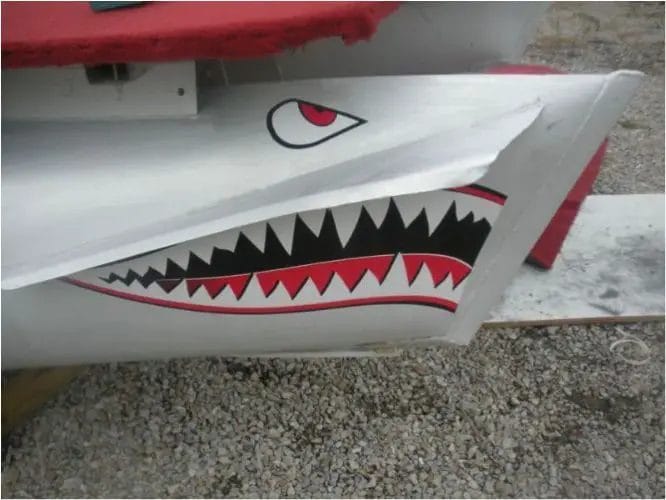
Looking to give your pontoon boat a fresh new look? Painting your pontoon boat can be a fun and rewarding DIY project that will not only enhance its appearance but also protect it from the elements. With the right tools and techniques, you can achieve professional-looking results without breaking the bank.
Before you begin, it’s important to properly prepare the surface of your pontoon boat. This involves cleaning and sanding the boat to create a smooth and even surface for the paint to adhere to. Once the surface is prepped, you can start applying a high-quality marine-grade paint that is specifically designed for boats.
When choosing the paint, consider factors such as durability, UV resistance, and color options. It’s also essential to select the appropriate primer for your boat’s material, whether it’s aluminum, fiberglass, or steel. Applying multiple coats of paint will ensure a long-lasting and vibrant finish.
Make sure to follow the manufacturer’s instructions regarding drying time and application techniques. Use a brush, roller, or spray gun to apply the paint evenly, and take your time to avoid drips and uneven coverage.
Remember to protect yourself and the surrounding area by wearing appropriate safety gear and using drop cloths or tarps. It’s also a good idea to work in a well-ventilated area to minimize fumes.
By following these steps and investing some time and effort, you can transform the
Preparing the Surface for Painting
Before starting any painting project, it is important to properly prepare the surface to ensure a smooth and long-lasting finish. Proper preparation helps the paint adhere better, prevents peeling or cracking, and ensures a professional-looking result. In this section, we will discuss the steps involved in preparing the surface for painting.
Clean the Surface
The first step in preparing the surface for painting is to clean it thoroughly. Remove any dirt, grease, or grime using a mild detergent and a scrub brush. For exterior surfaces, a pressure washer can be used to remove stubborn stains. Make sure to rinse the surface thoroughly and allow it to dry completely before proceeding.
Repair Imperfections
Inspect the surface for any imperfections such as cracks, holes, or dents. Use a putty knife to fill in any cracks or holes with a suitable filler or spackling compound. Smooth out the surface and allow it to dry according to the manufacturer’s instructions. Once dry, sand the repaired areas to ensure a smooth finish.
Sand the Surface
To create a smooth and even surface for painting, it is important to sand the entire surface. Use a fine-grit sandpaper or sanding block to lightly sand the surface, removing any rough spots or blemishes. Sanding also helps to remove any glossy or shiny surfaces, allowing the paint to adhere better.
Remove Loose Paint
If there are any areas where the paint is peeling or flaking, it is important to remove the loose paint before painting. Use a scraper or wire brush to gently scrape away the loose paint. Make sure to wear protective goggles and a mask to prevent inhaling any paint particles.
Prime the Surface
Priming the surface is an important step in preparing for painting, especially when painting over bare wood or porous surfaces. Apply a coat of primer to the surface using a brush or roller, following the manufacturer’s instructions. Primer helps the paint adhere better, provides a uniform surface for painting, and helps to block any stains or discoloration.
Protect Surrounding Areas
Before starting to paint, it is important to protect the surrounding areas from paint splatters or spills. Cover any furniture, floors, or fixtures with drop cloths or plastic sheets. Use painter’s tape to tape off areas that should not be painted, such as trim or windows.
Clean Up
After completing the surface preparation, make sure to clean up any tools or materials used. Dispose of any leftover paint or chemicals according to local regulations. Properly store any reusable tools and equipment for future use.
In summary, preparing the surface for painting is a crucial step in achieving a professional and long-lasting finish. By cleaning, repairing imperfections, sanding, removing loose paint, priming, and protecting surrounding areas, you can ensure a smooth and successful painting project. Take the time to properly prepare the surface, and you will be rewarded with a beautiful and durable paint job.
Step-by-Step Guide to Painting a Pontoon Boat
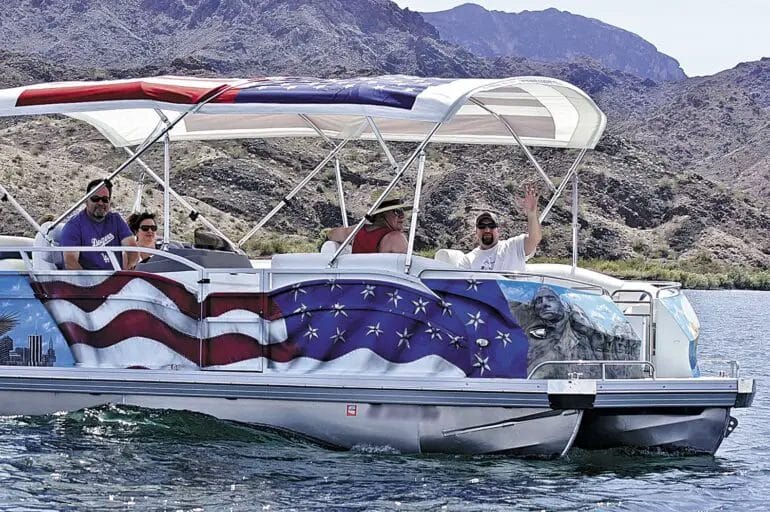
If you own a pontoon boat and want to give it a fresh new look, painting is a great way to do so. Whether you want to restore the boat’s original color or choose a completely new one, painting can transform the appearance of your pontoon boat. In this step-by-step guide, we will walk you through the process of painting a pontoon boat, from preparation to final touches.
Materials Needed
- Marine-grade paint
- Marine-grade primer
- Sandpaper (grit size will depend on the condition of the boat’s surface)
- Tape and plastic sheets
- Quality paintbrushes and rollers
- Masking tape
- Painter’s tape
- Drop cloth
- Boat cleaner
- Water hose or pressure washer
- Wax and grease remover
Step 1: Preparation
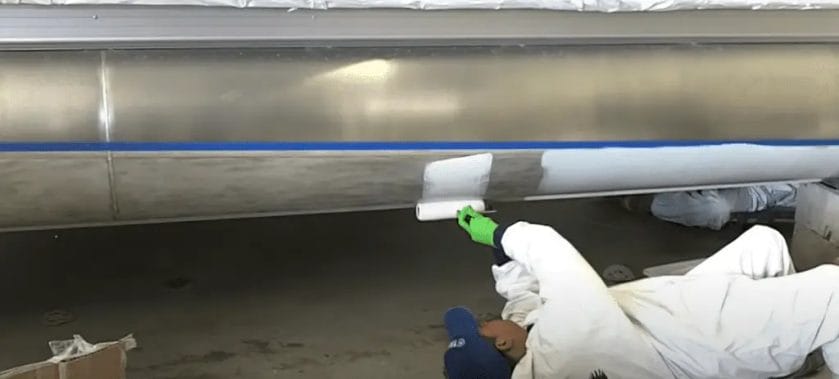
The first step in painting a pontoon boat is proper preparation. Start by cleaning the boat thoroughly using a boat cleaner, water hose, or pressure washer. Remove any dirt, grime, or loose paint from the surface. Once the boat is clean, allow it to dry completely.
Next, use sandpaper to lightly sand the entire surface of the pontoon boat. This will help the paint adhere better and provide a smoother finish. Be sure to remove any rough areas or peeling paint during this process. After sanding, wipe down the boat with a wax and grease remover to eliminate any residue.
Step 2: Masking and Protection
To protect areas of the boat that you don’t want to paint, use masking tape and plastic sheets. Cover windows, edges, and any other parts that should remain unpainted. Use painter’s tape to create clean and precise lines.
Place a drop cloth or tarp underneath the boat to catch any drips or spills and protect the ground from paint splatters.
Step 3: Applying Primer
Priming the surface is an important step to ensure proper adhesion of the paint and increase its longevity. Apply a marine-grade primer on the entire surface of the boat using a paintbrush or roller. Follow the manufacturer’s instructions for the recommended drying time.
Step 4: Painting
Once the primer is dry, it’s time to start painting your pontoon boat. Pour the marine-grade paint into a paint tray and use a paintbrush or roller to apply an even coat. Start from the top and work your way down, making sure to cover every area thoroughly.
Depending on the desired color and finish, multiple coats may be necessary. Allow each coat to dry according to the manufacturer’s instructions before applying the next one. This will ensure a smooth and uniform appearance.
Step 5: Finishing Touches
After the final coat of paint is dry, carefully remove the masking tape and plastic sheets. Inspect the boat for any areas that need touch-ups. Use a small paintbrush to fix any imperfections or uneven spots.
Once you are satisfied with the paint job, consider applying a marine-grade wax or clear coat to protect the paint and give it a glossy finish. This step will help preserve the new paint and enhance the overall appearance of your pontoon boat.
Summary
Painting a pontoon boat can be a rewarding project that gives your boat a fresh and appealing look. By following this step-by-step guide, you can achieve professional-looking results. Remember to properly prepare the surface, apply primer, and use high-quality marine-grade paint for long-lasting and durable results. With a little time and effort, your pontoon boat will be transformed and ready for many more years of enjoyment on the water.
Tips and Techniques for Achieving a Professional Finish
When it comes to completing a project, whether it’s painting a room, refinishing furniture, or even crafting, achieving a professional finish is essential. A professional finish not only enhances the overall appearance of the project but also adds a touch of expertise and finesse. If you’re looking to elevate your craftsmanship and achieve a professional finish, here are some tips and techniques to consider:
1. Preparing the Surface
Before you begin any project, proper surface preparation is key. This involves cleaning the surface thoroughly, removing any dirt, dust, or grease. If you’re working with wood, sanding the surface to a smooth finish can help ensure better paint adhesion or stain absorption. In the case of walls or ceilings, patching any holes or cracks and applying a primer can help create a smooth and even surface.
2. Choosing the Right Tools and Materials
The tools and materials you use can greatly impact the quality of your finish. Investing in high-quality brushes, rollers, and applicators can make a noticeable difference in achieving a professional look. Additionally, using the right type of paint, stain, or varnish for your project can help you achieve the desired finish. Consult with professionals or research product recommendations to ensure you’re using the best tools and materials for your specific project.
3. Proper Technique
Mastering proper technique is crucial for achieving a professional finish. Here are a few techniques to keep in mind:
- Painting: When painting, use long, smooth strokes and maintain a wet edge to prevent visible brush or roller marks. Start from the top and work your way down, allowing each layer to dry before applying additional coats.
- Staining: Apply stain in the direction of the wood grain and wipe away any excess to avoid uneven color or blotches.
- Varnishing: Apply varnish in thin, even coats using a brush or sprayer. Sand between coats for a smooth finish.
4. Pay Attention to Detail
Professional finishes often involve meticulous attention to detail. Take the time to mask off areas that should not be painted or stained, such as trim, windows, or hardware. Use precision tools, like a small brush or sponge, for intricate areas or fine details. Clean up any drips or smudges immediately for a pristine finish.
5. Practice Makes Perfect
As with any skill, practice is key to achieving a professional finish. Start with smaller projects to hone your technique before tackling larger or more visible surfaces. Experiment with different tools, materials, and techniques to find what works best for you.
6. Follow Instructions and Safety Guidelines
Lastly, always read and follow the instructions provided by manufacturers for the tools, materials, and products you’re using. Additionally, follow proper safety guidelines such as wearing protective gear, working in a well-ventilated area, and disposing of any hazardous waste appropriately.
In summary, achieving a professional finish requires proper surface preparation, the right tools and materials, mastering proper techniques, paying attention to detail, practicing, and following instructions and safety guidelines. By incorporating these tips and techniques into your projects, you’ll be well on your way to creating stunning, professional-quality results.
Maintenance and Care for your Newly Painted Pontoon Boat
After spending time and effort to paint your pontoon boat, it’s important to take proper care of the new paint job to ensure its longevity and appearance. With the right maintenance routine, you can keep your boat looking fresh and vibrant for years to come. In this section, we will discuss some essential tips for maintaining and caring for your newly painted pontoon boat.
1. Regular Cleaning
Regular cleaning is crucial for preserving the paint on your pontoon boat. Saltwater, dirt, and grime can accumulate on the surface, causing the paint to fade or peel over time. It’s recommended to wash your boat thoroughly after each use, especially if you’ve been in saltwater. Use a mild detergent and a soft sponge or cloth to gently clean the painted surfaces, removing any debris or stains.
2. Avoid Harsh Cleaning Agents
While cleaning your pontoon boat, it’s essential to avoid using harsh cleaning agents or abrasive cleaning tools that can damage the paint. These include harsh solvents, bleach, or abrasive scrub brushes. Stick to mild soaps or specialized boat cleaning products that are safe for painted surfaces.
3. Waxing and Polishing
Waxing and polishing your newly painted pontoon boat can provide an additional layer of protection and enhance its appearance. Apply a high-quality boat wax or polish specifically designed for painted surfaces. This will help seal the paint, protect it from UV rays, and prevent oxidation. Regular waxing can also make cleaning easier by repelling dirt and grime.
4. Inspect and Touch Up
Regularly inspect your pontoon boat for any signs of damage, such as scratches, chips, or peeling paint. Promptly address any issues by touching up the affected areas. Use paint that matches the original color, and follow the manufacturer’s instructions for application. Taking care of minor touch-ups can prevent further damage and maintain the integrity of the paint job.
5. Store Properly
Proper storage is essential for preserving the paint on your pontoon boat. When not in use, store your boat in a covered area, such as a garage or boat shed, to protect it from harsh weather conditions and prolonged exposure to sunlight. If storing outdoors, consider using a boat cover or tarp to shield the painted surfaces from UV rays and debris.
6. Regular Maintenance
In addition to cleaning and inspection, regular maintenance is crucial for the overall well-being of your pontoon boat. This includes checking the boat’s mechanical components, electrical systems, and structural integrity. By keeping all aspects of your boat in good working condition, you can prevent any issues that may indirectly affect the paint job.
7. Professional Help
If you’re unsure about the best maintenance practices or need assistance with specific repairs, don’t hesitate to seek professional help. Boat experts and technicians can provide guidance, advice, and services to ensure your pontoon boat remains in top-notch condition. They can also offer recommendations on the best products and techniques for maintaining and caring for your boat’s paint.
In summary, proper maintenance and care are essential for preserving the paint on your newly painted pontoon boat. Regular cleaning, avoiding harsh cleaning agents, waxing and polishing, inspecting and touch-ups, proper storage, regular maintenance, and seeking professional help when needed are all important aspects of maintaining your boat’s paint job. By following these tips, you can enjoy a beautiful and long-lasting paint finish on your pontoon boat.
FAQs
1. How can I paint a pontoon boat?
To paint a pontoon boat, start by cleaning and sanding the surface to remove any dirt or old paint. Apply a primer specifically designed for marine use, and allow it to dry completely. Then, apply several coats of marine-grade paint, following the manufacturer’s instructions. Remember to allow each coat to dry before applying the next one for best results.
2. What type of paint should I use for a pontoon boat?
It is recommended to use marine-grade paint for painting a pontoon boat. Marine paints are designed to withstand the harsh conditions of being constantly exposed to water, sunlight, and other elements. They provide better durability, UV resistance, and protection against corrosion.
3. Can I paint a pontoon boat myself or should I hire a professional?
Painting a pontoon boat can be done as a DIY project if you have the necessary skills and tools. However, it is important to ensure proper preparation, application, and use of marine-grade products for long-lasting results. If you are unsure or lack experience, it may be advisable to hire a professional to ensure a high-quality and professional finish.
Conclusion:
In conclusion, painting a pontoon boat is a fantastic way to give it a fresh and rejuvenated look while protecting it from the elements. By following the right steps and using high-quality paint and materials, you can achieve professional-grade results. Remember to thoroughly prepare the boat’s surface, including cleaning and sanding, before applying the paint. Additionally, make sure to select a marine-grade paint that is specifically designed for the unique challenges of being on the water. Take your time, follow the instructions carefully, and enjoy the process of transforming your pontoon boat into a work of art that will turn heads on the water.