
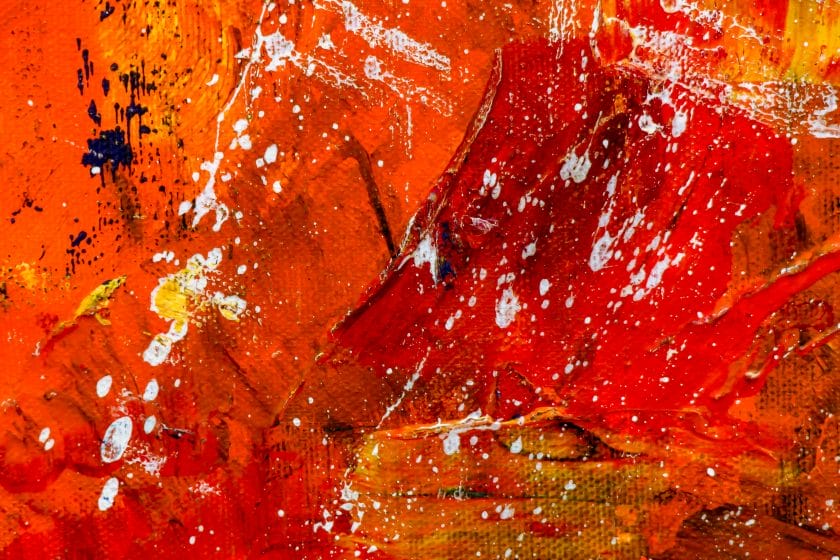
If you’re looking to create a realistic blood splatter effect with acrylic paint, you’ve come to the right place. With a few simple techniques and a little creativity, you can achieve a convincing and striking blood splatter effect for your artistic projects. Whether it’s for a Halloween costume, a horror-themed painting, or a theatrical prop, mastering the art of blood splattering can add a dramatic and impactful touch.
First, start by selecting the right shade of red acrylic paint. Opt for a deep, rich red color that closely resembles real blood. A mixture of crimson, cadmium red, and a touch of black can help achieve a more authentic look. Experiment with the ratios until you find the perfect shade.
Next, gather your materials. You will need a paintbrush or a toothbrush, a piece of cardboard or a palette, and some water to dilute the paint. It’s also a good idea to cover your work area with newspaper or a drop cloth to protect it from any accidental splatters.
To create the blood splatter effect, dip your paintbrush or toothbrush into the diluted red paint. Hold the brush about an inch or two above your canvas or surface, and use your finger or a tool to flick the bristles, causing the paint to splatter onto the desired area. Experiment with different flicking techniques and brush sizes to vary the size and shape of the splatters.
For a
Tips and Techniques for Achieving Realistic Blood Splatter Using Acrylic Paint
Creating a realistic blood splatter effect can add a touch of horror and suspense to your artwork or special effects makeup. Whether you are working on a Halloween costume, a theater production prop, or a gruesome painting, mastering the art of blood splatter can take your work to the next level. In this section, we will explore some tips and techniques for achieving a realistic blood splatter using acrylic paint.
1. Choose the Right Materials
Before you start splattering paint, it’s important to gather the right materials. Acrylic paint is a popular choice for blood effects due to its fast-drying and vibrant properties. Here are the essential materials you will need:
- Acrylic paint in red, brown, and black
- A paintbrush with stiff bristles
- A mixing palette or disposable plate
- Protective clothing or apron
- Drop cloth or newspaper to protect your work surface
2. Prepare Your Work Area
Blood splatter can get messy, so it’s important to prepare your work area before you begin. Cover your surface with a drop cloth or layers of newspaper to catch any stray paint. Make sure you are working in a well-ventilated area or consider using a mask if you are sensitive to fumes.
3. Mix Your Colors
Creating realistic blood splatter involves mixing the right shades of red, brown, and black to achieve depth and texture. Start by squeezing a small amount of red paint onto your mixing palette or disposable plate. Gradually add small amounts of brown and black to create darker tones. Experiment with different ratios to achieve the desired effect.
4. Splatter Techniques
There are several techniques you can use to achieve different blood splatter effects. Here are a few to try:
- Flicking: Dip the bristles of your paintbrush into the mixed paint and hold the brush horizontally above your artwork. Use your thumb to flick the bristles, causing the paint to splatter onto the surface. Vary the distance and angle to create different sizes and directions of splatter.
- Dripping: Load your paintbrush with a generous amount of mixed paint and hold it vertically above your artwork. Tap the brush handle gently to create drips and allow the paint to fall naturally onto the surface.
- Blowing: Dip your paintbrush into the mixed paint and hold it close to the surface. Blow air through the bristles to create a spray effect. This technique can be used to simulate arterial spatters.
5. Layering and Detailing
To add depth and realism to your blood splatter, consider layering different splatter techniques and colors. Start with larger splatters using the flicking or dripping techniques, then add smaller, more concentrated splatters on top. Use a fine brush to add details like fine mist or droplets.
6. Practice and Experiment
Creating realistic blood splatter takes practice and experimentation. Don’t be afraid to try different techniques, color combinations, and application methods. The more you practice, the more control you will have over the final result. Remember to study reference photos or real-life blood splatter patterns for inspiration and accuracy.
In summary, achieving a realistic blood splatter effect using acrylic paint requires the right materials, proper preparation, color mixing, and various splatter techniques. With practice and experimentation, you can create gruesome and convincing blood splatter effects that will elevate your artwork or special effects makeup to a whole new level of horror.

Step-by-step guide to making blood splatter effects with acrylic paint
If you’re a fan of horror movies or looking to add a touch of realism to your artwork, creating blood splatter effects with acrylic paint can be a fun and exciting project. Whether you’re working on a Halloween costume, props for a theater production, or simply want to create a gruesome masterpiece, this step-by-step guide will walk you through the process of achieving realistic blood splatter effects using acrylic paint.
Materials you will need:
- Acrylic paint in red, dark red, and brown shades
- Flat brush
- Plastic dropper or toothbrush
- Palette or mixing surface
- Protective clothing and gloves
- Surface to splatter on (canvas, paper, props, etc.)
Step 1: Preparation
Before you begin, make sure you are working in a well-ventilated area or outdoors to prevent inhalation of paint fumes. Protect your work surface with a drop cloth or old newspaper, and wear old clothing or an apron to avoid staining.
Step 2: Mixing the paint
Start by squeezing a small amount of red, dark red, and brown acrylic paint onto your palette or mixing surface. Use the flat brush to mix the colors together, creating different shades of blood-like tones. Experiment with the proportions to achieve the desired color intensity.
Step 3: Preparing the splatter tool
You have two options for creating the blood splatter effect: using a plastic dropper or a toothbrush.
- Plastic dropper: Fill the dropper with some of the mixed paint. Hold the dropper over your chosen surface and tap the end gently with your finger to release small droplets of paint onto the surface.
- Toothbrush: Dip the bristles of a toothbrush into the mixed paint. Hold the toothbrush with your thumb and flick the bristles with your index finger, aiming the splatters at your desired surface. Practice on a piece of scrap paper first to get a feel for the motion and distance you need to achieve the desired effect.
Step 4: Creating the blood splatter effect
Now it’s time to unleash your creativity and start splattering! Hold the dropper or toothbrush a few inches away from your chosen surface and experiment with different techniques to create realistic blood splatter effects.
- Vary the distance: Move closer or farther away from the surface to achieve different splatter patterns. Closer splatters will result in smaller, more concentrated droplets, while being farther away will create larger and more dispersed splatters.
- Try different angles: Experiment with different angles of the dropper or toothbrush to create splatters that simulate the direction of blood spray.
- Layer the splatters: Build up the blood splatters gradually by adding multiple layers, using different shades and intensities of paint.
Step 5: Finishing touches
Once you are satisfied with the blood splatter effect, allow the paint to dry completely. This may take a few hours, depending on the thickness of the paint and the ventilation in your workspace. Avoid touching the wet splatters to prevent smudging. If desired, you can also add additional details like handprints or smears using a brush or your fingers.
In summary
Creating realistic blood splatter effects with acrylic paint can be an exciting and creative project. By following this step-by-step guide, you can achieve gruesome and convincing blood splatters on various surfaces. Remember to take precautions, such as wearing protective clothing and working in a well-ventilated area, and don’t be afraid to experiment with different techniques and colors to achieve the desired effect. Happy splattering!

Exploring different methods for making blood splatter using acrylic paint
Are you a horror movie enthusiast or a fan of spooky Halloween decorations? If so, you may be interested in creating realistic blood splatter effects to add an extra touch of gore to your artwork or props. In this section, we will explore different methods for making blood splatter using acrylic paint.
1. Drip and Flick Technique
The drip and flick technique is one of the most popular methods for creating blood splatter effects. To start, you will need a clean surface, preferably a canvas or a piece of paper. Take a small amount of red acrylic paint and dilute it with water to achieve a fluid consistency.
Next, load a paintbrush with the diluted red paint and hold it over the surface. Use your finger or another brush to flick the bristles, causing the paint to splatter onto the surface. You can vary the intensity of the splatters by adjusting the amount of paint on the brush and the force of your flicking motion.
For a more realistic effect, you can also experiment by adding a few drops of black or dark brown paint to the red mixture to create depth and texture in the splatters.
2. Toothbrush Spatter Technique
Another popular method for creating blood splatter effects is the toothbrush spatter technique. This technique allows for more control over the size and direction of the splatters.
To begin, dip a clean toothbrush into a small container of diluted red acrylic paint. Hold the toothbrush over the surface and use your thumb to brush the bristles, causing the paint to splatter in a controlled manner.
You can experiment with different toothbrushes to achieve different effects. A soft-bristled toothbrush will create finer splatters, while a stiffer-bristled toothbrush will create larger and more scattered splatters.
3. Straw Blowing Technique
The straw blowing technique is a fun and unpredictable method for creating blood splatter effects. Start by applying a base layer of red acrylic paint onto the surface. Once the paint is dry, mix a small amount of red paint with water to create a more fluid consistency.
Next, load a dropper or a small pipette with the diluted red paint and drop small droplets onto the surface. Use a straw and blow air onto the droplets, causing them to splatter and spread in different directions.
This technique allows for a more organic and random pattern of splatters, mimicking the unpredictable nature of blood splatter.
4. Sponge Splatter Technique
If you prefer a more textured look for your blood splatter, the sponge splatter technique is a great option. Start by cutting a small piece of sponge and dipping it into the red acrylic paint.
With the loaded sponge, gently press it onto the surface, creating a splattered effect. You can vary the intensity and shape of the splatters by changing the pressure applied and the angle at which you press the sponge.
This technique is particularly effective when combined with other methods, such as the drip and flick technique or the toothbrush spatter technique, to create a multi-dimensional blood splatter effect.
Creating realistic blood splatter effects using acrylic paint can add a chilling touch to your artwork or props. By experimenting with different techniques, such as the drip and flick technique, toothbrush spatter technique, straw blowing technique, and sponge splatter technique, you can achieve a variety of blood splatter effects with varying textures and patterns.
Remember to wear appropriate protective gear, such as gloves and goggles, when working with paint, and always ensure proper ventilation in your workspace. Happy splattering!
Achieving professional-looking blood splatter effects with acrylic paint
Creating realistic and professional-looking blood splatter effects can add a touch of horror and intrigue to various art projects, theatrical productions, or Halloween costumes. Acrylic paint provides a versatile medium for achieving these effects, allowing you to control the texture, color, and intensity of the blood splatter. In this section, we will explore the step-by-step process of creating professional-looking blood splatter effects with acrylic paint.
Gather your materials
The first step in creating blood splatter effects is to gather all the necessary materials. Here’s a list of items you will need:
- Acrylic paint in various shades of red, including bright red, dark red, and brownish-red
- A paintbrush or toothbrush
- Protective clothing or apron to prevent paint stains
- A drop cloth or newspaper to protect your work surface
- A palette or disposable plate for mixing paint
- Water for thinning the paint
Prepare your work area
Before you begin splattering paint, it’s essential to prepare your work area. Lay down a drop cloth or newspaper to protect your surroundings from any paint splatters. It’s also a good idea to wear protective clothing or an apron to avoid getting paint on yourself.
Mix your paint
Start by squeezing out the desired shades of red acrylic paint onto your palette or disposable plate. Mix the paint with a little water to achieve a more fluid consistency. This will make it easier for the paint to splatter and create a realistic blood effect. You can experiment with different ratios of paint to water to achieve the desired texture and consistency.
Practice your technique
Before applying the blood splatter to your intended surface, it’s a good idea to practice your technique on a scrap piece of paper or cardboard. Dip your paintbrush into the thinned paint, or load the bristles of a toothbrush with paint. Hold the brush a few inches away from the practice surface and use your finger or another brush to flick or tap the bristles, causing the paint to splatter. Experiment with different angles, brush sizes, and amounts of paint to achieve different effects.
Apply the blood splatter
Once you are comfortable with your technique, it’s time to apply the blood splatter to your desired surface. Depending on your project, you may want to splatter the paint onto canvas, paper, clothing, or props. Hold the brush or loaded toothbrush a few inches away from the surface and flick or tap the bristles to create the desired splatter effect. Vary the intensity and density of the splatters to create a realistic and dynamic blood spatter pattern. You can also layer different shades of red to add depth and dimension to the splatter.
Finishing touches
After applying the blood splatter, allow it to dry completely. Once dry, you can further enhance the effect by adding additional details such as drips or smears using a smaller brush. You can also use a toothpick or small brush to create more precise bloodstain shapes or to add texture. Use reference images or real-life blood patterns for inspiration and guidance.
In summary, achieving professional-looking blood splatter effects with acrylic paint requires careful preparation, practice, and experimentation. By following the step-by-step process outlined above, you can create realistic blood splatters that add a macabre touch to your artistic endeavors.
FAQs
1. How can I create blood splatter effects with acrylic paint?
To create blood splatter effects with acrylic paint, dilute the paint with water or a pouring medium to achieve a runny consistency. Then, use a brush or toothbrush and flick or splatter the paint onto your desired surface. Experiment with different techniques and tools to achieve the desired effect.
2. What safety precautions should I take when working with acrylic paint?
When working with acrylic paint, make sure to wear protective clothing and gloves to prevent any skin contact. Work in a well-ventilated area to minimize the inhalation of fumes. Also, ensure that you clean up any spills or messes promptly to avoid accidental contact or ingestion.
3. How can I remove acrylic paint stains from clothing or surfaces?
To remove acrylic paint stains from clothing, rinse the affected area under cold water as soon as possible. Then, apply a stain remover or liquid laundry detergent and gently rub the fabric together. Rinse with cold water until the stain fades. For surfaces, use warm soapy water and a sponge or cloth to gently scrub away the paint.
Conclusion
In conclusion, creating realistic blood splatter effects with acrylic paint is a thrilling and artistic endeavor. By following the right techniques and utilizing the right tools, you can achieve striking and convincing results. Experiment with different brush sizes, splatter techniques, and color variations to add depth and texture to your artwork.
Remember to consider the context and purpose of your piece, as blood splatters can evoke various emotions and meanings. Whether you’re working on a horror-themed painting, a special effects project, or simply want to explore the darker side of art, acrylic paint offers a versatile medium to bring your blood splatter visions to life.