
Looking to create unique and personalized milestone discs? Discover the art of making acrylic milestone discs with our easy-to-follow guide. Whether you’re commemorating a special occasion or marking important milestones, these handmade discs are a beautiful way to capture memories. With a few simple materials and step-by-step instructions, you can create stunning acrylic milestone discs that will be cherished for years to come.
From selecting the right acrylic sheets to cutting precise shapes and adding custom designs, we’ll walk you through each stage of the process. Our detailed guide will cover everything you need to know, including tips for painting, sealing and finishing your milestone discs for a professional look. So, let your creativity shine and get started on crafting your own unique acrylic milestone discs today!
Essential Tools and Materials for Making Acrylic Milestone Discs
Creating acrylic milestone discs is a fun and creative way to celebrate special moments in your life or the life of your little one. Whether it’s a baby’s monthly milestones or important occasions like birthdays or anniversaries, acrylic milestone discs are a fantastic way to capture and cherish these memories. To get started with this DIY project, you’ll need a few essential tools and materials. Let’s dive in and explore what you’ll need.
1. Acrylic Discs
The first and most important item you’ll need is acrylic discs. These discs will be the base for your milestone designs. You can find pre-cut acrylic discs in various sizes and thicknesses from craft stores or online suppliers. Choose the size that fits your preferences and the design you have in mind.
2. Acrylic Paint
Acrylic paint is essential for adding vibrant colors to your milestone discs. Opt for high-quality acrylic paints that offer excellent coverage and durability. You can choose a single color or a variety of shades to create eye-catching designs. Make sure to select colors that complement each other and match the theme or aesthetic you want to achieve.
3. Paintbrushes
To apply the acrylic paint smoothly and precisely, you’ll need a set of paintbrushes. Different brush sizes and shapes will allow you to create fine details, broad strokes, and various textures. Invest in a range of brushes, including flat, round, and detail brushes, to have more flexibility and control over your designs.
4. Stencils
Stencils are a great tool for achieving consistent and professional-looking designs on your acrylic milestone discs. You can either purchase ready-made stencils related to milestones or create your own using cardstock or stencil blanks. Stencils will help you create uniform shapes, letters, numbers, or patterns effortlessly.
5. Markers or Pens
If you prefer a more hand-drawn look, markers or pens are a fantastic alternative to acrylic paint. Choose markers or pens that are suitable for writing or drawing on acrylic surfaces. Make sure to select colors that stand out against the background color of your milestone disc.
6. Fine Sandpaper or Nail Buffer
After painting or drawing on the acrylic discs, you may want to smoothen out any rough edges or imperfections. Fine sandpaper or a nail buffer can help you achieve a polished finish. Gently sand the edges or any bumpy areas to ensure that your milestone discs have a professional look.
7. Clear Acrylic Sealant
To protect your milestone discs and make them more durable, it’s recommended to apply a clear acrylic sealant. This sealant will add a thin layer of protection against scratches, moisture, and fading. Choose a sealant that is specifically formulated for acrylic surfaces.
8. Ribbon or Twine
To hang your milestone discs or display them in a decorative way, you’ll need some ribbon or twine. Consider using a color that complements the design and theme of your milestone discs. You can attach the ribbon or twine to the top of the disc by drilling a small hole or using adhesive.
9. Drill (Optional)
If you prefer to hang your milestone discs using a drilled hole, you’ll need a drill along with a drill bit that is suitable for acrylic materials. This option provides a more secure attachment for the ribbon or twine.
10. Adhesive (Optional)
If you don’t want to drill a hole in your milestone discs, you can use adhesive to attach the ribbon or twine. Make sure to choose a strong adhesive that is suitable for bonding acrylic surfaces.
With these essential tools and materials, you’ll be well-equipped to create beautiful and personalized acrylic milestone discs. Get creative, experiment with different designs, and enjoy the process of commemorating special moments in a unique and visually appealing way.
Design Ideas and Inspiration for Acrylic Milestone Discs
Acrylic milestone discs have become increasingly popular in commemorating special events and milestones. These beautifully designed discs can be customized to reflect the uniqueness of the occasion, making them a perfect keepsake for any celebration. Whether you are looking for design ideas or seeking inspiration to create your own acrylic milestone disc, this section will provide you with some great suggestions to get started.
1. Minimalistic Designs:
One of the popular design trends for acrylic milestone discs is a minimalistic approach. This design style emphasizes clean lines, simple shapes, and a focus on essential elements. A minimalistic milestone disc can feature a single number or word, elegantly engraved or printed on the acrylic surface. This sleek and understated design is perfect for those who prefer a modern and sophisticated look.
2. Floral Patterns:
If you want to add a touch of elegance and femininity to your milestone disc, consider incorporating floral patterns. Delicate flowers or botanical motifs can be engraved or printed onto the acrylic surface, creating a stunning visual appeal. From intricate rose designs to minimalist daisies, floral patterns can beautifully complement the significance of the milestone being celebrated.
3. Geometric Shapes:
For those who appreciate geometric aesthetics, incorporating shapes such as triangles, circles, or hexagons can create a visually striking milestone disc. These crisp and angular designs can be engraved or cut out of the acrylic, adding a contemporary and trendy touch to the overall look. Geometric shapes can also be used to incorporate multiple milestone numbers or words in a stylish and organized manner.
4. Personalized Portraits or Silhouettes:
If you are looking to create a truly unique and sentimental milestone disc, consider adding a personalized portrait or silhouette. This can be a silhouette of the individual celebrating the milestone or a portrait of a loved one who holds a significant place in the event. Laser engraving techniques can capture intricate details, making the acrylic milestone disc a treasured keepsake.
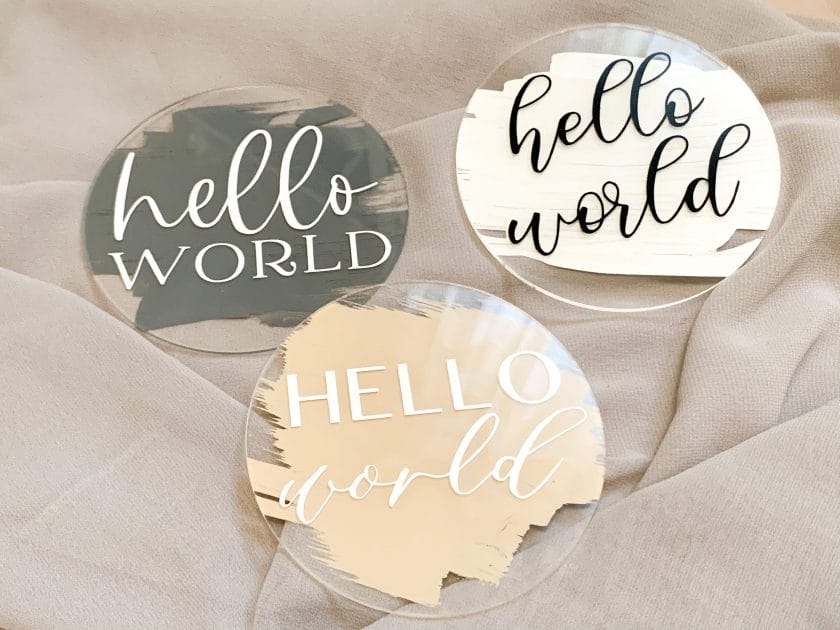
5. Custom Typography:
Typography plays a crucial role in design, and it can be excellently utilized in acrylic milestone discs. Customized fonts and typographic layouts can add a touch of personality and creativity to the design. Whether you prefer bold and dramatic lettering or elegant and cursive styles, typography can visually enhance the significance of the milestone being commemorated.
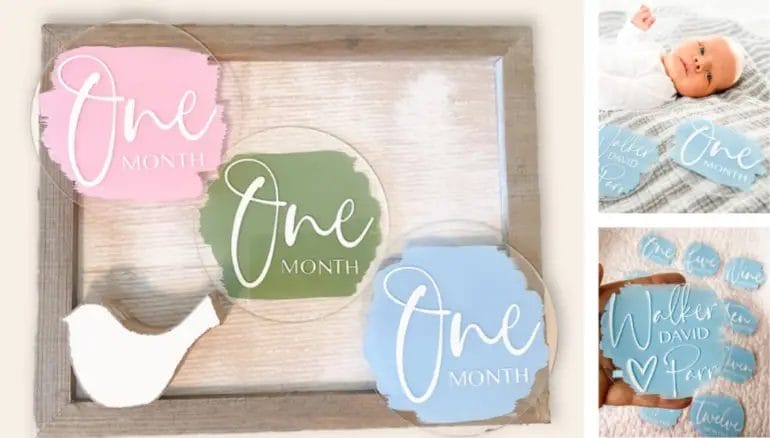
6. Colorful Accents:
While acrylic milestone discs are often clear or transparent, incorporating colorful accents can create an eye-catching design. Consider adding a splash of color to the milestone number or surrounding patterns. Choose shades that resonate with the theme or emotions associated with the milestone. Vibrant hues can make the acrylic milestone disc stand out and be a focal point of attention.
7. Metallic Finishes:
If you want to add a luxurious and glamorous touch to your acrylic milestone disc, consider utilizing metallic finishes. Metallic gold, silver, or rose gold accents can be achieved through processes like foiling or metallic ink printing. These finishes give the milestone disc a premium look and make it an exquisite piece of art.
8. Nature-Inspired Designs:
Nature-inspired designs can be a great way to infuse a sense of tranquility and serenity in your milestone disc. Incorporate elements like leaves, trees, or animals to symbolize growth, strength, or the cycle of life. These designs not only add aesthetic appeal but also provide a deeper meaning to the milestone being celebrated.
By incorporating these design ideas into your acrylic milestone disc, you can create a visually stunning and meaningful keepsake that celebrates life’s significant moments. Let your creativity flow and explore different design elements to make your milestone disc a cherished memory.
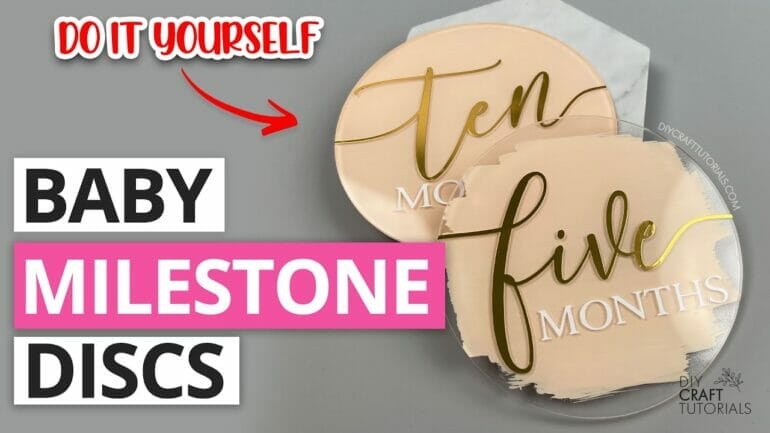
Step-by-Step Guide to Creating Acrylic Milestone Discs
Acrylic milestone discs are a creative and unique way to document and celebrate special moments in life. Whether you’re commemorating a child’s growth, marking important milestones in a relationship, or capturing significant achievements, these discs serve as memorable keepsakes. In this section, we’ll provide you with a step-by-step guide on how to create your own acrylic milestone discs.
Materials Needed:
- Acrylic discs
- Acrylic paints in various colors
- Paintbrushes
- Pencil
- Design templates or stencils
- Clear sealant spray
- String or ribbon
Step 1: Prepare the Acrylic Discs
Start by gathering your acrylic discs. These can be purchased from craft stores or online. Make sure they are clean and free from any dust or debris. You can choose the size and shape of the discs based on your preference.
Step 2: Plan Your Design
Using a pencil, lightly sketch out your design on the acrylic discs. You can create your own design or use pre-made templates or stencils. Decide on the colors you want to use and plan the layout accordingly.
Step 3: Paint the Design
Using acrylic paints, carefully paint your design on the acrylic discs. Take your time and apply thin layers of paint to achieve a smooth and even finish. Use different brushes for different colors and details. Allow the paint to dry completely before proceeding.
Step 4: Add Text or Numbers
If you want to include text or numbers on your milestone discs, use a fine-tip brush or a paint pen to add the desired information. This could be the age, date, or any other relevant details. Make sure the paint is dry before moving on to the next step.
Step 5: Seal the Discs
To protect the painted design and ensure its longevity, seal the discs with a clear acrylic sealant spray. Follow the instructions on the spray can, and apply an even coat to both sides of the discs. Allow the sealant to dry completely before handling.
Step 6: Attach String or Ribbon
Once the discs are completely dry, attach a string or ribbon to the top of each disc. This will allow you to hang or display them easily. Choose a string or ribbon that complements the overall design.
Step 7: Display and Enjoy
Your acrylic milestone discs are now ready to be displayed and enjoyed! Hang them on a wall, place them in a shadow box, or use them as decorative pieces. They make wonderful gifts and can be cherished for years to come.
In summary, creating acrylic milestone discs is a fun and rewarding DIY project. By following this step-by-step guide, you can personalize and commemorate special moments in a creative and visually appealing way. Get creative with your designs, experiment with different colors, and make each milestone disc unique and meaningful.
Tips and Tricks for Perfecting Your Acrylic Milestone Discs
If you’re a fan of tracking and celebrating your milestones, then you’re probably familiar with milestone discs. These small tokens are a great way to commemorate special moments in your life, such as birthdays, anniversaries, or the arrival of a new baby. One popular material for milestone discs is acrylic, a versatile and durable material that can be easily customized to fit your style and preference. In this section, we will provide you with some tips and tricks for perfecting your acrylic milestone discs.
1. Choose the Right Acrylic Material
When it comes to acrylic milestone discs, the first step is to choose the right acrylic material. There are different types of acrylic available, each with its own qualities and characteristics. It’s important to select an acrylic material that is durable, resistant to scratches, and easy to work with. Acrylic sheets with a higher thickness are generally recommended for milestone discs, as they provide better stability and longevity.
2. Design Considerations
Before you start creating your milestone discs, take some time to plan and design your desired look. Consider the purpose of the disc and the style you want to achieve. You can choose to engrave or print the milestone details on the disc, or you can opt for a more minimalist approach with a simple design. Experiment with different fonts, shapes, and colors to create a personalized and visually appealing milestone disc.
3. Preparing the Acrylic
Once you have your design ready, it’s time to prepare the acrylic for customization. Start by cleaning the acrylic sheet with a mild detergent or acrylic cleaner to remove any dirt or debris. Then, use a soft cloth to dry the sheet thoroughly. This step ensures that the surface is clean and free from any contaminants that could affect the adhesion of your design.
4. Customization Techniques
There are several ways to customize your acrylic milestone discs, depending on your preference and available resources. Some popular customization techniques include:
- Engraving: Using a laser engraving machine, you can create intricate designs and precise details on the acrylic surface. This technique provides a professional and long-lasting finish.
- Printing: If you prefer a full-color design, you can opt for printing your milestone details directly onto the acrylic sheet. This technique allows for a wide range of colors and designs.
- Decals: Another option is to use decals or stickers to decorate your milestone disc. This method provides flexibility and allows for easy customization.
5. Finishing Touches
Once you have customized your acrylic milestone disc, it’s time to add some finishing touches. Consider adding a protective layer, such as a clear coat or laminate, to preserve the design and protect it from scratches or fading. You can also attach a small stand or adhesive backing to make it easy to display or mount your milestone disc.
6. Care and Maintenance
To ensure the longevity of your acrylic milestone disc, it’s important to take proper care of it. Avoid using abrasive cleaners or rough materials when cleaning the disc, as this can cause scratches or damage the design. Instead, use a soft cloth or microfiber cloth to gently clean the surface. Store your milestone disc in a cool and dry place to avoid exposure to extreme temperatures or humidity.
In summary, creating the perfect acrylic milestone discs requires careful consideration of the acrylic material, design, customization techniques, and finishing touches. By following these tips and tricks, you can create personalized and visually stunning milestone discs to celebrate and cherish your special moments.
FAQs
1. How do I make acrylic milestone discs?
To make acrylic milestone discs, start by purchasing acrylic discs or cut them from acrylic sheets using a laser cutter. Then, design and create the milestone artwork using graphic design software. Next, print the artwork onto vinyl and apply it to the acrylic discs. Finally, seal the discs with a clear sealant to protect the artwork.
2. What materials do I need to make acrylic milestone discs?
To make acrylic milestone discs, you will need acrylic discs or sheets, a laser cutter or cutting tool, graphic design software, vinyl, a printer, a transfer tape, and a clear sealant. Additionally, you may need a ruler, scissors, and an applicator tool for applying the vinyl.
3. Are there any tips for making acrylic milestone discs?
When making acrylic milestone discs, it’s important to clean and dry the acrylic surfaces before applying the vinyl. Use a ruler to ensure precise alignment of the artwork. Apply the vinyl carefully to avoid air bubbles or wrinkles. Make sure to use a clear sealant that is compatible with acrylic to protect the artwork and provide a glossy finish.
Conclusion:
In conclusion, creating your own acrylic milestone discs is a fun and creative way to capture special moments in your life or the life of your loved ones. By following the step-by-step process, you can craft unique and personalized milestone discs that will be cherished for years to come. Whether you’re making them as a gift or for your own keepsake, these discs are a beautiful way to commemorate important milestones such as birthdays, anniversaries, or significant achievements. With a little bit of time, patience, and creativity, you can design and produce acrylic milestone discs that are truly one-of-a-kind.
Not only are these milestone discs a wonderful addition to your own collection, but they also make thoughtful and heartfelt gifts for family and friends. The versatility of acrylic allows for endless customization options, including engraving names, dates, or special messages. By adding your personal touch, each milestone disc becomes a unique and meaningful piece that carries sentimental value. So why not give it a try and start creating your own acrylic milestone discs today? Let your imagination run wild, and enjoy the process of making something beautiful to celebrate life’s memorable moments.