
Are you looking to cut acrylic rods but unsure where to start? Cutting acrylic rods is a straightforward process that can be done with a few simple tools and techniques. In this guide, we will walk you through the step-by-step process of cutting acrylic rods safely and accurately, ensuring clean and precise cuts every time. So, whether you’re working on a DIY project or need to resize an acrylic rod for a specific application, let’s dive in and learn how to cut acrylic rods like a pro.
The first step in cutting acrylic rods is to gather the necessary tools and materials. You will need a sturdy work surface, a fine-toothed saw or a specialized acrylic rod cutter, a ruler or measuring tape, a marker or pencil for marking the cut line, and safety equipment such as safety goggles and gloves.
Next, measure the desired length of the acrylic rod and mark it with a marker or pencil. Ensure your measurements are accurate to achieve the desired result. Double-check your measurements before proceeding to the cutting stage.
When it comes to actually cutting the acrylic rod, there are a few different methods you can choose from. If you have a fine-toothed saw, such as a hacksaw or a circular saw with a fine-toothed blade, you can use it to make the cut. Alternatively, you can use a specialized acrylic rod cutter, which is designed specifically for cutting acrylic rods with ease.
Regardless

Safety Precautions for Cutting Acrylic Rod
Acrylic rods are widely used in various applications, including crafting, DIY projects, and even industrial settings. Cutting acrylic rods requires careful attention to detail and adherence to safety precautions to prevent accidents and injuries. In this section, we will discuss some essential safety measures that should be followed when cutting acrylic rods.
1. Personal Protective Equipment (PPE)
Prior to cutting acrylic rods, it is crucial to wear the appropriate personal protective equipment to ensure your safety. The following PPE should be worn:
- Safety goggles or glasses: These will protect your eyes from flying debris and splinters during the cutting process.
- Gloves: Wear gloves to protect your hands from sharp edges and potential cuts. Nitrile gloves are recommended for their durability and resistance to chemicals.
- Dust mask or respirator: Cutting acrylic rods can produce fine dust particles that may be harmful if inhaled. Use a dust mask or respirator to prevent inhalation of these particles.
- Protective clothing: Consider wearing long sleeves and pants to provide additional protection against potential scratches.
2. Proper Workspace Setup
Setting up a suitable workspace is essential to ensure a safe cutting environment. Follow these guidelines when preparing your workspace:
- Well-ventilated area: Make sure you are cutting the acrylic rod in a well-ventilated area to minimize the inhalation of toxic fumes.
- Stable work surface: Use a stable workbench or table to secure the acrylic rod during the cutting process. This will prevent it from moving or rolling, reducing the risk of accidents.
- Clean and clutter-free: Remove any clutter or obstacles from your workspace to prevent tripping hazards and ensure a clear work area.
- Secure the acrylic rod: Use clamps or a vise to secure the acrylic rod firmly in place, ensuring it does not move while cutting.
3. Selection of Cutting Tools
Choosing the right cutting tools is crucial for a safe and precise cutting experience. The following tools are commonly used for cutting acrylic rods:
- Acrylic rod cutter: Designed specifically for cutting acrylic rods, these cutters provide clean and precise cuts. Ensure that the cutter is sharp and in good condition before use.
- Hacksaw: A fine-toothed hacksaw can also be used to cut acrylic rods. Select a blade with a sufficient number of teeth per inch to ensure smooth cuts.
- Power tools: If using power tools such as a jigsaw or circular saw, ensure that they are equipped with a fine-toothed blade suitable for cutting acrylic. Follow the manufacturer’s guidelines for proper usage and safety precautions.
4. Cutting Techniques
When cutting acrylic rods, it is important to employ the right techniques to minimize the risk of accidents:
- Measure and mark: Accurately measure and mark the desired cutting point on the acrylic rod using a ruler or tape measure. This will ensure precise cuts.
- Slow and steady: Apply a moderate amount of pressure while cutting and maintain a steady pace. Avoid rushing or applying excessive force, as this may cause the acrylic rod to crack or shatter.
- Support the rod: Support the acrylic rod as close to the cutting point as possible to prevent it from bending or vibrating during the cutting process. This will help maintain stability and improve the quality of the cut.
- Use lubrication: Applying a lubricant, such as water or cutting fluid, can help dissipate heat during the cutting process and reduce the risk of the acrylic melting or warping.
In summary, when cutting acrylic rods, prioritize safety by wearing the appropriate personal protective equipment, setting up a proper workspace, selecting the right cutting tools, and employing the correct cutting techniques. By following these safety precautions, you can ensure a safer cutting experience and minimize the risk of accidents or injuries.
Different Methods for Cutting Acrylic Rod
Acrylic rod is a versatile material that is commonly used in various DIY projects, crafts, and industrial applications. However, cutting acrylic rod can be a bit tricky if you don’t have the right tools or techniques. In this section, we will discuss different methods for cutting acrylic rod that will help you achieve precise and clean cuts.
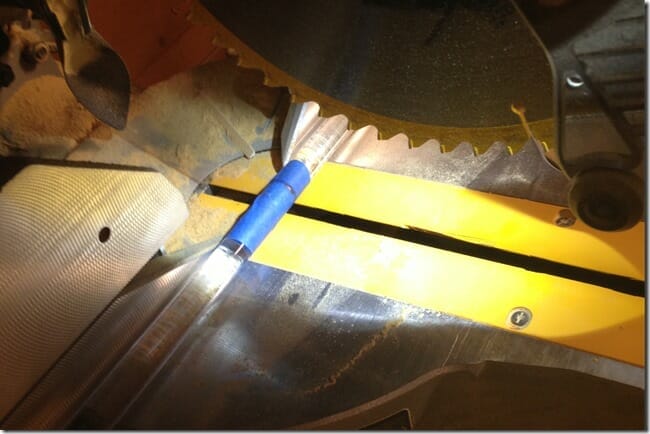
Method 1: Using a Circular Saw
One of the most common methods for cutting acrylic rod is by using a circular saw. This method requires a circular saw with a fine-toothed blade specifically designed for cutting acrylic. Follow these steps to cut acrylic rod using a circular saw:
- Measure and mark the length you want to cut on the acrylic rod using a measuring tape and a marker.
- Secure the acrylic rod firmly in place using clamps or a vise.
- Set the circular saw to a low speed and adjust the cutting depth to slightly more than the thickness of the acrylic rod.
- Carefully align the saw blade with the marked line and slowly guide the saw along the line, applying gentle pressure.
- Continue cutting until you have fully severed the acrylic rod.
Remember to wear appropriate safety gear, such as safety goggles and gloves, when using a circular saw.
Method 2: Using a Hacksaw
If you don’t have access to a circular saw, you can also cut acrylic rod using a hacksaw. This method requires a hacksaw with a fine-toothed blade. Here’s how you can cut acrylic rod using a hacksaw:
- Measure and mark the length you want to cut on the acrylic rod.
- Secure the acrylic rod in place using clamps or a vise.
- Position the hacksaw blade perpendicular to the marked line and start sawing back and forth.
- Apply steady and even pressure while sawing to prevent the acrylic rod from cracking or breaking.
- Continue sawing until you have fully cut through the acrylic rod.
Be cautious and take your time to ensure a clean and precise cut.
Method 3: Using a Band Saw
If you have access to a band saw, it can be a great tool to cut acrylic rod. This method provides smooth and accurate cuts. Follow these steps to cut acrylic rod using a band saw:
- Measure and mark the length you want to cut on the acrylic rod.
- Secure the acrylic rod in place using clamps or a vise.
- Adjust the band saw’s blade tension and speed settings according to the manufacturer’s instructions.
- Carefully guide the acrylic rod into the band saw blade, making sure to follow the marked line.
- Maintain a steady cutting speed and apply gentle pressure to avoid any cracking or chipping of the acrylic rod.
- Continue cutting until you have achieved the desired length.
Always prioritize safety by wearing protective equipment and following the manufacturer’s guidelines when using a band saw.
Method 4: Using a Laser Cutter
If you have access to a laser cutter, it can provide precise and clean cuts on acrylic rod. Laser cutting is especially suitable for intricate designs and fine details. Here’s how you can cut acrylic rod using a laser cutter:
- Design your desired shape or pattern using a computer-aided design (CAD) software.
- Import the design into the laser cutter’s software and set the appropriate cutting parameters.
- Secure the acrylic rod in the laser cutter’s bed and align it according to the design.
- Start the laser cutting process and allow the machine to cut through the acrylic rod.
- Once the cutting is complete, carefully remove the acrylic rod from the laser cutter.
Remember to follow the laser cutter’s safety protocols and guidelines to avoid any accidents or injuries.
Summary
Cutting acrylic rod can be accomplished using various methods, including using a circular saw, hacksaw, band saw, or laser cutter. Each method requires different tools and techniques, so choose the one that best suits your needs and equipment availability. Always prioritize safety by wearing appropriate protective gear and following the manufacturer’s instructions

Tips for achieving a clean and smooth cut on acrylic rod
Acrylic rods are commonly used in various applications, from crafts and DIY projects to industrial uses. Whether you are a beginner or an experienced user, achieving a clean and smooth cut on acrylic rod can sometimes be challenging. However, with the right tools and techniques, you can achieve professional-looking results. In this section, we will provide you with some valuable tips to help you achieve a clean and smooth cut on acrylic rod.
Choose the right tools
Using the right tools is essential for achieving a clean and smooth cut on acrylic rod. Here are some tools that you will need:
- Acrylic cutting tool or a fine-toothed saw
- Protective goggles and gloves
- Measuring tape or ruler
- Masking tape
- Sandpaper or a sanding block
Ensure that you have these tools ready before you start cutting your acrylic rod.
Marking and securing
Prior to cutting the acrylic rod, it is important to mark the area where you want to make the cut. Use a measuring tape or ruler to get accurate measurements. Once you have determined the desired length, mark the acrylic rod using a pen or a marker.
To prevent the acrylic rod from chipping or cracking during the cutting process, secure it firmly in place. You can do this by clamping the rod down or using a vice grip. Make sure that the area you will be cutting is free from any obstructions.
Using an acrylic cutting tool
If you have an acrylic cutting tool, follow these steps for a clean and smooth cut:
- Place the cutting tool on the marked line, aligning the blade with the mark.
- Apply even pressure and begin cutting through the acrylic rod. Make sure to maintain a steady pace.
- Continue cutting until you have completely severed the acrylic rod.
Remember to wear protective goggles and gloves when using an acrylic cutting tool to avoid any injuries.
Using a fine-toothed saw
If you don’t have an acrylic cutting tool, you can use a fine-toothed saw. Follow these steps:
- Wrap masking tape around the area where you will be making the cut. This helps to reduce chipping and provides additional stability.
- Place the saw blade on the marked line and start sawing with a gentle back and forth motion.
- Continue sawing until you have cut through the acrylic rod.
After making the cut, remove the masking tape and inspect the edges for any roughness.
Finishing touches
Once you have made the cut, you may notice some rough edges. To achieve a clean and smooth finish, use sandpaper or a sanding block to gently sand the edges of the cut acrylic rod. Start with a coarser grit sandpaper and gradually move to a finer grit for a polished look.
Remember to wear protective goggles and gloves during the sanding process to protect yourself from any flying debris.
Summary
Achieving a clean and smooth cut on acrylic rod is possible with the right tools and techniques. Remember to choose the appropriate tools, mark and secure the rod properly, and follow the instructions for either an acrylic cutting tool or a fine-toothed saw. Finish off the cut by sanding the edges for a polished look. By following these tips, you can achieve professional-looking results and enhance your acrylic rod projects.
Common Mistakes to Avoid While Cutting Acrylic Rod
Acrylic rods are a popular choice for a wide range of applications, thanks to their versatility, durability, and aesthetic appeal. However, cutting acrylic rods can be a delicate process that requires precision and careful attention to detail. To ensure a clean, smooth cut, it’s important to avoid common mistakes that can compromise the quality and integrity of the final result. In this section, we will discuss some of these mistakes and offer valuable tips on how to avoid them.
1. Using the Wrong Tools
One of the most common mistakes people make when cutting acrylic rods is using the wrong tools. Acrylic is a sensitive material that can easily crack or chip if not cut properly. It is essential to use the right tools specifically designed for acrylic cutting. A fine-toothed saw or a laser cutter are recommended for clean and precise cuts. Avoid using regular saws, as they can cause the acrylic to melt or crack due to excessive heat or improper blade design.
2. Lack of Proper Safety Gear
Safety should always be a top priority when working with acrylic rods. One common mistake is not wearing the necessary safety gear while cutting, which can lead to serious injuries. Always wear safety goggles, gloves, and a dust mask to protect your eyes, hands, and respiratory system from flying debris and harmful acrylic dust. Taking these precautions will ensure a safe working environment and reduce the risk of accidents.
3. Incorrect Measurements
Precision is crucial when cutting acrylic rods, and inaccurate measurements can lead to botched cuts and wasted material. Double-check your measurements before making any cuts and use a straight edge or ruler to ensure precise lines. Taking the time to measure accurately will save you from costly mistakes and wasted acrylic.
4. Applying Excessive Force
Acrylic is a brittle material that can easily crack or shatter under excessive force. Many people make the mistake of applying too much pressure while cutting, which can result in rough edges or damaged acrylic. Instead, use a steady and gentle cutting motion with even pressure to achieve clean and smooth cuts without risking damage to the material.
5. Ignoring Proper Lubrication
Lubrication is essential when cutting acrylic rods to reduce friction and prevent the material from melting or chipping. Ignoring this crucial step can lead to rough cuts and compromised quality. Apply water or a specialized cutting fluid to the cutting area to ensure smoother cuts and prolong the life of your cutting tools. This simple step can greatly enhance the overall cutting experience.
6. Rushing the Cutting Process
Patience is key when cutting acrylic rods. Rushing the cutting process is a common mistake that can result in sloppy cuts and damaged acrylic. Take your time, follow the cutting guidelines, and maintain a steady pace throughout the process. By being patient and diligent, you will achieve cleaner, more precise cuts and avoid unnecessary mistakes.
7. Improper Clamping Techniques
Securing the acrylic rod adequately before cutting is essential to prevent slipping and ensure accurate cuts. Improper clamping techniques can lead to movement during the cutting process, resulting in uneven or angled cuts. Use clamps or a vise to firmly hold the rod in place and minimize any unwanted movement. This will help you achieve straight and clean cuts.
Summary
When cutting acrylic rods, it’s important to avoid common mistakes that can compromise the quality of the final product. Using the wrong tools, lacking proper safety gear, incorrect measurements, excessive force, ignoring lubrication, rushing the cutting process, and improper clamping can all lead to subpar results. By being aware of these mistakes and following the recommended tips, you can ensure clean, precise, and professional-looking cuts every time.
Frequently Asked Questions
How do I cut acrylic rod?
To cut acrylic rod, you can use a fine-toothed saw, such as a hacksaw or a circular saw with a fine-toothed blade. Mark the desired length on the rod and secure it firmly in place. Then, carefully cut along the marked line, applying consistent pressure. After cutting, smooth the edges using sandpaper or a file.
What precautions should I take when cutting acrylic rod?
When cutting acrylic rod, it is important to wear safety goggles and gloves to protect yourself from flying debris. Additionally, ensure that the work area is well-ventilated, as cutting acrylic can produce fumes. Take your time and use gentle, steady motions to avoid cracking or shattering the rod.
Can I use a power tool to cut acrylic rod?
Yes, you can use a power tool like a circular saw or a jigsaw to cut acrylic rod. However, it is important to use a fine-toothed blade designed for cutting plastic materials. Make sure to set the saw at a low speed and apply minimal pressure to avoid overheating and melting the acrylic.
Conclusion:
Overall, cutting acrylic rods can be a straightforward process with the right tools and techniques. By following proper safety precautions, such as wearing protective gear and using a well-ventilated area, you can confidently undertake this DIY project.
Remember to choose the appropriate cutting tool, such as a circular saw or a fine-toothed handsaw, and use a guide or template to ensure precise cuts. Taking your time and applying even pressure will help prevent splintering or cracking of the acrylic rod during the cutting process.
Lastly, always double-check the measurements and plan your cuts before starting to minimize any potential mistakes. With practice and patience, you’ll be able to confidently slice through acrylic rods like a pro and achieve the desired results for your projects.