
Wondering how to shrink your acrylic beanie to get the perfect fit? Look no further! We have the solution for you. Shrink your acrylic beanie by following these simple steps:
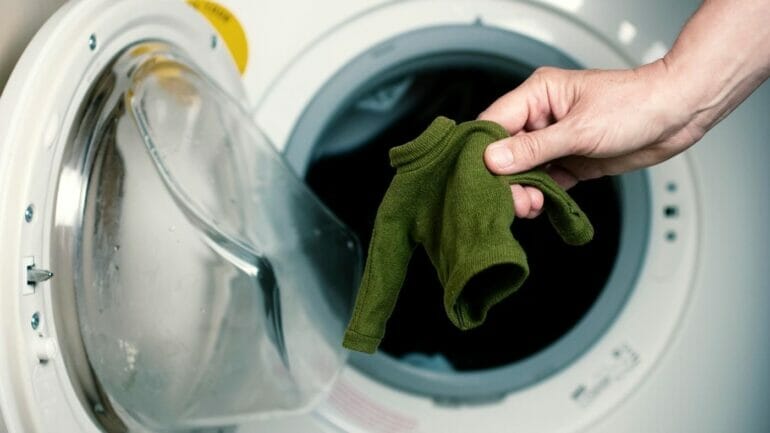
First, fill a basin with hot water and add a small amount of mild detergent.
Next, submerge your acrylic beanie in the hot water and let it soak for about 10 minutes.
After soaking, remove the beanie from the water and gently squeeze out the excess water.
Now, place the damp beanie on a clean towel and carefully roll the towel to remove even more moisture.
Lastly, reshape the beanie to your desired size and let it air dry completely. Voila! Your acrylic beanie is now perfectly shrunk to fit your head.
Remember to always check the care instructions on your beanie before attempting to shrink it, as different materials may require different methods.
The Best Methods for Shrinking Your Acrylic Beanie at Home
Acrylic beanies are a popular and stylish choice for keeping warm in cold weather. However, sometimes these beanies can stretch out over time or be too large when purchased. If you find yourself in this situation, don’t worry! There are several methods you can try at home to shrink your acrylic beanie and get it fitting perfectly again. In this section, we will discuss the best methods for shrinking your acrylic beanie at home.
1. Hot Water Method
The hot water method is a simple and effective way to shrink your acrylic beanie. Here’s how you can do it:
- Fill a sink or basin with hot water. Make sure the water is not boiling, as this can damage the acrylic material.
- Submerge your beanie in the hot water and let it soak for about 5-10 minutes. This will help relax the fibers of the beanie.
- Take the beanie out of the water and gently squeeze out the excess moisture. Do not wring or twist the beanie, as this can cause it to lose its shape.
- Put the beanie on your head while it is still damp. This will allow it to stretch slightly to fit your head shape.
- Leave the beanie on your head until it dries completely. This will help it shrink to the desired size.
- If the beanie is still slightly loose after drying, you can repeat the process or try another method.
2. Steam Method
The steam method is another effective way to shrink your acrylic beanie. Here’s how you can do it:
- Fill a pot with water and bring it to a boil.
- Hold the beanie over the steam from the boiling water, making sure not to get too close to the hot steam. Allow the steam to penetrate the fibers of the beanie.
- Stretch the beanie slightly while it is still warm and damp to mold it to your desired size.
- Place the beanie on a flat surface to dry completely. You can use a towel or a drying rack for this purpose.
- If the beanie is still not the desired size after drying, you can repeat the process or try another method.
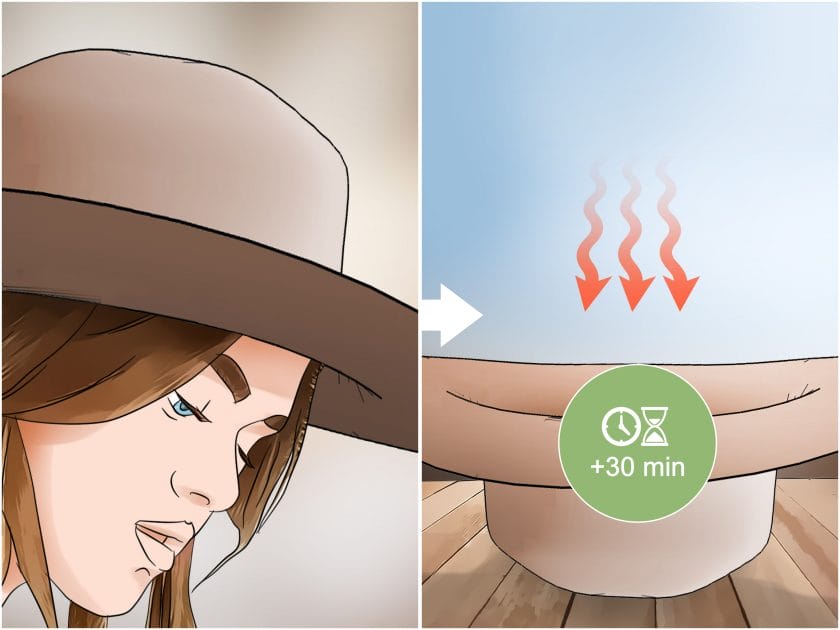
3. Hairdryer Method
The hairdryer method is a quick and convenient way to shrink your acrylic beanie. Here’s how you can do it:
- Put on your beanie and adjust it to the size you want it to be.
- Using a hairdryer set on high heat, blow hot air directly onto the beanie. Make sure to keep the hairdryer moving to avoid overheating or damaging the fabric.
- Continue blowing hot air on the beanie until it is dry. This will help the fibers shrink and conform to your head shape.
- Remove the beanie and allow it to cool and set in its new shape.
- If the beanie is still too loose, you can repeat the process or try another method.
In summary, shrinking your acrylic beanie at home is possible using simple and effective methods. Whether you choose the hot water method, steam method, or hairdryer method, make sure to follow the instructions carefully to avoid damaging the beanie. With a little patience and experimentation, you can get your acrylic beanie fitting perfectly again and enjoy its warmth and style during the colder months.
Proven Ways to Achieve the Perfect Fit for Your Acrylic Beanie
Are you tired of your acrylic beanie slipping off your head or feeling too tight? Achieving the perfect fit for your beanie is essential for both comfort and style. Whether you’re heading out for a winter adventure or simply want to add a fashionable accessory to your outfit, here are some proven ways to ensure the ideal fit for your acrylic beanie.
1. Measure Your Head
The first step in achieving the perfect fit for your acrylic beanie is to measure your head. Use a flexible tape measure and wrap it around the widest part of your head, just above your eyebrows and ears. Note down the measurement in inches or centimeters, depending on your preference.
This measurement will serve as a guide when selecting the appropriate beanie size. Most acrylic beanies come in standard sizes like small, medium, and large. Refer to the manufacturer’s size chart to find the best match for your head circumference.
2. Choose the Right Style
Acrylic beanies come in various styles, including slouchy, cuffed, and fitted. Each style offers a different fit and look, so choose the one that suits your preference and head shape. Slouchy beanies provide a relaxed and casual fit, while cuffed beanies offer a more snug and secure feel. Fitted beanies, on the other hand, provide a sleek and tailored look.
Consider the occasion and your personal style when selecting the right beanie style. Experiment with different styles to find the one that complements your outfit and enhances your overall appearance.
3. Adjust the Fit
If your acrylic beanie feels too loose or tight, you can make simple adjustments to achieve the perfect fit. For a looser fit, fold the cuff of the beanie inwards to create an extra layer of fabric. This will add volume and provide a more relaxed feel.
On the other hand, if your beanie feels too tight, you can stretch the fabric gently by placing it over a round object, such as a bowl or can, that matches your desired head size. Leave it overnight to allow the fabric to stretch naturally. Be cautious not to overstretch the beanie, as it may lose its shape.
4. Consider a Lined Beanie
If you find that your acrylic beanie is still not providing the desired fit, consider opting for a lined beanie. Lined beanies have an additional layer of fabric, such as fleece or satin, on the inside. This lining not only adds warmth but also enhances the fit and comfort of the beanie.
Lined beanies are particularly suitable for colder climates or individuals with sensitive skin who may experience discomfort from the acrylic fabric. The lining creates a barrier between the skin and the beanie, ensuring a cozy and irritation-free experience.
5. Proper Care and Maintenance
To maintain the perfect fit of your acrylic beanie, it is important to follow proper care and maintenance guidelines. Always check the manufacturer’s instructions for specific recommendations, but in general, hand washing or using a gentle cycle on a washing machine with cold water is preferred.
Avoid using harsh detergents or bleach, as they can damage the fabric and alter the fit. Instead, opt for mild detergent specifically designed for delicate fabrics. After washing, reshape the beanie and allow it to air dry flat to preserve its shape.
In summary, achieving the perfect fit for your acrylic beanie involves measuring your head, choosing the right style, making necessary adjustments, considering a lined beanie, and practicing proper care and maintenance. By following these proven ways, you can ensure a comfortable and stylish fit for your acrylic beanie, making it your go-to accessory for any occasion.
Expert Tips for Shrinking Your Acrylic Beanie without Damaging It
Acrylic beanies are a popular accessory during the cooler months, providing warmth and style. However, sometimes these beanies can stretch out over time, leaving them loose and ill-fitting. If you find yourself with an oversized acrylic beanie that you’d like to shrink down to the perfect size, follow these expert tips to achieve the desired result without causing any damage.
1. Use Hot Water
Hot water is an effective method to shrink acrylic beanies. Start by filling a basin or sink with hot water, ensuring that it’s not boiling. Submerge the beanie in the hot water and let it soak for around 10 minutes. The heat will help the fibers contract, resulting in a tighter fit.
2. Add Fabric Softener
Adding fabric softener to the hot water can enhance the shrinking process. Fabric softeners contain chemicals that help relax the fibers, making them more susceptible to shrinking. Follow the instructions on the fabric softener bottle and mix the appropriate amount in the hot water. Let the beanie soak in this solution for 10-15 minutes.
3. Hand Wash the Beanie
Gently agitate the beanie in the hot water and fabric softener solution. Use your hands to knead and squeeze the beanie, ensuring that the entire surface is exposed to the hot water. Be careful not to stretch or pull the fabric excessively, as it may cause damage. Continue this process for a few minutes to allow the fibers to contract.
4. Rinse with Cold Water
After the desired shrinking has been achieved, rinse the beanie with cold water. Cold water will help set the fibers in their shrunken state. Thoroughly rinse out any remaining fabric softener and hot water from the beanie.
5. Gently Squeeze Out Excess Water
Once rinsed, gently squeeze the beanie to remove excess water. Avoid twisting or wringing it out, as this can cause stretching or damage. Place the beanie on a clean towel and roll it up to absorb additional moisture.
6. Air Dry the Beanie
Lay the beanie flat on a clean, dry towel or place it on a drying rack. Allow it to air dry naturally, away from direct sunlight or heat sources. Avoid using a dryer, as the heat can cause further stretching or damage to the beanie.
By following these expert tips, you can successfully shrink your acrylic beanie without damaging it. Enjoy a snug and comfortable fit once again, and rock your beanie with confidence!
5. Foolproof Ways to Resize Your Acrylic Beanie for a Snug and Stylish Fit
Acrylic beanies are a popular choice for keeping warm and stylish during the colder months. However, finding the perfect fit can be a challenge, as beanies often come in a one-size-fits-all design. Thankfully, there are foolproof ways to resize your acrylic beanie for a snug and stylish fit. In this section, we’ll explore five methods that you can try to ensure your beanie fits comfortably and looks great on you.
1. Use a Hairdryer
If your acrylic beanie is a little too loose, you can use a hairdryer to shrink it slightly. Start by putting on the beanie and adjusting it to the desired fit. Then, using a hairdryer set on high heat, concentrate the airflow on the areas that need to be resized. Move the hairdryer in a circular motion, evenly distributing the heat. As you do this, gently pull the beanie in the opposite direction to provide resistance. This will help the beanie shrink and conform to the shape of your head.
2. Wet and Stretch Method
If your beanie is too tight, the wet and stretch method can help you achieve a better fit. Begin by wetting the beanie thoroughly with warm water. This will make the fabric more pliable. Once it is damp, put on the beanie and gently stretch it in the areas where you need more room. You can use your hands to manipulate the fabric or place the beanie on a round object, like a bowl or a balloon, to stretch it overnight. Allow the beanie to dry completely before wearing it again.
3. Sew in an Elastic Band
If your acrylic beanie is consistently loose and resizing methods don’t provide the desired fit, you can sew an elastic band into the brim. This will add some tension and ensure a snug fit. Start by measuring the circumference of your head and cut a piece of elastic slightly shorter than that measurement. Fold the brim of the beanie outward and sew the elastic band onto the inner layer of the fabric. Be sure to distribute the tension evenly around the brim. Once complete, fold the brim back into place, and you’ll have a custom-fitted beanie.
4. Add a Hat Size Reducer
If you prefer a more temporary solution, you can use a hat size reducer to adjust the fit of your acrylic beanie. These adhesive strips or foam inserts can be attached inside the band of the beanie to reduce its circumference. Simply place the hat size reducer where you need it most and press firmly to secure it. Hat size reducers are readily available online or at your local craft or hat store, making it a convenient option for resizing your beanie.
5. Visit a Professional Tailor or Seamstress
If you’re unsure about resizing your acrylic beanie yourself or want a more precise adjustment, consider visiting a professional tailor or seamstress. They have the expertise and tools to resize your beanie to perfection. Bring your beanie to the tailor or seamstress and explain the fit issues you’re experiencing. They will be able to assess the situation and make the necessary alterations to ensure your beanie fits comfortably and looks stylish.
In summary, finding the right fit for your acrylic beanie doesn’t have to be a challenge. By using these foolproof methods, you can resize your beanie for a snug and stylish fit. Whether you choose to use a hairdryer, wet and stretch method, sew in an elastic band, add a hat size reducer, or visit a professional tailor or seamstress, you’ll be able to customize your beanie to suit your needs. With a well-fitted acrylic beanie, you can stay warm, comfortable, and fashionable all season long.
FAQs
1. How can I shrink an acrylic beanie?
To shrink an acrylic beanie, start by washing it in hot water using a washing machine or by hand. Then, put it in the dryer on high heat until it has dried completely. Repeat this process if further shrinking is desired. However, please note that acrylic material may have limited shrinkage capabilities compared to natural fibers.
2. Can I shrink an acrylic beanie without washing it?
While washing the beanie is the most effective way to shrink it, you can also try using a hot steam iron. Set the iron to the highest heat setting and gently steam the beanie, pulling and stretching it slightly as you go. This method may result in some shrinkage, but it might not be as effective as washing and drying.
3. What precautions should I take when shrinking an acrylic beanie?
When shrinking an acrylic beanie, it’s important to follow the care instructions provided by the manufacturer. Be mindful of the heat settings on your washing machine and dryer to avoid damaging the beanie. If using a steam iron, be cautious not to scorch or melt the fabric. Always test a small, inconspicuous area before attempting to shrink the entire beanie.
Conclusion
In conclusion, shrinking an acrylic beanie can be a simple and effective way to achieve a better fit. By following the right method, you can ensure that your beanie fits comfortably on your head without compromising its quality.
Remember to always check the care instructions provided by the manufacturer before attempting to shrink your acrylic beanie. It is important to use the appropriate temperature and washing method to prevent damage to the fabric.
Whether you choose to use hot water, a washing machine, or steam, make sure to monitor the process closely to avoid over-shrinking. Taking gradual steps and testing the size along the way can help you achieve the desired fit without going too far.
By following these steps, you can confidently shrink your acrylic beanie and enjoy a snug and comfortable fit that complements your style.