
Painting cardboard without warping can be a tricky task, but with the right techniques, you can achieve excellent results.
Firstly, choose a high-quality paint specifically designed for cardboard surfaces. Prep the cardboard by lightly sanding it to create a smooth and even surface.
Next, apply a primer to the cardboard to prevent the paint from soaking in and causing warping. Use thin, even coats of paint, allowing each layer to dry completely before applying the next.
Avoid using excessive amounts of water-based paint, as this can cause the cardboard to warp. Lastly, store your painted cardboard in a cool, dry place to prevent any moisture-related issues.
By following these steps, you can paint cardboard without worrying about warping and achieve a professional-looking finish.
2. Choosing the Right Paint for Cardboard: A Comprehensive Guide
Painting cardboard can be a fun and creative way to transform plain cardboard into a vibrant and eye-catching art piece or craft project. However, not all paints are suitable for use on cardboard, as the material’s porous nature and low water resistance can cause certain paints to bleed, warp, or not adhere properly. To ensure successful and long-lasting results, it is important to choose the right paint for your cardboard project. This comprehensive guide will walk you through the various types of paint suitable for cardboard and provide tips on how to achieve the best outcome.
1. Acrylic Paint
Acrylic paint is one of the most popular choices for painting cardboard due to its versatility and ease of use. It is available in a wide range of colors and finishes, and it dries quickly to a durable and water-resistant finish. Acrylic paint also adheres well to cardboard surfaces, providing a smooth and even coverage. When using acrylic paint on cardboard, it is recommended to apply a primer or gesso to create a smoother surface and enhance the paint’s adhesion.
2. Tempera Paint
Tempera paint is another suitable option for painting cardboard. It is a water-based paint that is easy to work with and has good coverage. Tempera paint dries to a matte finish and adheres well to cardboard. However, it is important to note that tempera paint is not as durable or water-resistant as acrylic paint. To protect a tempera-painted cardboard surface from moisture or damage, it is advisable to apply a clear sealant or varnish.
3. Spray Paint
For larger cardboard projects or when a smooth and even finish is desired, spray paint can be an excellent choice. Spray paint provides quick and uniform coverage, allowing you to achieve a professional-looking result. It is important to select a spray paint specifically designed for use on cardboard and follow the instructions on the can for the best outcome. It is also recommended to use spray paint in a well-ventilated area or outdoors to avoid inhaling fumes.
4. Watercolor Paint
If you prefer a more translucent and delicate look for your cardboard project, watercolor paint can be a great option. Watercolor paint creates beautiful washes of color and allows for easy blending and layering. However, it is important to note that watercolor paint can warp or distort the cardboard if applied too heavily or with excessive water. It is recommended to use a watercolor paper or heavy-weight cardboard specifically designed for watercolor painting to avoid damage.
5. Oil Paint
While less commonly used for cardboard painting, oil paint can also be applied to cardboard surfaces. It provides rich and vibrant colors with a glossy finish. However, oil paint takes a longer time to dry compared to acrylic or tempera paint. It is important to note that oil paint requires proper ventilation and can emit strong odors. Additionally, oil paint can saturate the cardboard and cause warping if applied too heavily.
Summary
Choosing the right paint for your cardboard project is essential for achieving the desired results. Acrylic paint is a versatile and durable option suitable for most cardboard applications. Tempera paint offers good coverage but may require additional protection. Spray paint provides quick and even coverage for larger projects. Watercolor paint creates a translucent and delicate look but should be used with caution to avoid warping. Oil paint is an option for those seeking vibrant colors and glossy finish, but it requires longer drying time and proper ventilation.
By considering the nature of your project, desired outcome, and the tips provided in this comprehensive guide, you can confidently choose the right paint for your cardboard and unleash your creativity!
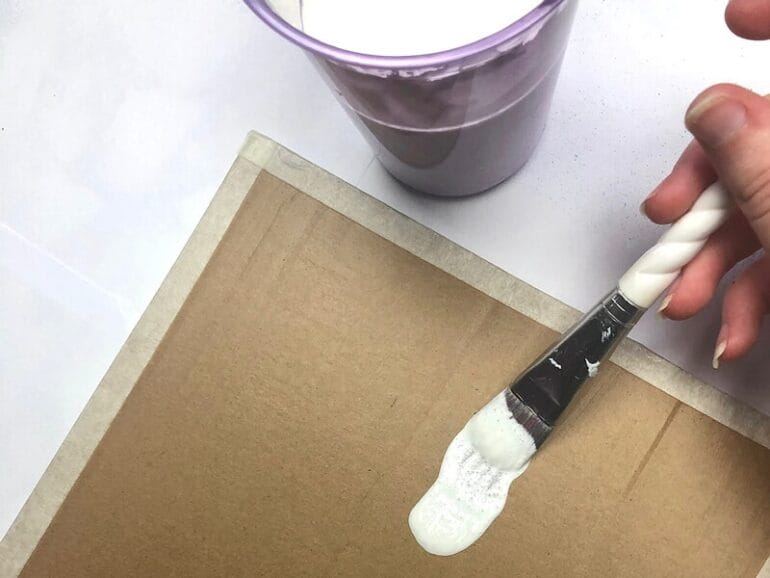
Applying Primer on Cardboard: Key Steps for a Flawless Finish
When it comes to working with cardboard, applying primer is an essential step to ensure a flawless finish. Primer not only provides a smooth surface for paint adhesion but also helps to seal the cardboard, preventing it from absorbing moisture and warping. Whether you’re working on a DIY project or creating cardboard props, here are the key steps you need to follow for applying primer on cardboard.
Gather Your Materials
To begin, gather all the materials you’ll need for the primer application:
- Cardboard piece
- Primer (acrylic or latex-based)
- Paintbrush or foam brush
- Sandpaper (medium grit)
- Painter’s tape (optional)
- Dust mask
Having everything ready beforehand will make the process smoother and more efficient.
Prepare the Cardboard Surface
Before applying primer, it’s important to prepare the cardboard surface properly:
- Start by removing any dust or debris from the cardboard. Use a clean cloth or a soft brush to gently wipe away any loose particles.
- If the cardboard has any rough edges or imperfections, use sandpaper to smooth them out. Be gentle to avoid damaging the cardboard.
- For better adhesion, consider lightly sanding the entire surface of the cardboard. This will help the primer to adhere more effectively.
- If you’re working with multiple cardboard pieces, arrange them in the desired pattern and secure them with painter’s tape to create a seamless surface.
Apply the Primer
Now that the cardboard surface is prepared, it’s time to apply the primer:
- Shake the primer can or stir the primer thoroughly if you’re using a container.
- Dip your paintbrush or foam brush into the primer and remove any excess by gently tapping it against the side of the container.
- Begin applying the primer to the cardboard in smooth, even strokes. Start from one corner and work your way across the surface, covering the entire area.
- Make sure to apply a thin, even layer of primer. Avoid applying too much primer at once, as it may create drips or an uneven finish.
- If you’re working with multiple cardboard pieces, apply primer to each piece individually before securing them together.
- Allow the primer to dry completely according to the manufacturer’s instructions. This usually takes around 1-2 hours, but it may vary depending on the type of primer.
Sand and Repeat (Optional)
After the primer has dried, you may choose to sand the surface lightly to ensure a smoother finish. Use fine-grit sandpaper and gently sand the surface in a circular motion. Wipe away any dust particles with a clean cloth before applying a second coat of primer.
If desired, you can apply a second coat of primer following the same steps mentioned above. This will provide additional coverage and enhance the durability of the finish.
Summary
Applying primer on cardboard is a crucial step to achieve a flawless finish in your projects. By following the key steps outlined above, you can ensure that the primer adheres well to the cardboard surface, providing a smooth and even base for your paint or other finishing techniques. Remember to prepare the cardboard surface properly, apply the primer in thin and even layers, and allow it to dry completely before proceeding with the next steps of your project. With these guidelines, you’ll be able to create stunning cardboard creations with a professional-looking finish.
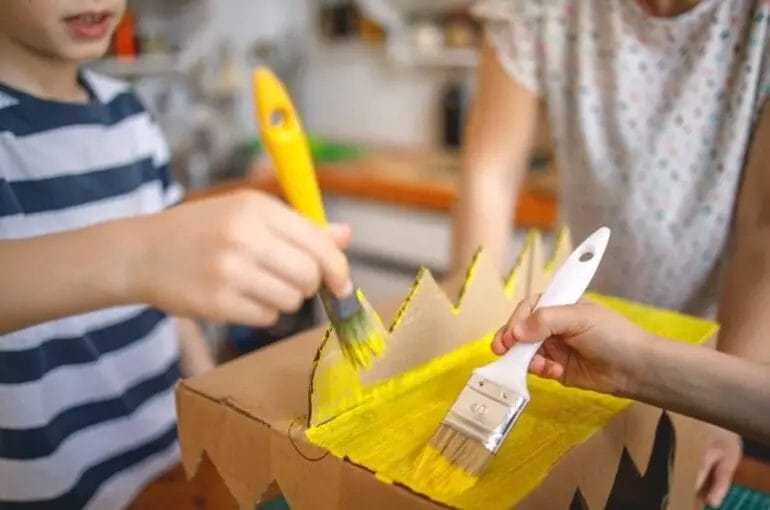
Techniques for Painting Cardboard: Brush, Spray, and Other Options
Cardboard is a versatile and affordable material that can be used for various projects, from creating props to making custom packaging. One of the best ways to enhance the look of cardboard is by painting it. Painting cardboard not only adds color but also provides protection, making it more durable and resistant to wear and tear. In this section, we will explore different techniques for painting cardboard, including brush application, spray painting, and other options.
1. Brush Painting
Brush painting is the most commonly used technique for painting cardboard. It allows for precise control and is suitable for both small and large areas. Here are the steps to brush paint cardboard:
- Clean the surface: Before painting, ensure that the cardboard surface is clean and free from any dust or debris. Use a soft cloth or brush to gently remove any dirt.
- Prepare the paint: Choose a high-quality acrylic or latex paint that is suitable for cardboard. Mix the paint well to ensure a consistent color.
- Prime the cardboard (optional): If you want to achieve better paint adhesion and durability, it is recommended to prime the cardboard with a suitable primer. Apply the primer evenly and let it dry according to the manufacturer’s instructions.
- Apply the paint: Dip a paintbrush into the paint and start applying it to the cardboard surface using even strokes. Work in small sections and apply multiple thin coats for better coverage. Allow each coat to dry before applying the next one.
- Seal the paint (optional): To protect the painted surface and add a glossy or matte finish, you can apply a clear sealant or varnish. This step is particularly important if the painted cardboard will be exposed to moisture or frequent handling.
2. Spray Painting
Spray painting is another popular method for painting cardboard. It allows for quicker and more even coverage, especially on larger surfaces. Here’s how to spray paint cardboard:
- Prepare the area: Choose a well-ventilated area, preferably outdoors, and cover the surrounding surfaces with a drop cloth or newspaper to protect them from overspray.
- Clean the surface: Just like with brush painting, make sure the cardboard surface is clean and free from any dirt or debris.
- Prime the cardboard (optional): Priming the cardboard before spray painting can help improve the adhesion and longevity of the paint. Use a primer specifically designed for spray painting.
- Shake the spray paint can: Shake the can vigorously for a few minutes to ensure that the paint is thoroughly mixed.
- Spray the paint: Hold the spray paint can approximately 6-8 inches away from the cardboard surface and apply the paint using smooth, sweeping motions. Start spraying off the cardboard and then move across it in a steady back-and-forth motion. Apply multiple thin coats for better coverage, allowing each coat to dry before applying the next one.
- Seal the paint (optional): Similar to brush painting, you can seal the spray paint on cardboard with a clear varnish or sealant for added protection and a desired finish.
3. Other Options
Aside from brush and spray painting, there are other techniques and options you can consider when painting cardboard:
- Stamping or stenciling: Create unique patterns and designs on the cardboard surface using stamps or stencils. Apply paint with a brush or sponge over the stamp or stencil to transfer the design onto the cardboard.
- Sponging: Use a sponge to dab paint onto the cardboard surface. This technique adds texture and creates an interesting effect.
- Airbrushing: For more advanced painters, airbrushing can achieve smooth and professional-looking results. It requires an airbrush kit and some practice to master the technique.
- Mixed media: Combine painting with other art mediums such as collage, decoupage, or fabric to create unique and visually appealing cardboard projects.
Experiment with these techniques and find the one that suits your project best. Remember to let the paint dry completely before handling or using the painted cardboard. With the right technique and a creative approach, you can transform plain cardboard into a vibrant and eye-catching masterpiece.
Preventing Warping: Tips and Tricks to Maintain the Shape of Cardboard
Cardboard is a versatile and cost-effective material that is commonly used for packaging, storage, and crafting. However, one common issue with cardboard is its tendency to warp over time, especially when exposed to moisture or improper storage conditions. Warping not only compromises the structural integrity of cardboard but also affects its functionality and appearance. In this section, we will discuss some useful tips and tricks to prevent warping and maintain the shape of cardboard.
1. Store in a Dry Environment
Moisture is the main culprit behind cardboard warping. To prevent this, it is crucial to store cardboard in a dry environment. Avoid storing cardboard in areas prone to high humidity or dampness, such as basements or bathrooms. Instead, opt for a cool and dry location, preferably with low humidity levels.
2. Use Climate-Controlled Storage
If you need to store cardboard for an extended period or in areas with fluctuating temperature and humidity, consider using climate-controlled storage units. These units regulate temperature and humidity levels, providing an ideal environment for preserving the shape and integrity of cardboard. Climate-controlled storage can be particularly beneficial for storing valuable or sensitive items made of cardboard.
3. Avoid Direct Contact with Water
To prevent warping, it is crucial to keep cardboard away from direct contact with water. If you need to transport or store cardboard items in wet conditions, ensure they are adequately protected. Use waterproof covers or plastic wrap to shield the cardboard from moisture. Additionally, avoid placing wet objects on top of cardboard, as the water can seep through and cause warping.
4. Maintain Proper Weight Distribution
Uneven weight distribution can lead to distortion and warping of cardboard. When packing or storing items in cardboard boxes, distribute the weight evenly to prevent stress on specific areas. Avoid overpacking boxes or placing heavy objects on top of delicate cardboard surfaces. By maintaining proper weight distribution, you can minimize the risk of warping and prolong the lifespan of your cardboard items.
5. Use Supportive Inserts or Reinforcements
In cases where you need to store or display delicate or structurally weak cardboard pieces, consider using supportive inserts or reinforcements. These can be in the form of additional cardboard layers, foam inserts, or custom-designed supports. These inserts help distribute weight evenly and provide added stability, reducing the chances of warping.
6. Minimize Exposure to Heat
Heat can cause cardboard to expand and warp. To prevent this, avoid exposing cardboard items to excessive heat sources, such as direct sunlight or heaters. Store cardboard away from radiators, heating vents, or other heat-emitting appliances. Additionally, if you need to transport cardboard in a hot climate, try to keep it in a shaded area or use insulated packaging to minimize heat absorption.
7. Handle with Care
Proper handling can also contribute to preventing warping in cardboard. When moving or carrying cardboard items, avoid bending or applying excessive pressure to vulnerable areas. Use caution while stacking cardboard boxes to prevent crushing or distortion. By handling cardboard with care, you can preserve its shape and prevent unnecessary warping.
By following these tips and tricks, you can effectively prevent warping and maintain the shape of cardboard items. Whether you are using cardboard for storage, packaging, or crafting purposes, keeping it in optimal condition ensures its functionality and prolongs its usability.
FAQs
How can I paint cardboard without warping it?
To paint cardboard without warping, you can follow these steps: 1. Use a primer to create a smooth surface. 2. Apply thin, even layers of paint to prevent saturation. 3. Allow each layer to dry completely before adding another. 4. Avoid using excessive amounts of water-based paint or water. 5. Use a light touch when painting to minimize moisture absorption. 6. Consider sealing the painted cardboard with a clear, protective spray.
What type of paint is best for cardboard?
Acrylic paint is commonly used for painting on cardboard. It dries quickly, adheres well, and offers a wide range of colors. It is also water-based, which makes cleanup easier. However, if you are painting a large surface or want a more vibrant finish, you can also consider using oil-based paints or spray paints specifically formulated for cardboard.
Can I use watercolors on cardboard?
While watercolors can be used on cardboard, it is important to note that cardboard is absorbent and may warp or buckle when exposed to excessive moisture. To minimize this, you can try using less water and apply thin layers of paint. It is recommended to test a small area first to see how the watercolors react with the cardboard surface.
Conclusion:
In conclusion, painting cardboard without warping is possible with a few simple steps. First, ensure that the cardboard is clean and free from any dirt or debris. Next, apply a thin layer of primer to create a smooth surface for the paint to adhere to. Allow the primer to dry completely before applying the paint. Use thin coats of paint, allowing each layer to dry before applying the next one. This will prevent excessive moisture from warping the cardboard. Avoid using excessive water or heavy layers of paint, as this can cause the cardboard to warp. With proper preparation and care, you can achieve a beautiful and durable painted cardboard creation.
Remember, it is always a good idea to test a small corner of the cardboard before proceeding with the full painting process. This will help you assess the compatibility and the possible effects of the paint on the cardboard. Additionally, consider using acrylic paints or spray paints as they tend to dry quickly and adhere well to cardboard surfaces. Take your time and be patient throughout the painting process to ensure the best results. Now that you have the knowledge, go ahead and create stunning painted cardboard projects without worrying about warping!