
Painting a sky with acrylics is a delightful artistic endeavor that allows you to capture the captivating beauty of nature on canvas. With the versatility of acrylic paints, you can easily create stunning skies with a variety of colors and textures. Whether you are a beginner or an experienced artist, this guide will provide you with valuable tips and techniques to create a mesmerizing sky painting using acrylics.
First, start by selecting the colors for your sky. Consider the time of day and the mood you want to convey in your artwork. For a serene daytime sky, choose shades of blue and white. For a vibrant sunset or sunrise, experiment with warm hues like oranges, pinks, and purples.
Next, prepare your canvas by applying a thin layer of gesso to create a smooth surface. This will help the paint adhere better and allow you to blend colors seamlessly. Once the gesso is dry, sketch the outline of your sky using a pencil.
As you begin painting, remember to work from the top of the canvas downwards. Start by applying a light base color, gradually building up the layers to create depth and dimension. Use a large brush and broad strokes to cover larger areas of the sky.
For added realism, try incorporating different brush techniques such as dry brushing or stippling to create texture in the clouds. Blend the colors gently with a clean brush or a sponge to achieve a soft, ethereal effect
Creating Realistic Clouds in the Sky with Acrylics
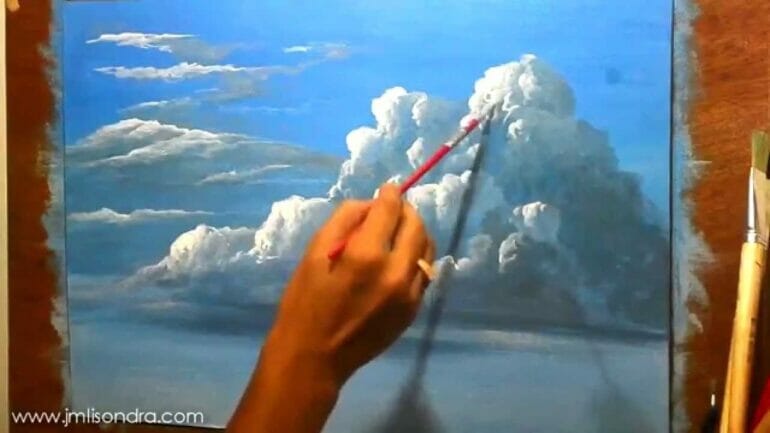
Painting clouds can bring life and depth to any landscape painting. With acrylics, you can easily create realistic and vibrant clouds that add a touch of magic to your artwork. In this section, we will explore the step-by-step process of painting clouds using acrylic paints.
Gather Your Materials
Before you start painting, make sure you have all the necessary materials at hand. Here’s a list of what you’ll need:
- Acrylic paints in various shades of white, gray, and blue
- Paintbrushes in different sizes, including flat and round brushes
- A palette or a mixing surface
- A canvas or a painting surface
- A cup of water
- Paper towels
Prepare Your Workspace
Find a comfortable and well-lit area to set up your workspace. Lay down a protective covering to avoid any accidental spills or stains on your working surface.
Start with a Base Color
Begin by applying a thin layer of blue paint to your canvas. This will serve as the base color for the sky. Use a large flat brush and apply the paint in horizontal strokes to create a smooth and even background.
Add Depth with Layers
To achieve a realistic cloud effect, you’ll need to build up layers of paint. Start by mixing a light gray color using white and a touch of black or blue. Use a round brush to apply this mixture in soft circular motions, creating the shape of the clouds.
Continue adding layers of varying shades of gray and white, blending them together using gentle brush strokes. Remember to leave some areas of the base color peeking through to add depth and dimension to your clouds.
Create Highlights and Shadows
To make your clouds appear more three-dimensional, add highlights and shadows. Mix a lighter shade of white and apply it to the areas where the light hits the clouds. Use a smaller brush and apply the paint in short, feathery strokes.
For the shadows, mix a darker shade of gray and lightly brush it along the edges of the clouds. This will create a sense of depth and realism.
Refine and Blend
Take a step back and assess your painting. Use a clean brush to blend any harsh lines or edges. Soften the transitions between colors to create a seamless and natural-looking sky.
Final Touches
Once you are satisfied with the overall appearance of your clouds, you can add any additional details or elements to your painting. This could include birds, trees, or other elements that complement your desired landscape.
Allow your painting to dry completely before adding any final touches or varnishing.
Summary
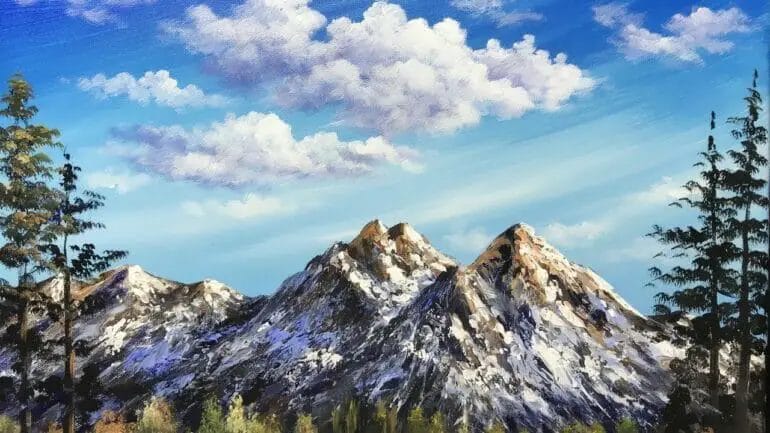
Creating realistic clouds with acrylics is a rewarding process that allows you to bring life and movement to your artwork. By layering different shades of white, gray, and blue, you can achieve a sense of depth and realism. Remember to blend your colors and add highlights and shadows to create a three-dimensional effect. With practice and experimentation, you’ll be able to paint stunning clouds that add a touch of magic to your paintings.

Mastering Different Techniques for Painting a Sky
Painting a sky is an essential skill for any artist, as it sets the mood and atmosphere of a painting. Whether you are creating a landscape, a seascape, or a cityscape, mastering different techniques for painting a sky can greatly enhance the overall composition of your artwork. In this section, we will explore various techniques that you can use to paint a realistic and expressive sky.
1. Wet-on-Wet Technique
The wet-on-wet technique involves applying paint onto a wet surface, allowing the colors to blend and create soft transitions. This technique is ideal for painting vibrant and dynamic skies, such as those seen during sunrise or sunset. To paint a sky using the wet-on-wet technique, start by wetting your canvas or paper with a clean brush or water spray. Then, apply the desired colors onto the wet surface and use a brush or palette knife to blend them together. This technique allows for the seamless blending of colors and the creation of dramatic sky effects.
2. Dry Brush Technique
The dry brush technique involves using a dry brush with minimal paint to create texture and depth in the sky. This technique is perfect for painting cloudy or stormy skies, where you want to capture the rough and textured appearance of the clouds. To paint a sky using the dry brush technique, load a small amount of paint onto a dry brush and lightly drag it across the surface, allowing the bristles to create uneven strokes and texture. This technique adds a sense of realism and dimension to your sky.
3. Glazing Technique
The glazing technique involves applying thin layers of transparent or translucent paint over an already dried base layer. This technique is ideal for painting subtle and soft skies, such as those seen on a clear day or during dusk. To paint a sky using the glazing technique, start by applying a solid base layer of color. Once the base layer is completely dry, mix a small amount of transparent or translucent paint with a glazing medium and apply it gently over the base layer. This technique allows for the gradual build-up of color and creates a luminous and ethereal effect.
4. Impasto Technique
The impasto technique involves applying thick layers of paint onto the canvas or paper, creating texture and depth. This technique is ideal for painting stormy or turbulent skies, where you want to capture the energy and movement of the clouds. To paint a sky using the impasto technique, load a large amount of paint onto a palette knife or a stiff brush and apply it directly to the surface with bold and expressive strokes. This technique adds a sense of drama and intensity to your sky.
5. Stippling Technique
The stippling technique involves creating a sky using small dots or strokes of paint, creating a stippled or pointillist effect. This technique is perfect for painting starry nights or distant skies, where you want to capture the twinkling of stars or the softness of distant clouds. To paint a sky using the stippling technique, load a small brush with a small amount of paint and gently tap or stroke it onto the surface, creating a pattern of dots or strokes. This technique adds a sense of delicacy and detail to your sky.
By mastering these different techniques for painting a sky, you can expand your artistic repertoire and create stunning and realistic skies in your artworks. Experiment with these techniques and find the ones that resonate with your artistic style and the mood you wish to convey. With practice and experimentation, you can confidently paint skies that enhance the overall composition of your paintings.
Adding Depth and Dimension to Your Acrylic Sky
Acrylic painting is a versatile medium that allows artists to create vibrant and dynamic skies. By mastering techniques to add depth and dimension to your acrylic sky, you can bring your paintings to life and evoke a sense of realism. In this section, we will explore various methods and tips to enhance your skies.
1. Layering Colors
One effective way to create depth in your acrylic sky is by layering colors. Start by applying a base layer of the lightest color that represents the overall tone of the sky. Then, gradually build up the layers by introducing darker shades and contrasting colors. This technique mimics the natural transition of colors in the sky, creating a sense of depth and atmosphere.
When layering colors, it’s essential to consider the position of the light source. Add highlights and shadows accordingly to enhance the three-dimensional effect. By blending and overlapping the layers, you can achieve a more realistic and textured sky.
2. Using Atmospheric Perspective
Another technique to add depth to your acrylic sky is by employing atmospheric perspective. This principle suggests that objects in the distance appear lighter, less detailed, and have a bluish hue due to the presence of atmospheric particles. By incorporating these elements into your sky, you can create the illusion of depth and distance.
To achieve this effect, start by painting the foreground sky with more vibrant and saturated colors. As you move towards the background, gradually lighten the colors and add a touch of blue. This gradual shift in tones will make the sky appear deeper and create a sense of space.
3. Creating Clouds with Texture
Clouds play a significant role in adding dimension and interest to your acrylic sky. To create realistic-looking clouds, consider using various techniques to add texture.
You can use a dry brush technique to create wispy and feathery clouds. Load a dry brush with a small amount of paint and lightly drag it across the canvas, leaving behind thin streaks. This method mimics the appearance of soft, distant clouds.
For more defined and fluffy clouds, use a palette knife to apply thick and impasto strokes. This technique adds texture and depth to the clouds, making them appear more three-dimensional.
4. Incorporating Atmospheric Effects
To further enhance the depth and dimension of your acrylic sky, consider incorporating atmospheric effects such as sunsets, sunrises, and haze. These elements not only add visual interest but also create a sense of atmosphere in your painting.
When painting sunsets or sunrises, use warm, vibrant colors near the horizon and gradually transition to cooler tones as you move upwards. This color gradient creates depth and captures the ethereal beauty of these natural phenomena.
Haze can be achieved by adding a thin layer of translucent white or gray paint over your sky. This technique softens the edges and adds a sense of distance, creating a hazy and atmospheric effect.
5. Experimenting with Brushstrokes and Blending
Lastly, don’t be afraid to experiment with different brushstrokes and blending techniques to add depth and dimension to your acrylic sky.
Using various brush sizes and styles, such as flat brushes for wide strokes or fan brushes for softer edges, can create different effects and textures in the sky. You can also try wet-on-wet blending, where you apply wet paint onto wet paint, to achieve seamless transitions and gradients.
Remember to step back and observe your painting from a distance to ensure the overall effect is cohesive and captures the desired depth and dimension.
Summary
Adding depth and dimension to your acrylic sky involves layering colors, using atmospheric perspective, creating clouds with texture, incorporating atmospheric effects, and experimenting with brushstrokes and blending. By mastering these techniques and adding your artistic flair, you can create captivating and realistic skies that bring a sense of life and atmosphere to your acrylic paintings.
Enhancing Your Sky Painting with Unique Textures and Details
When it comes to creating a beautiful sky painting, adding unique textures and details can elevate your artwork to new heights. By incorporating these elements into your composition, you can bring depth, dimension, and visual interest to your sky. In this section, we will explore various techniques and ideas to enhance your sky painting with unique textures and details.
1. Cloud Formation and Textures
One of the most effective ways to add texture and detail to your sky painting is by focusing on the formation and depiction of clouds. Clouds are not only visually appealing but also provide an opportunity to introduce different textures and patterns into your artwork.
You can experiment with various cloud formations such as cumulus, stratus, or cirrus clouds. Each type of cloud has its own unique texture, shape, and appearance. By studying reference images or observing the sky in real life, you can gain inspiration and understanding of how to accurately capture and represent different cloud formations.
To create realistic cloud textures, you can use techniques like dry brushing, stippling, or glazing. These techniques allow you to build up layers of paint, creating a sense of depth and three-dimensionality. Additionally, you can use different brush sizes and shapes to vary the texture and create a more dynamic sky.
2. Atmospheric Effects
Another way to enhance your sky painting is by incorporating atmospheric effects. These effects add realism and create a sense of depth in your artwork. Atmospheric effects include elements such as haze, mist, or atmospheric perspective.
To create the illusion of distance and depth, you can use the technique of atmospheric perspective. This technique involves gradually reducing the saturation, contrast, and detail of objects as they recede into the background. By applying this technique to your sky, you can create a sense of depth and distance, making your painting more visually compelling.
Haze and mist can also add a mysterious and ethereal quality to your sky painting. You can achieve this effect by using soft brush strokes and blending techniques to create a soft, diffused look. Additionally, you can experiment with glazing techniques to create subtle shifts in color and tone, adding to the atmospheric effect.
3. Incorporating Unique Elements
To infuse your sky painting with a sense of uniqueness and creativity, consider incorporating unconventional elements and details. These elements can add personality and make your artwork stand out.
For example, you can add birds or other flying creatures to your sky painting. Birds in flight can create a sense of movement and life in your artwork. Additionally, you can experiment with adding other unique elements such as hot air balloons, kites, or even celestial objects like shooting stars or a vibrant rainbow.
By thoughtfully incorporating these elements into your composition, you can create a narrative or evoke specific emotions in your viewers. Remember to pay attention to scale, placement, and balance to ensure that these unique details complement and enhance the overall composition of your sky painting.
4. Adding Dynamic Lighting
Lighting plays a crucial role in setting the mood and atmosphere of your sky painting. By incorporating dynamic lighting effects, you can create a sense of drama and visual interest.
One technique to add dynamic lighting is by introducing a sunrise or sunset scene. These moments provide a golden opportunity to play with warm, vibrant colors and create striking contrasts between light and shadow. Additionally, you can experiment with the interplay of light and clouds, capturing the rays of sunlight filtering through the clouds.
Another way to add dynamic lighting is by depicting the sky during different weather conditions. You can explore the dramatic lighting effects of a stormy sky, with dark, brooding clouds and moments of intense light breaking through.
Overall, by considering the lighting conditions and experimenting with different techniques, you can bring a sense of energy and visual impact to your sky painting.
Summary
Enhancing your sky painting with unique textures and details is a wonderful way to take your artwork to the next level. By focusing on cloud formation and textures, incorporating atmospheric effects, adding unique elements, and playing with dynamic lighting, you can create a captivating sky painting that stands out. Remember to experiment, observe the sky, and let your creativity soar to achieve stunning results.
FAQs
1. How can I paint a sky with acrylics?
To paint a sky with acrylics, start by choosing the colors you want to use. Use a large brush to paint the sky with a base color, blending it smoothly. Then, add lighter colors near the horizon and darker colors as you move upwards. Use a dry brush technique to create clouds, and blend them with the surrounding colors. Finally, add details like stars or a sunset if desired.
2. What techniques can I use to create a realistic sky with acrylics?
To create a realistic sky with acrylics, you can use techniques like wet-on-wet blending, dry brushing, and layering. Wet-on-wet blending involves applying wet paint onto a wet surface to achieve smooth transitions between colors. Dry brushing creates texture and depth by using a dry brush with a small amount of paint. Layering involves building up multiple transparent layers to create depth and luminosity in the sky.
3. Are there any tips for painting a sky with acrylics?
Here are some tips for painting a sky with acrylics: Use a reference photo for inspiration and guidance. Start with a light hand and gradually build up the colors and details. Use different brush sizes to create different effects. Experiment with different techniques to achieve the desired look. Practice blending and layering to create smooth transitions. Don’t be afraid to make mistakes and learn from them.
Conclusion
In conclusion, painting a sky with acrylics can be a fun and fulfilling artistic endeavor. With a few simple techniques and a bit of practice, you can create stunning and realistic skies that will add depth and beauty to your paintings. Remember to start with a solid understanding of color theory and to use a variety of brush strokes to create texture and movement in your sky. Don’t be afraid to experiment and let your creativity soar as you blend and layer different shades and hues. With patience and perseverance, you’ll be able to master the art of painting a captivating sky with acrylics.