
Looking to create stunning and unique artwork with acrylics? One technique you should try is making acrylic skins. These thin, flexible sheets of dried acrylic paint can be used to create collages, mixed media art, jewelry, and more.
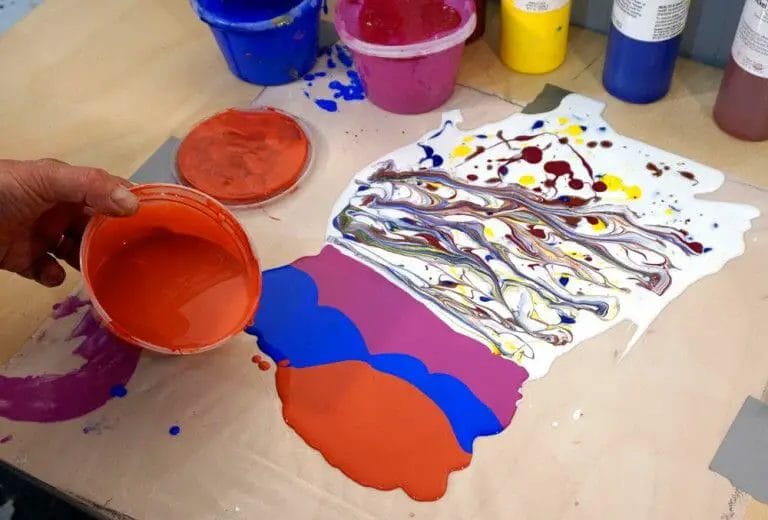
To make acrylic skins, start by applying a thin layer of acrylic paint onto a non-stick surface, such as a silicone mat or plastic sheet. Let it dry completely, then carefully peel off the dried paint. You can experiment with different colors, textures, and techniques to achieve the desired effect.
Acrylic skins can be cut, torn, or manipulated to fit your artistic vision. They can add depth, texture, and visual interest to your artwork. So, why not give it a try and unlock a whole new world of creative possibilities!
Mastering the Technique: Step-by-Step Guide to Making Acrylic Skins
Acrylic skins are a popular technique in the world of acrylic painting. They allow artists to create unique textures, patterns, and effects that can be used in various art projects. Whether you are a beginner or an experienced artist, learning how to make acrylic skins can add a new dimension to your artwork. In this section, we will provide you with a step-by-step guide to mastering the technique of making acrylic skins.
Gather Your Materials
Before you begin creating acrylic skins, it is important to gather all the necessary materials. Here’s a list of what you’ll need:
- Acrylic paint in various colors
- Palette knife or old credit card
- Silicone molds or non-stick surface
- Wax paper or plastic sheet
- Paintbrush
- Medium or pouring medium
- Plastic cups or containers
Prepare Your Workspace
Before you start creating acrylic skins, it is important to prepare your workspace. Lay down a piece of wax paper or plastic sheet to protect your surface from any paint spills or stains. Ensure that you have enough room to work comfortably and that you have access to all your materials.
Mix the Acrylic Paint
To create your acrylic skins, you will first need to mix your acrylic paint with a medium or pouring medium. This will make the paint more fluid and easier to work with. Take your plastic cup or container and pour in a small amount of acrylic paint. Add the pouring medium or medium to the paint and stir well until the mixture is smooth and consistent.
Create Your Acrylic Skins
Once you have mixed your paint, it’s time to create your acrylic skins. There are two main methods for creating acrylic skins: using silicone molds or using a non-stick surface.
If you are using silicone molds, simply pour the paint mixture into the molds and spread it evenly using a palette knife or an old credit card. Allow the paint to dry completely before removing the skins from the molds.
If you prefer to use a non-stick surface, pour the paint mixture onto the wax paper or plastic sheet. Use a paintbrush or palette knife to spread the paint in your desired pattern or texture. Let the paint dry completely before peeling it off the surface.
Experiment with Techniques
One of the exciting aspects of creating acrylic skins is the opportunity to experiment with different techniques. Here are a few ideas to get you started:
- Layering: Create multiple layers of acrylic paint to add depth and dimension to your skins.
- Marbling: Swirl different colored paints together to create a marbled effect.
- Texture: Use tools such as brushes, sponges, or even your fingers to create interesting textures.
- Combining: Cut or tear the dried acrylic skins and combine them to create collages or mixed media pieces.
Sealing and Preserving Your Acrylic Skins
Once your acrylic skins are dry, you may want to seal and preserve them for future use. You can do this by applying a layer of varnish or acrylic medium over the surface of the skins. This will protect them from damage and ensure their longevity.
In summary, creating acrylic skins is a versatile and exciting technique that can enhance your acrylic paintings and other art projects. By following this step-by-step guide, you can master the technique of making acrylic skins and unleash your creativity. So, gather your materials, prepare your workspace, mix your paint, and start experimenting with different techniques. Have fun and enjoy the process of creating unique and captivating acrylic skins!
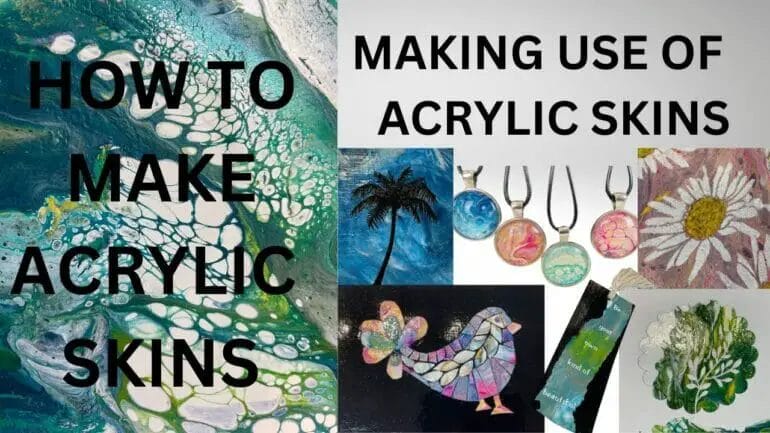
Beyond the Canvas: Innovative Ways to Use Acrylic Skins in Mixed Media Art
Acrylic skins are a versatile and exciting element in mixed media art. While they are commonly used as a background or base layer on canvas, there are many creative ways to incorporate them into your artwork. In this section, we will explore some innovative techniques for using acrylic skins in mixed media art.
1. Collage
One of the most popular ways to use acrylic skins in mixed media art is by incorporating them into collages. Cut or tear the skins into various shapes and sizes, and adhere them to your artwork using gel medium or glue. The transparent nature of acrylic skins allows you to layer them over other elements, creating a visually interesting effect. You can also experiment with overlapping the skins to add depth and texture to your collage.
2. Image Transfer
Another exciting technique to explore with acrylic skins is image transfer. Print or photocopy your desired image onto a transparency sheet and apply a layer of gel medium to the acrylic skin. Press the transparency sheet onto the skin, image side down, and smooth out any air bubbles. Allow the gel medium to dry completely before gently peeling off the transparency sheet. The image will transfer onto the acrylic skin, adding a unique and personal touch to your artwork.
3. Stenciling
Acrylic skins can also be used for stenciling in mixed media art. Cut out your desired shape or design from the skin and position it on your canvas or substrate. Secure the skin in place using tape or adhesive. Apply acrylic paint or other mediums over the stencil, making sure to cover the entire area. Once the paint is dry, carefully remove the skin to reveal your stenciled design. This technique allows for precise and intricate patterns in your artwork.
4. Embellishments
Acrylic skins can serve as unique embellishments in mixed media art. Cut the skins into small pieces or strips and use them to create texture or add accents to your artwork. You can curl, fold, or crinkle the skins to create interesting three-dimensional effects. Additionally, you can paint or draw on the skins before incorporating them into your artwork, further enhancing their visual appeal.
5. Resin Jewelry
For artists looking to explore alternative uses for acrylic skins, creating resin jewelry is a great option. Cut the skins into small shapes or embed them whole into resin molds. Mix and pour resin over the skins, ensuring they are fully covered. Allow the resin to cure according to the manufacturer’s instructions, and then remove the jewelry pieces from the molds. Polish and finish the pieces as desired, and you’ll have unique and vibrant jewelry made from acrylic skins.
6. Printmaking
Acrylic skins can also be used in printmaking techniques. Apply a layer of ink or paint onto a flat surface such as a gel plate or glass. Press the acrylic skins onto the inked surface, making sure to cover the entire skin. Carefully lift the skin off the surface, and then press it onto a piece of paper or fabric. Gently rub the back of the skin to transfer the ink or paint onto the surface. This method allows you to create multiple prints with the same skin, resulting in a series of unique and textured artworks.
In summary, acrylic skins offer endless possibilities for experimentation and creativity in mixed media art. Whether you use them in collages, image transfers, stenciling, embellishments, resin jewelry, or printmaking, acrylic skins can add depth, texture, and visual interest to your artwork. So go beyond the canvas and explore the innovative ways to incorporate acrylic skins into your mixed media creations.
Preserving Your Art: Tips for Sealing and Protecting Acrylic Skins
Acrylic skins are a popular technique in the world of mixed media art. They are created by pouring acrylic paint onto a non-stick surface and allowing it to dry, resulting in a flexible and translucent sheet of paint. These skins can then be incorporated into various art projects such as collages, jewelry, or even used as standalone pieces. If you have created acrylic skins and want to preserve them for long-lasting enjoyment, here are some tips for sealing and protecting them:
1. Clean and Prepare the Surface
Before sealing your acrylic skin, it’s important to clean and prepare the surface. Use a gentle cleanser or mild soap to remove any dirt, dust, or debris from the skin. Rinse it thoroughly with water and pat it dry with a clean cloth. This step ensures that the sealant adheres properly to the skin.
2. Choose the Right Sealant
There are several options when it comes to choosing a sealant for your acrylic skins. One popular choice is a gloss or matte varnish specifically designed for acrylic paintings. These varnishes not only protect the skin from dust and dirt but also enhance the colors and give a finished look to your artwork. Other options include clear acrylic mediums or resin, which provide a durable and glossy finish.
3. Apply the Sealant
When applying the sealant, it’s essential to follow the manufacturer’s instructions. Some sealants can be applied with a brush, while others may require spraying. Make sure to apply the sealant in thin and even layers, allowing each layer to dry completely before applying the next. This helps to avoid any streaks or bubbles in the final finish.
4. Consider UV Protection
If you want to protect your acrylic skins from the damaging effects of sunlight, consider using a sealant with UV protection. UV rays can fade the colors of your artwork over time, so using a sealant with UV filters helps to prevent this. Look for products labeled as UV-resistant or archival-grade to ensure maximum protection.
5. Allow Sufficient Drying Time
Once you have applied the sealant, allow sufficient drying time before handling or displaying your acrylic skins. This ensures that the sealant fully cures and provides optimal protection. The drying time can vary depending on the type of sealant used, so refer to the manufacturer’s instructions for guidance.
6. Store and Display Properly
To keep your acrylic skins in pristine condition, it’s important to store and display them properly. Avoid exposing them to extreme temperatures or humidity, as this can affect the integrity of the sealant. If you plan to frame your acrylic skin, use acid-free materials and consider using a UV-resistant glass or acrylic sheet to provide additional protection.
7. Regular Maintenance
Finally, to ensure the longevity of your acrylic skins, it’s important to perform regular maintenance. Dust them gently with a soft, dry cloth or use a feather duster to remove any surface dust. Avoid using harsh chemicals or abrasive materials that can damage the sealant or the skin itself.
In summary, sealing and protecting your acrylic skins is essential for preserving their beauty and longevity. By following these tips, you can ensure that your artwork remains vibrant and protected for years to come. Remember to clean and prepare the surface, choose the right sealant, apply it properly, consider UV protection, allow sufficient drying time, store and display properly, and perform regular maintenance. With these precautions in place, your acrylic skins will continue to captivate and inspire.
Inspiration Galore: Exploring Different Designs and Patterns for Acrylic Skins
Acrylic skins have gained immense popularity in the world of art and craft. These flexible and translucent sheets can be used to add unique textures and designs to various surfaces. Whether you are a beginner or an experienced artist, acrylic skins offer a plethora of possibilities to explore and experiment with.
One of the most exciting aspects of working with acrylic skins is the ability to create captivating designs and patterns. In this section, we will delve into the world of acrylic skin designs and discover diverse techniques that can help you unleash your creativity and create stunning artwork.
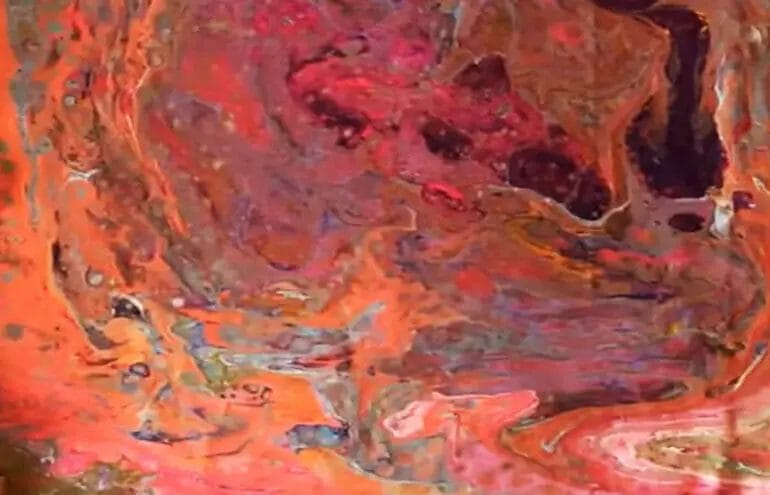
1. Abstract Designs
Abstract designs are a popular choice when it comes to acrylic skins. The fluid nature of acrylic paint allows artists to create mesmerizing and unpredictable patterns. Whether you prefer bold and vibrant colors or subtle and understated tones, abstract designs offer endless possibilities.
To create abstract designs, you can use various techniques such as pouring, dripping, or splattering the acrylic paint onto the skin. You can also experiment with different tools like brushes, sponges, or palette knives to achieve your desired effect. The key to creating captivating abstract designs is to embrace spontaneity and let the paint flow freely.
2. Geometric Patterns
If you have a penchant for clean lines and symmetry, geometric patterns are a great choice for your acrylic skins. Geometric designs can add a sense of structure and precision to your artwork. From simple shapes like squares and triangles to intricate patterns like chevrons and hexagons, the possibilities are endless.
To create geometric patterns, you can use masking techniques or stencils to define the shapes. Acrylic skins can be easily cut into desired shapes and positioned on the canvas or any other surface. You can also experiment with different color combinations to enhance the visual impact of your geometric designs.
3. Textured Effects
Creating textured effects with acrylic skins can add depth and dimension to your artwork. Texture can evoke emotions and create a tactile experience for viewers. There are several techniques that can be used to achieve interesting textured effects.
One technique is to mix various mediums like gel mediums, modeling paste, or sand with acrylic paint to create different textures. Another technique is to apply the paint onto the skin with different tools like sponges, brushes, or palette knives to create unique patterns and textures. Experimenting with different materials and techniques can lead to fascinating results.
4. Nature-Inspired Designs
Nature is a never-ending source of inspiration for artists. Acrylic skins can be used to replicate the beauty and intricacy of natural elements. Whether you want to create a realistic depiction or an abstract interpretation, nature-inspired designs can add a touch of serenity and beauty to your artwork.
You can experiment with various techniques to create nature-inspired designs with acrylic skins. For example, you can use acrylic pour techniques to create mesmerizing landscapes or use a delicate brush to capture the intricate details of flowers and plants. The versatility of acrylic skins allows you to explore different aspects of nature and bring them to life on your canvas.
5. Mixed Media Collage
Acrylic skins can also be incorporated into mixed media collage artworks. Mixed media art is a combination of various art forms and materials. By incorporating acrylic skins into your collage, you can add an extra layer of visual interest and texture.
You can cut the acrylic skins into desired shapes and sizes and combine them with other materials like paper, fabric, or found objects to create a dynamic and visually engaging collage. Experiment with different textures, colors, and compositions to create unique mixed media artworks that tell a story.
In summary, acrylic skins offer a world of possibilities when it comes to creating mesmerizing designs and patterns. Whether you prefer abstract or geometric designs, textured effects, nature-inspired artwork, or mixed media collages, acrylic skins allow you to explore your creativity and bring your artistic visions to life. So, grab your acrylic paints, brushes, and tools, and let your imagination run wild!
FAQs
How can I make acrylic skins?
To make acrylic skins, you can start by applying a layer of acrylic paint onto a non-stick surface like a silicone mat or wax paper. Allow the paint to fully dry, then gently peel it off the surface. The resulting acrylic skin can be used for various art projects, collages, or mixed media work.
What is the best way to store acrylic skins?
For storing acrylic skins, place them between sheets of wax paper or parchment paper to prevent sticking. You can also store them in a plastic sleeve or envelope to keep them flat and protected from dust and moisture.
How can I adhere acrylic skins to a canvas or surface?
To adhere acrylic skins to a canvas or surface, you can use a clear gel medium or acrylic medium. Apply a thin layer of the medium onto the desired area of the canvas, then carefully place the acrylic skin on top. Gently press down to ensure it adheres well, and let it dry completely.
Conclusion
In conclusion, creating acrylic skins can be a fun and creative process that allows you to explore your artistic abilities. By following the step-by-step instructions outlined in this guide, you can easily make stunning acrylic skins that can be used in various art projects.
Experimenting with different techniques such as pouring, swiping, and marbling will help you create unique and visually appealing designs. Don’t be afraid to mix and match colors, add textures, or incorporate other materials into your acrylic skins to add depth and dimension to your artwork.
Remember to properly store your acrylic skins to protect them from dust and damage. With practice and experimentation, you can master the art of creating acrylic skins and use them to enhance your paintings, collages, and mixed media projects.