
Yes, it is generally recommended to wet the brush before using acrylic paint. Wetting the brush helps to improve the flow and spreadability of the paint, making it easier to apply smoothly onto the canvas or surface. Wetting the brush also helps to prevent the paint from drying too quickly on the brush, allowing for better control and blending of colors. However, it is important to note that the amount of water should be controlled to avoid diluting the paint too much.
The Importance of Wetting Your Brush in Acrylic Painting
Acrylic painting is a popular form of art that allows artists to express their creativity and create stunning works of art. One important technique in acrylic painting is wetting your brush before applying paint to the canvas. This may seem like a simple step, but it plays a crucial role in achieving the desired results.
When you wet your brush before painting, it helps to dilute the paint and make it easier to work with. Acrylic paint has a thick consistency, and wetting the brush helps to thin it out, making it smoother and easier to apply. This is particularly important when working on larger areas of the canvas, as it helps to ensure an even coverage and avoids streaks or clumps of paint.
Wetting your brush also helps to improve the flow of the paint. Acrylic paint tends to dry quickly, and a dry brush can result in the paint drying too fast on the canvas. By wetting your brush, you extend the drying time of the paint and allow yourself more time to blend colors and create smooth transitions. This is especially beneficial when working on techniques such as blending, glazing, or creating gradients.
In addition to improving the application and flow of the paint, wetting your brush also helps to keep the bristles of the brush in good condition. Dry paint can harden and accumulate in the bristles, making it difficult to clean and resulting in a shorter lifespan for your brushes. By wetting your brush before and during painting, you keep the paint from drying and ensure that your brushes stay in optimal condition for longer.
Now that we understand the importance of wetting your brush in acrylic painting, let’s discuss the proper technique to do so. Start by wetting your brush under running water or dipping it in a container of water. Make sure to thoroughly wet the bristles, but be careful not to soak the entire brush handle. After wetting the brush, gently shake off any excess water before loading it with paint.
It’s important to note that the amount of water you use to wet your brush will depend on the desired consistency of the paint. If you want a more fluid consistency, use more water. If you prefer a thicker consistency, use less water. Experiment with different amounts of water to find the consistency that works best for your painting style and desired outcome.
In summary, wetting your brush in acrylic painting is an essential step that improves the application, flow, and lifespan of your brushes. It helps to dilute the paint, make it easier to work with, and extend the drying time. By properly wetting your brush before and during painting, you can achieve smoother and more professional-looking results in your acrylic paintings.
Tips for Wetting Your Brush Before Using Acrylic Paint
When it comes to working with acrylic paint, wetting your brush properly can make a significant difference in the outcome of your artwork. Whether you’re a beginner or an experienced artist, these tips will help you achieve better results and enhance your painting techniques.
1. Use water to wet your brush
The first step in wetting your brush is to dip it in water. This will help to loosen any dried paint particles from previous use and ensure that the brush is clean and ready to use. Fill a container with water and gently swish your brush in it until it is fully saturated.
2. Blot excess water
After wetting your brush, it’s essential to remove any excess water before dipping it into the paint. Take a clean cloth or paper towel and gently squeeze the bristles between them to remove the excess moisture. This step is crucial as too much water can dilute the paint and affect its consistency.
3. Use a palette for mixing
Instead of dipping your brush directly into the paint tube, it’s best to use a palette for mixing colors. Squeeze a small amount of paint onto the palette and use your wet brush to pick up the desired color. This method allows for better control over the amount of paint you use and helps in achieving the desired color palette.
4. Experiment with different brush sizes
Acrylic paint comes in various consistencies, from thin to thick. It’s important to choose the right brush size for the effect you want to achieve. A small brush is ideal for detailed work and intricate lines, while a larger brush is better suited for covering larger areas quickly. Experimenting with different brush sizes will give you a better understanding of how they affect your painting technique.
5. Keep brushes clean
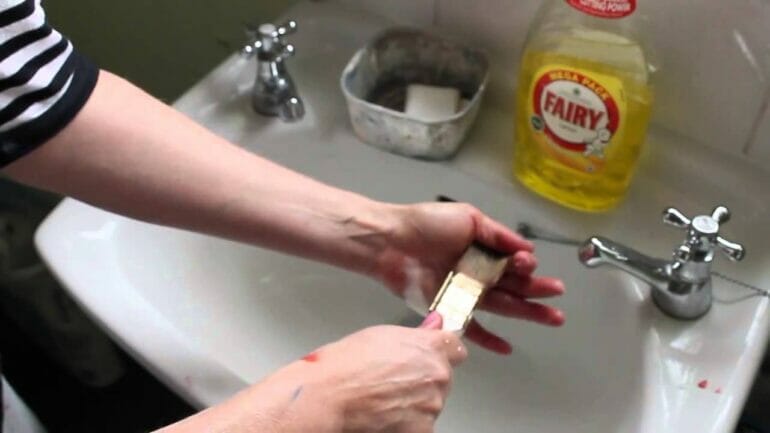
Regularly cleaning your brushes during and after painting sessions is crucial for maintaining their quality and prolonging their lifespan. Rinse your brushes thoroughly with water between color changes to avoid color contamination. After painting, use a mild soap or brush cleaner to remove any paint residue, and reshape the bristles before letting them dry.
6. Store brushes properly
Proper storage is essential to prevent damage to your brushes. After cleaning, allow the brushes to dry completely, preferably laying them flat or hanging them with the bristles facing downwards. Avoid storing brushes in airtight containers, as this can lead to mold growth. Instead, use a brush holder or a dedicated brush case to keep them organized and protected.
7. Practice regularly
Like any skill, practicing regularly is the key to improving your painting technique. Set aside dedicated time for painting and experiment with different brush strokes, blending techniques, and color combinations. The more you practice, the more confident and proficient you will become in working with acrylic paint.
In summary, wetting your brush properly before using acrylic paint is essential for achieving the best results in your artwork. By following these tips and practicing regularly, you’ll enhance your painting techniques and create beautiful masterpieces with acrylic paint.

Common Mistakes to Avoid When Wetting Your Brush with Acrylic Paint
When working with acrylic paint, wetting your brush properly can greatly impact the outcome of your artwork. Although it may seem like a simple task, there are a few common mistakes that artists often make when wetting their brush with acrylic paint. In this section, we will discuss these mistakes and provide tips on how to avoid them.
1. Overloading the Brush with Water
One of the most common mistakes when wetting a brush with acrylic paint is overloading it with water. Adding too much water to your brush can dilute the paint, resulting in a thin and watery consistency. This can affect color intensity and coverage, making it difficult to achieve desired effects.
To avoid this, it is important to wet your brush with just the right amount of water. Start by dipping the tip of your brush into water and gently swishing it around to moisten the bristles. You want the brush to be damp, but not dripping wet.
2. Using Dirty Water
Another mistake to avoid is using dirty water to wet your brush. When rinsing your brush in a container of water, it is crucial to regularly change the water to prevent any dirt or residue from getting onto your brush.
Using clean water ensures that your paint colors remain pure and free from any unwanted particles. It also helps to prevent any contamination that may affect the overall quality of your artwork.
3. Forgetting to Squeeze Out Excess Water
After wetting your brush, it is important to squeeze out any excess water before dipping it into your acrylic paint. Failing to do so can result in diluted paint and affect the consistency and texture of your artwork.
To squeeze out excess water, gently press the bristles of your brush against the side of your water container or use a clean paper towel. This will remove the excess water and ensure that your brush is ready to pick up the right amount of paint.
4. Using the Wrong Brush for the Task
Using the wrong brush for the task at hand is another common mistake when wetting your brush with acrylic paint. Different brushes have different bristle types, shapes, and sizes that are designed for specific techniques and effects.
Before wetting your brush, consider the purpose of your painting and select the appropriate brush accordingly. For example, if you are working on fine details, a small round brush would be more suitable, while a flat brush would be better for covering larger areas.
5. Allowing Paint to Dry on the Brush
Leaving paint to dry on your brush can cause bristles to become stiff and damaged, making it challenging to achieve smooth and precise strokes. It is important to clean your brush thoroughly after each painting session to maintain its quality and lifespan.
After using your brush, rinse it under running water until the water runs clear. Gently reshape the bristles with your fingers and let the brush air dry or store it horizontally to prevent any bending or misshaping.
Summary
Wetting your brush with acrylic paint is a fundamental step in creating artwork. By avoiding common mistakes such as overloading the brush with water, using dirty water, forgetting to squeeze out excess water, using the wrong brush, and allowing paint to dry on the brush, you can ensure better results and enhance your painting techniques.
Remember to wet your brush with just the right amount of water, use clean water, squeeze out excess water, choose the appropriate brush for the task, and clean your brush thoroughly after each use. With these tips in mind, you can maximize the potential of your acrylic paint and create beautiful, vibrant artworks.
Achieving Better Results by Properly Preparing Your Brush for Acrylic Painting
Acrylic painting is a popular medium among artists due to its versatility and quick drying time. Whether you are a professional artist or just starting out, one of the key factors in achieving better results with acrylic painting is properly preparing your brush. In this section, we will discuss the importance of brush preparation and provide some tips on how to do it effectively.
Why Proper Brush Preparation Matters
Preparing your brush before starting a painting session is essential for several reasons. First and foremost, it helps to preserve the quality and lifespan of your brushes. By properly cleaning and conditioning your brushes, you can prevent the buildup of dried paint, which can damage the bristles and affect the application of paint.
Secondly, proper brush preparation ensures that your brushes are free from any contaminants or residues that may affect the paint’s consistency or color. This is particularly important when working with acrylics, as they dry quickly and can become difficult to remove once dry.
Lastly, preparing your brush allows you to achieve better control and precision in your brushstrokes. A well-prepared brush will hold and distribute paint more evenly, resulting in smoother and more consistent application on the canvas.
Tips for Proper Brush Preparation
Now that we understand why brush preparation is important, let’s delve into some tips on how to properly prepare your brushes for acrylic painting:
- Start with a clean brush: Before each painting session, make sure your brushes are clean. Use lukewarm water and mild soap to gently wash away any paint residue from the bristles. Avoid using hot water, as it can damage the brush.
- Condition the bristles: After cleaning, it’s important to condition the bristles to keep them soft and supple. You can use a brush conditioner or a small amount of hair conditioner to do this. Simply apply a small amount to the bristles and gently work it in with your fingers. Rinse thoroughly afterwards.
- Shape the brush: To ensure optimal performance, reshape the bristles of your brush while they are still damp. Use your fingers to gently reshape the bristles back into their original shape. This will help maintain the brush’s precision and control.
- Store brushes properly: When not in use, store your brushes in a brush holder or container to protect them from dust and damage. Avoid storing them with the bristles facing downwards, as this can cause them to bend or lose their shape.
By following these tips, you can ensure that your brushes are always in top condition, allowing you to achieve better results in your acrylic paintings.
In summary, proper brush preparation plays a crucial role in achieving better results with acrylic painting. By starting with a clean brush, conditioning the bristles, shaping the brush, and storing them properly, you can ensure the longevity of your brushes and enhance your overall painting experience. So, take the time to prepare your brushes before each painting session, and you’ll be rewarded with improved control, precision, and quality in your acrylic paintings.
FAQs
1. Do I need to wet the brush before using acrylic paint?
No, you don’t need to wet the brush before using acrylic paint. Acrylic paint is water-based and will adhere well to a dry brush. However, some artists prefer to slightly dampen the brush with water for better paint flow.
Conclusion:
In conclusion, when it comes to using acrylic paint, wetting the brush before painting is not necessary. Acrylic paint is water-based and has a smooth consistency, which allows it to be easily applied without the need for additional moisture. By using a dry brush, you have better control over the application and can achieve desired effects such as texture and layering. However, it is important to keep a cup of water nearby to clean the brush between colors or to thin the paint if needed. With its versatility and vibrant colors, acrylic paint allows artists to create stunning artwork with ease and precision.